Soft- and gateware
Obviously, the newly minted DMGPlus won't do much without software for the Raspberry Pi or configuration for the FPGA. Let's start with the FPGA, as that is the first thing to start up. The FPGA is responsible for showing the scrolling 'Nintendo' logo startup screen and sound, as well as converting the Raspberry Pi output to something the LCD understands. It also allows the Raspberry Pi to read the inserted cartridge, and for 'fake' cartridges, it shows a bootup screen to hide the longer loading times.
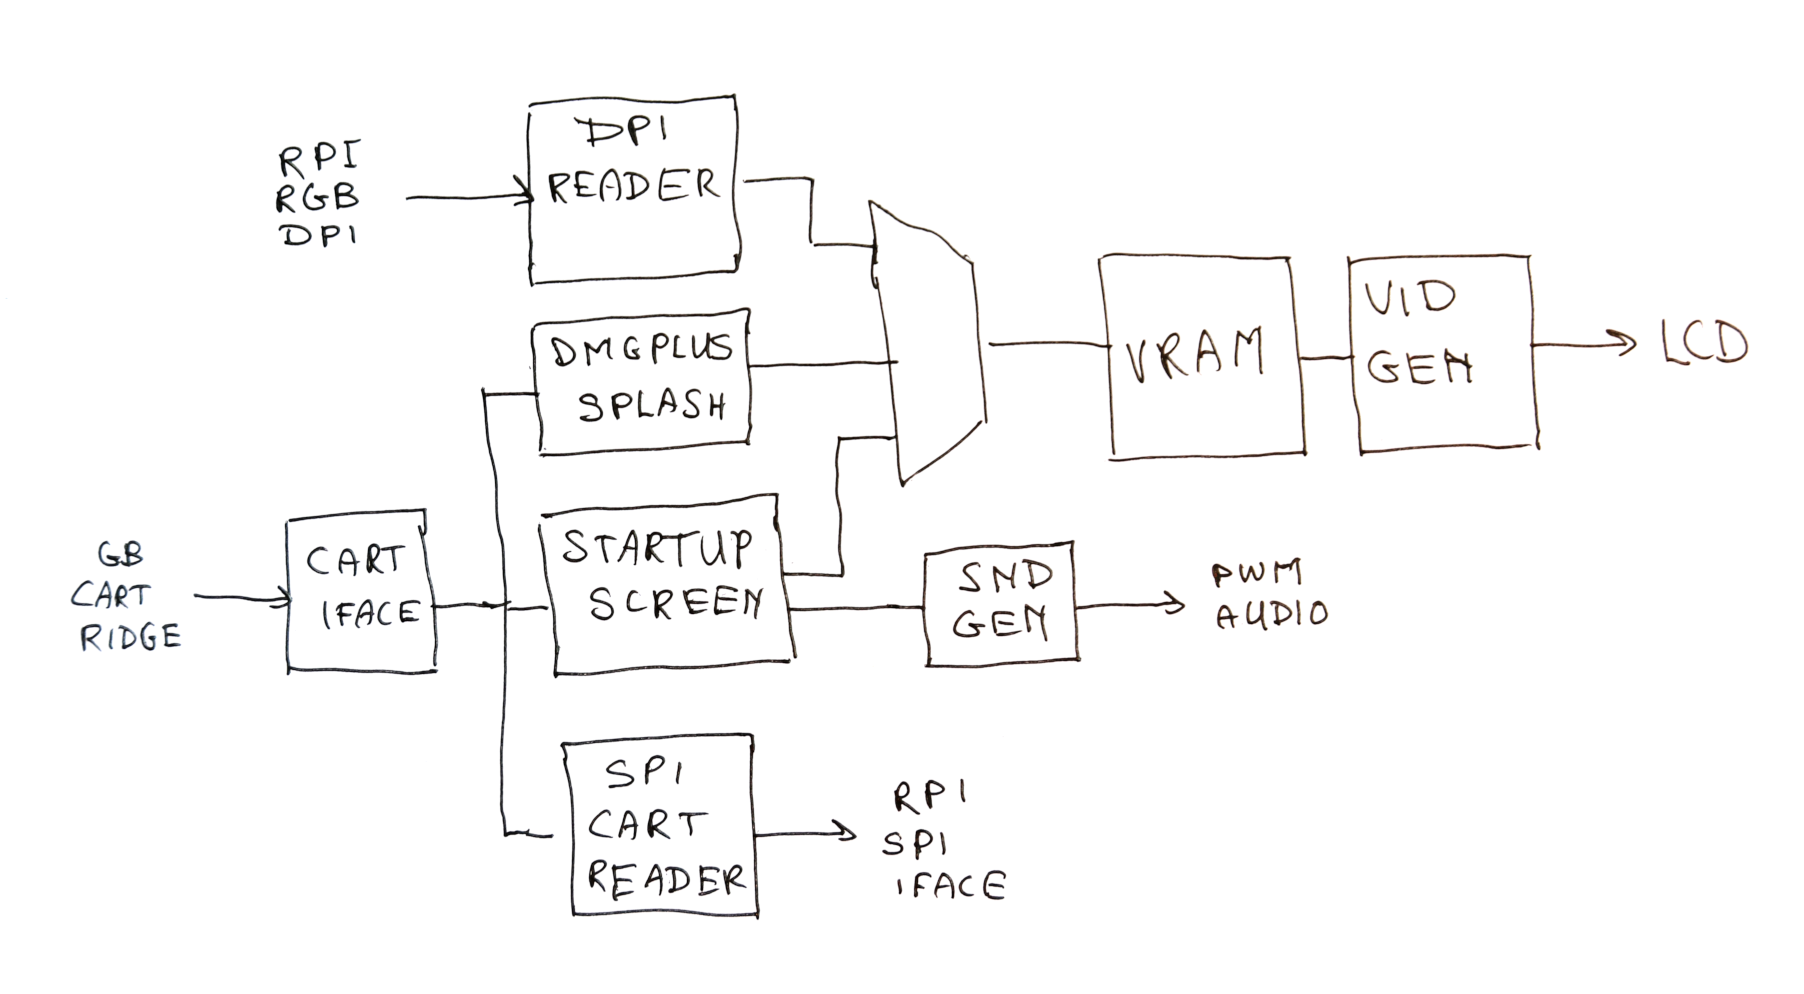
Let's start on the right side. The GameBoy LCD is connected there. The LCD is a controller-less thing: it takes a pixel clock, a 2-bit data signal which indicates the current pixel, as well as various timing signals. I used a logic analyzer to grab the waveforms as a reference, and together with some information found on the Internet I could get my FPGA to replicate the original signals and get an image.
The video generator receives the image to display either from the startup logo generator or from VRAM. On startup, the startup logo generator is active. It will grab the 'Nintendo' logo from cartridge RAM and scroll it down, just like a real GameBoy. (This also means that just like on a real GameBoy, a dirty cartridge leads to a corrupted startup logo.) As soon as the logo is scrolled down, it triggers the sound generator to produce the well-known 'Pli-dink!' startup sound.
The sound generator itself is written by looking at the reverse engineered Game Boy boot rom and re-implementing both the bits of the GameBoy sound system that produce the noise as well as the ROM logic in Verilog. The result is a sound that seems pretty much identical to the original.
As soon as the startup sequence is done, what happens next is dependent on the cartridge inserted. The FPGA will look at a specific few bytes in the cartridge ROM, and if that contains a magic string, the FPGA knows that the cartridge inserted is a 'fake' cartridge that triggers the Raspberry Pi to start up a native application. As starting a native application may take a while, these 'fake' cartridges also contain a startup screen image. This is read by the DMGPlush splash block, which reads the splash screen from the cartridge into VRAM and shows it for a certain duration, also read from the cartridge.
Finally, the FPGA switches to the DPI sampler. It reads in the video signal from the Raspberry Pi and writes this to the VRAM. It also does some temporal dithering: to generate more than the 4 shades of gray the GameBoy LCD can produce, it switches intensities between frames to generate 16 grays in total. This actually is possible because the GameBoy screen is so slow that it 'smoothes out' the actually-flickering pixels into an intermediate gray. This is especially important for games with a somewhat high dynamic range. For instance, take a look at this Doom scene:
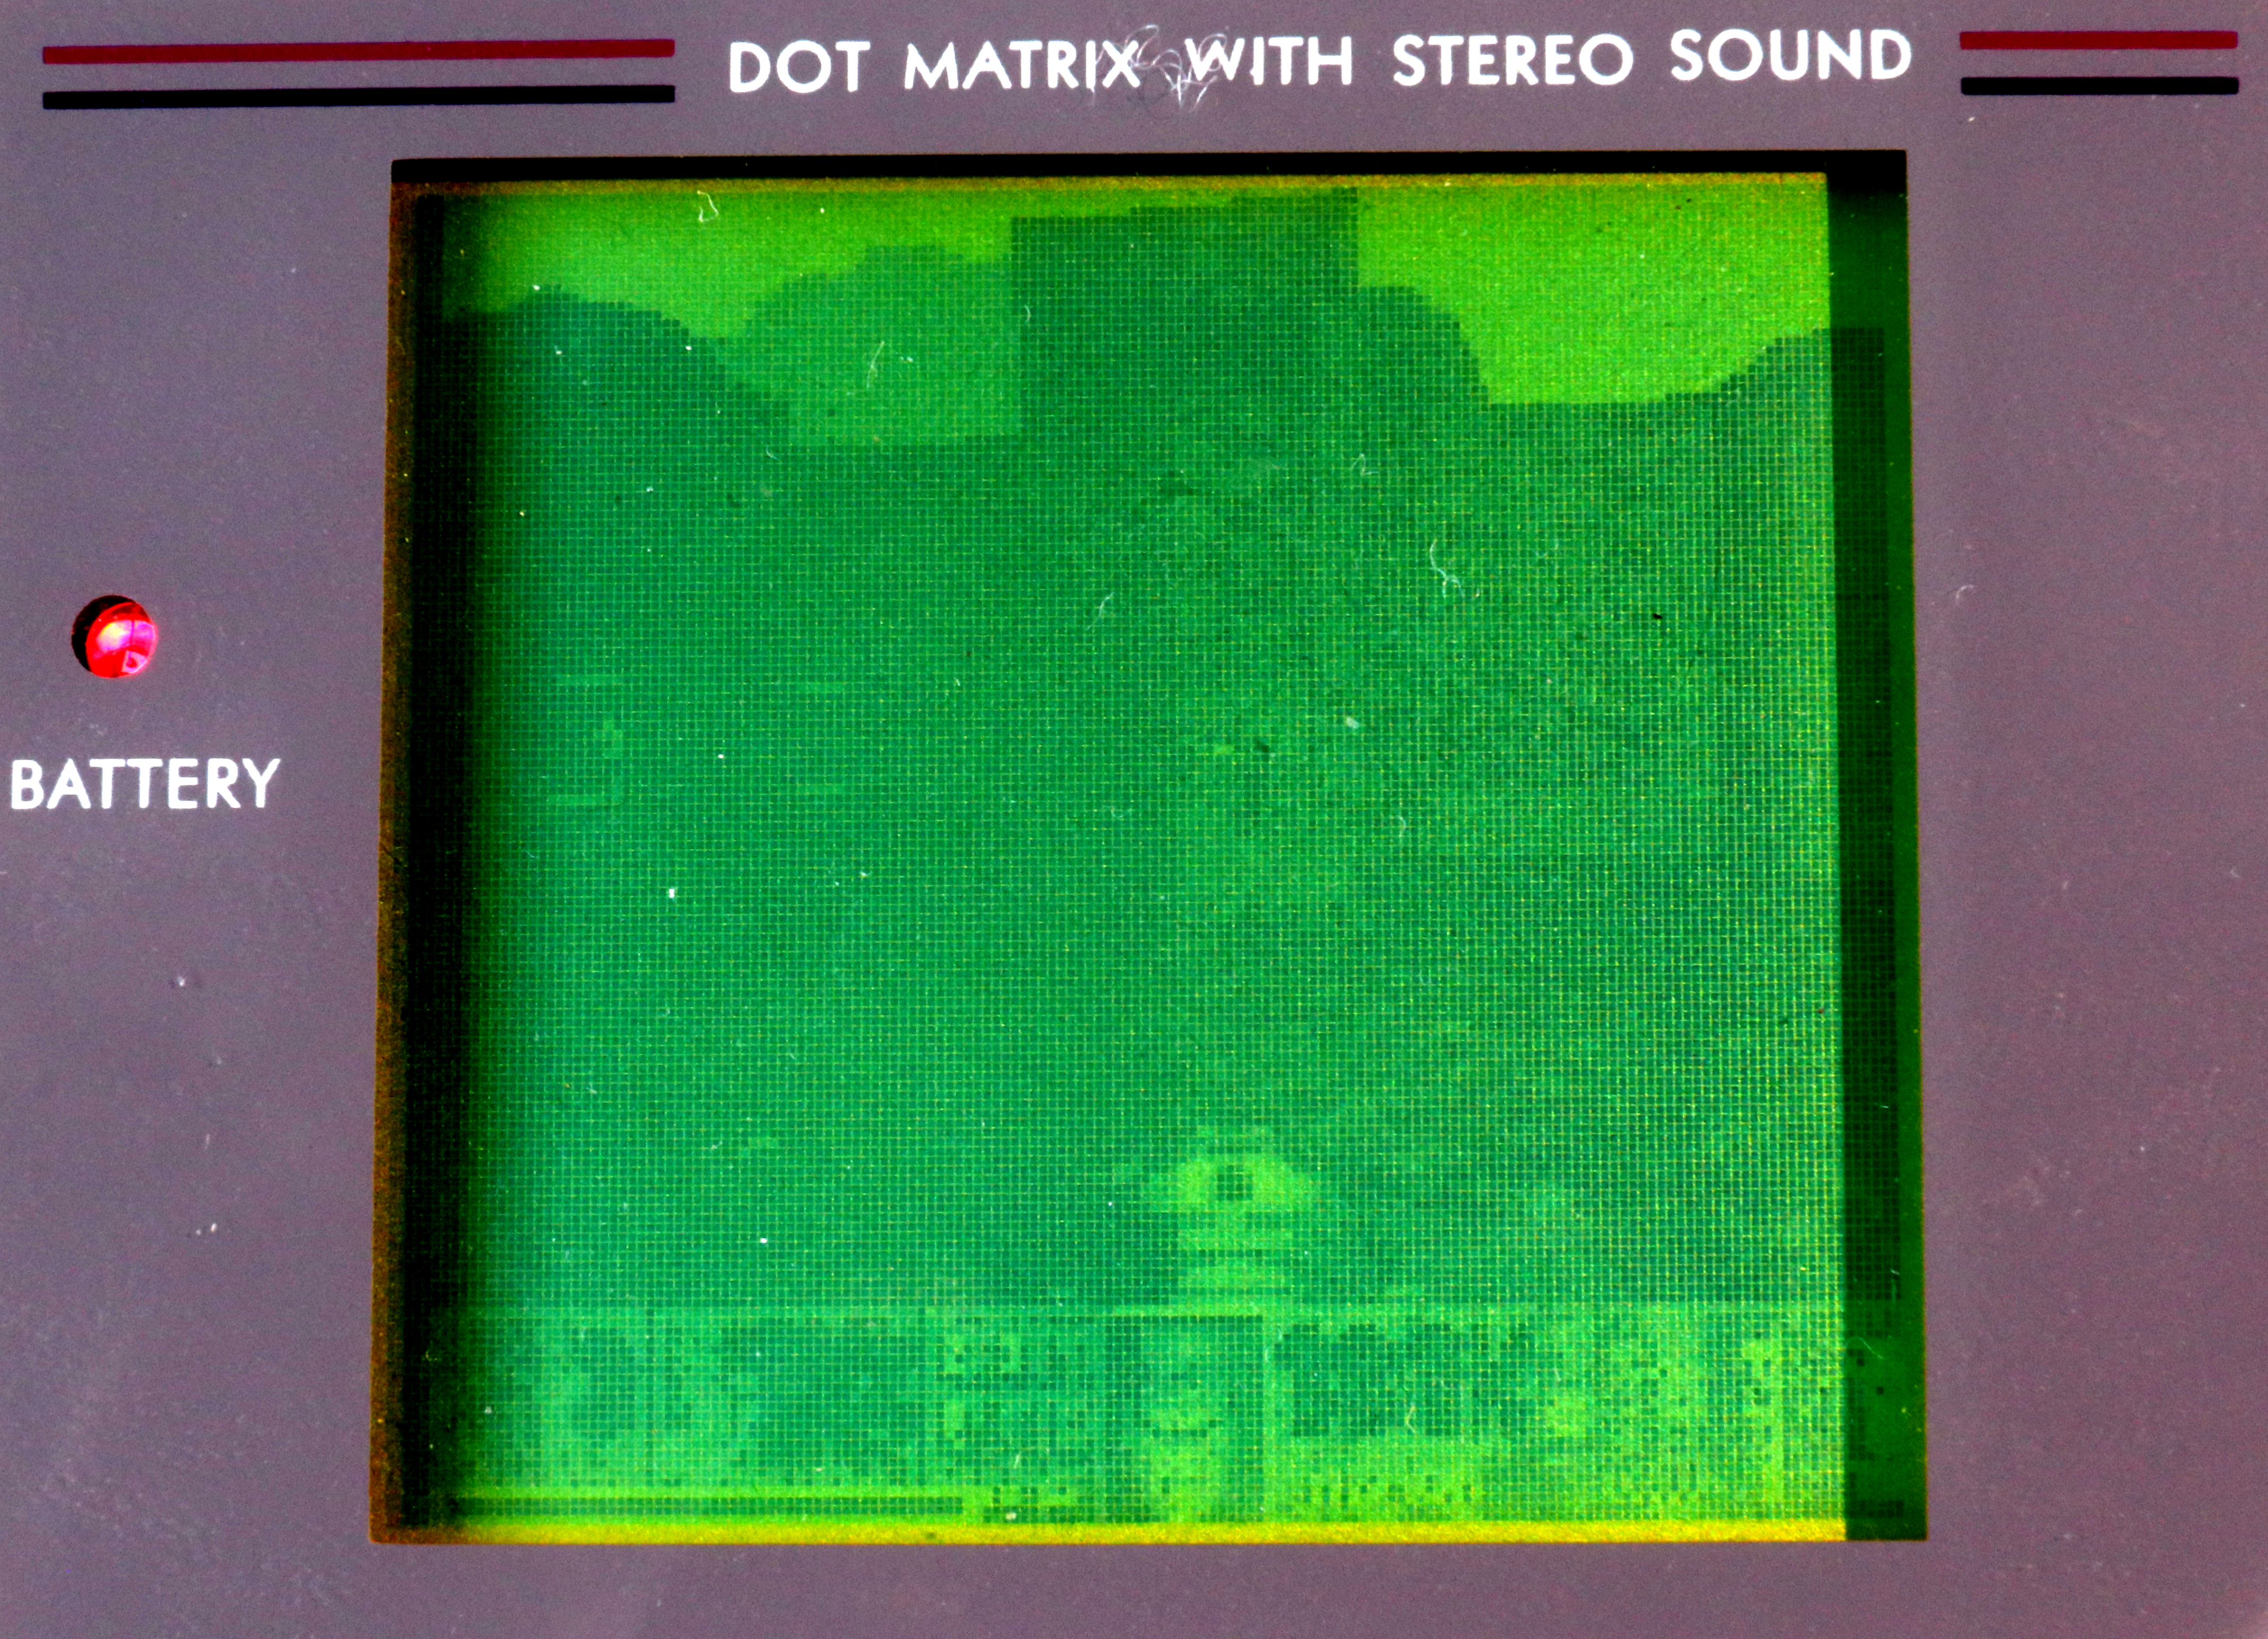
The FPGA is programmed to disable temporal dither on the left half of the screen, while the right half has it enabled. On the left, you can see the building silhouette show up in one shade of gray; as the ground is the same gray, they blend together. On the right, it's possible to see the texture of the buildings as well as distinguish it from the ground.
Obviously, the FPGA here doesn't do much more than generate the startup screen; the Raspberry Pi does the heavy lifting of actually running the games. The Raspberry Pi runs a stock version of Raspbian for this, as having an entire OS made it easy to develop for it. However, the Raspberry Pi isn't fast enough to start up the entire operating system before the FPGA is done showing the startup screen; it's actually not even done booting the stock kernel at the time the logo disappears.
I needed to fix this: aside from being irritating; if you need to wait half a minute before you can play, it breaks the illusion that you're dealing with an original stock GameBoy. Luckily, there are webpages that tell you how to accelerate booting a Raspberry Pi. This was really helpful; compiling a custom kernel with LZO compression and the bits that I didn't need stripped out already got the kernel to boot within the time it took for the 'Nintendo' logo to come down.
(As a sidenote: I needed to compile a custom kernel anyway. You may remember that I connected the button matrix of the GameBoy straight to the Raspberry Pi GPIOs. There is a gpio_matrix_keypad that makes interfacing with this very easy: just write the correct GPIOs into the device tree, load the module, and pushing the buttons will generate keyboard input as specified. The only downside is that this driver lacks polling support and as such doesn't support pressing multiple buttons, something that is quite important for playing games. Luckily, I found a patch for the kernel to fix this. As this patch never made it to the mainline kernel, I had to manually patch this in and recompile the kernel anyway.)
To get to playing the game as soon as possible after the kernel loaded, I decided to entirely bypass the operating system. The kernel has a command line parameter "init=" which indicates which program to run as soon as the kernel has booted. Normally, this is /sbin/init which then starts up the entire OS. I decided to specify my own script instead: it uses the SPI interface to check if the GameBoy cart inserted is an original GameBoy cart or a 'fake' DMGPlus cart, and runs either GNUBoy to emulate a GameBoy, or whatever program is associated with the 'fake' cart. If there is no cartridge, it will fall through to the original /sbin/init and Raspbian is started.