The case
Obviously, the main platform for Doom was the IBM PC, so as you saw in the beginning of the article, I decided to use a 3d-model of something PC-ish as the source. Something like a PC or compatible with a 386 or 486 processor would be closest to what people ran Doom on; however because of space requirements the monitor-stand-less IBM XT was a more feasible model to use. (This was actually not entirely unreasonable either: I know I cobbled together my first PC from whatever parts I could get my hands on; I can imagine someone ducttaping a 2nd hand 486 mainboard into an IBM PC-XT case.)
A model for this already exists on Thingiverse intended to be printed in multiple parts with multiple colors on a FDM printer. I imported the parts for the case and monitor into OpenSCAD, connected the parts together in software and hollowed out the result.
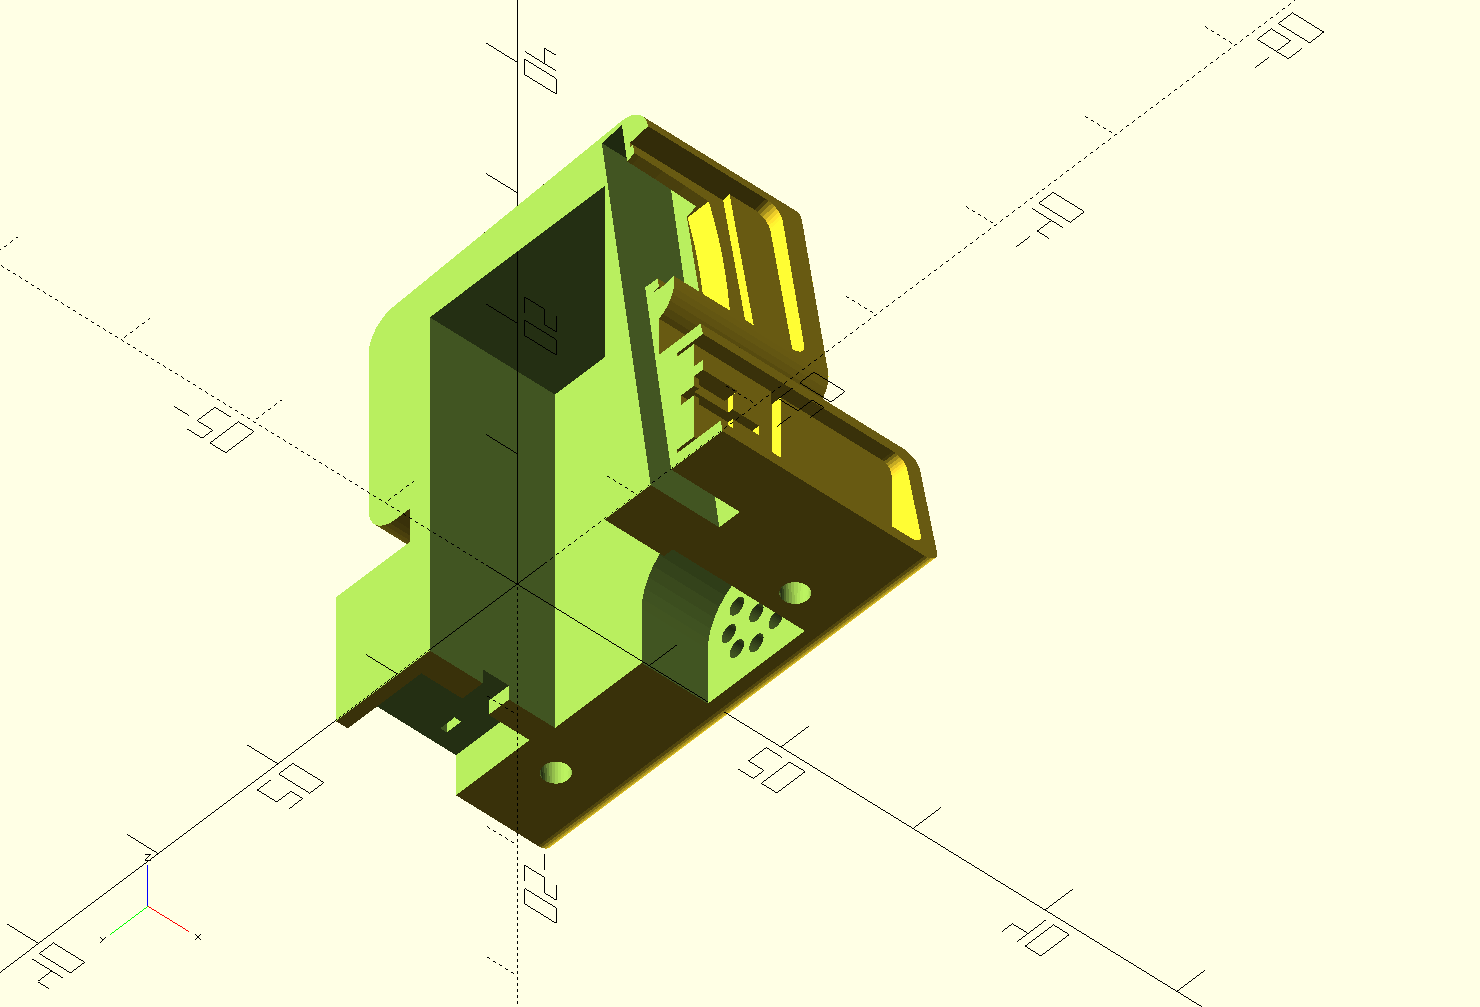
Here's the model cut in half. Note the main compartment for the electronics and battery. The other, smaller compartment is for the LCD. In case you didn't catch it earlier: to my knowledge, there is no affordable 0.6" screen, so what I did was to take a rectangular 0.96" LCD and put it into the model, which is just tall enough to make it fit. Only the top part of the LCD is visible through the monitor bezel, and a rotated and scaled 80x60 pixel Doom framebuffer is drawn there.
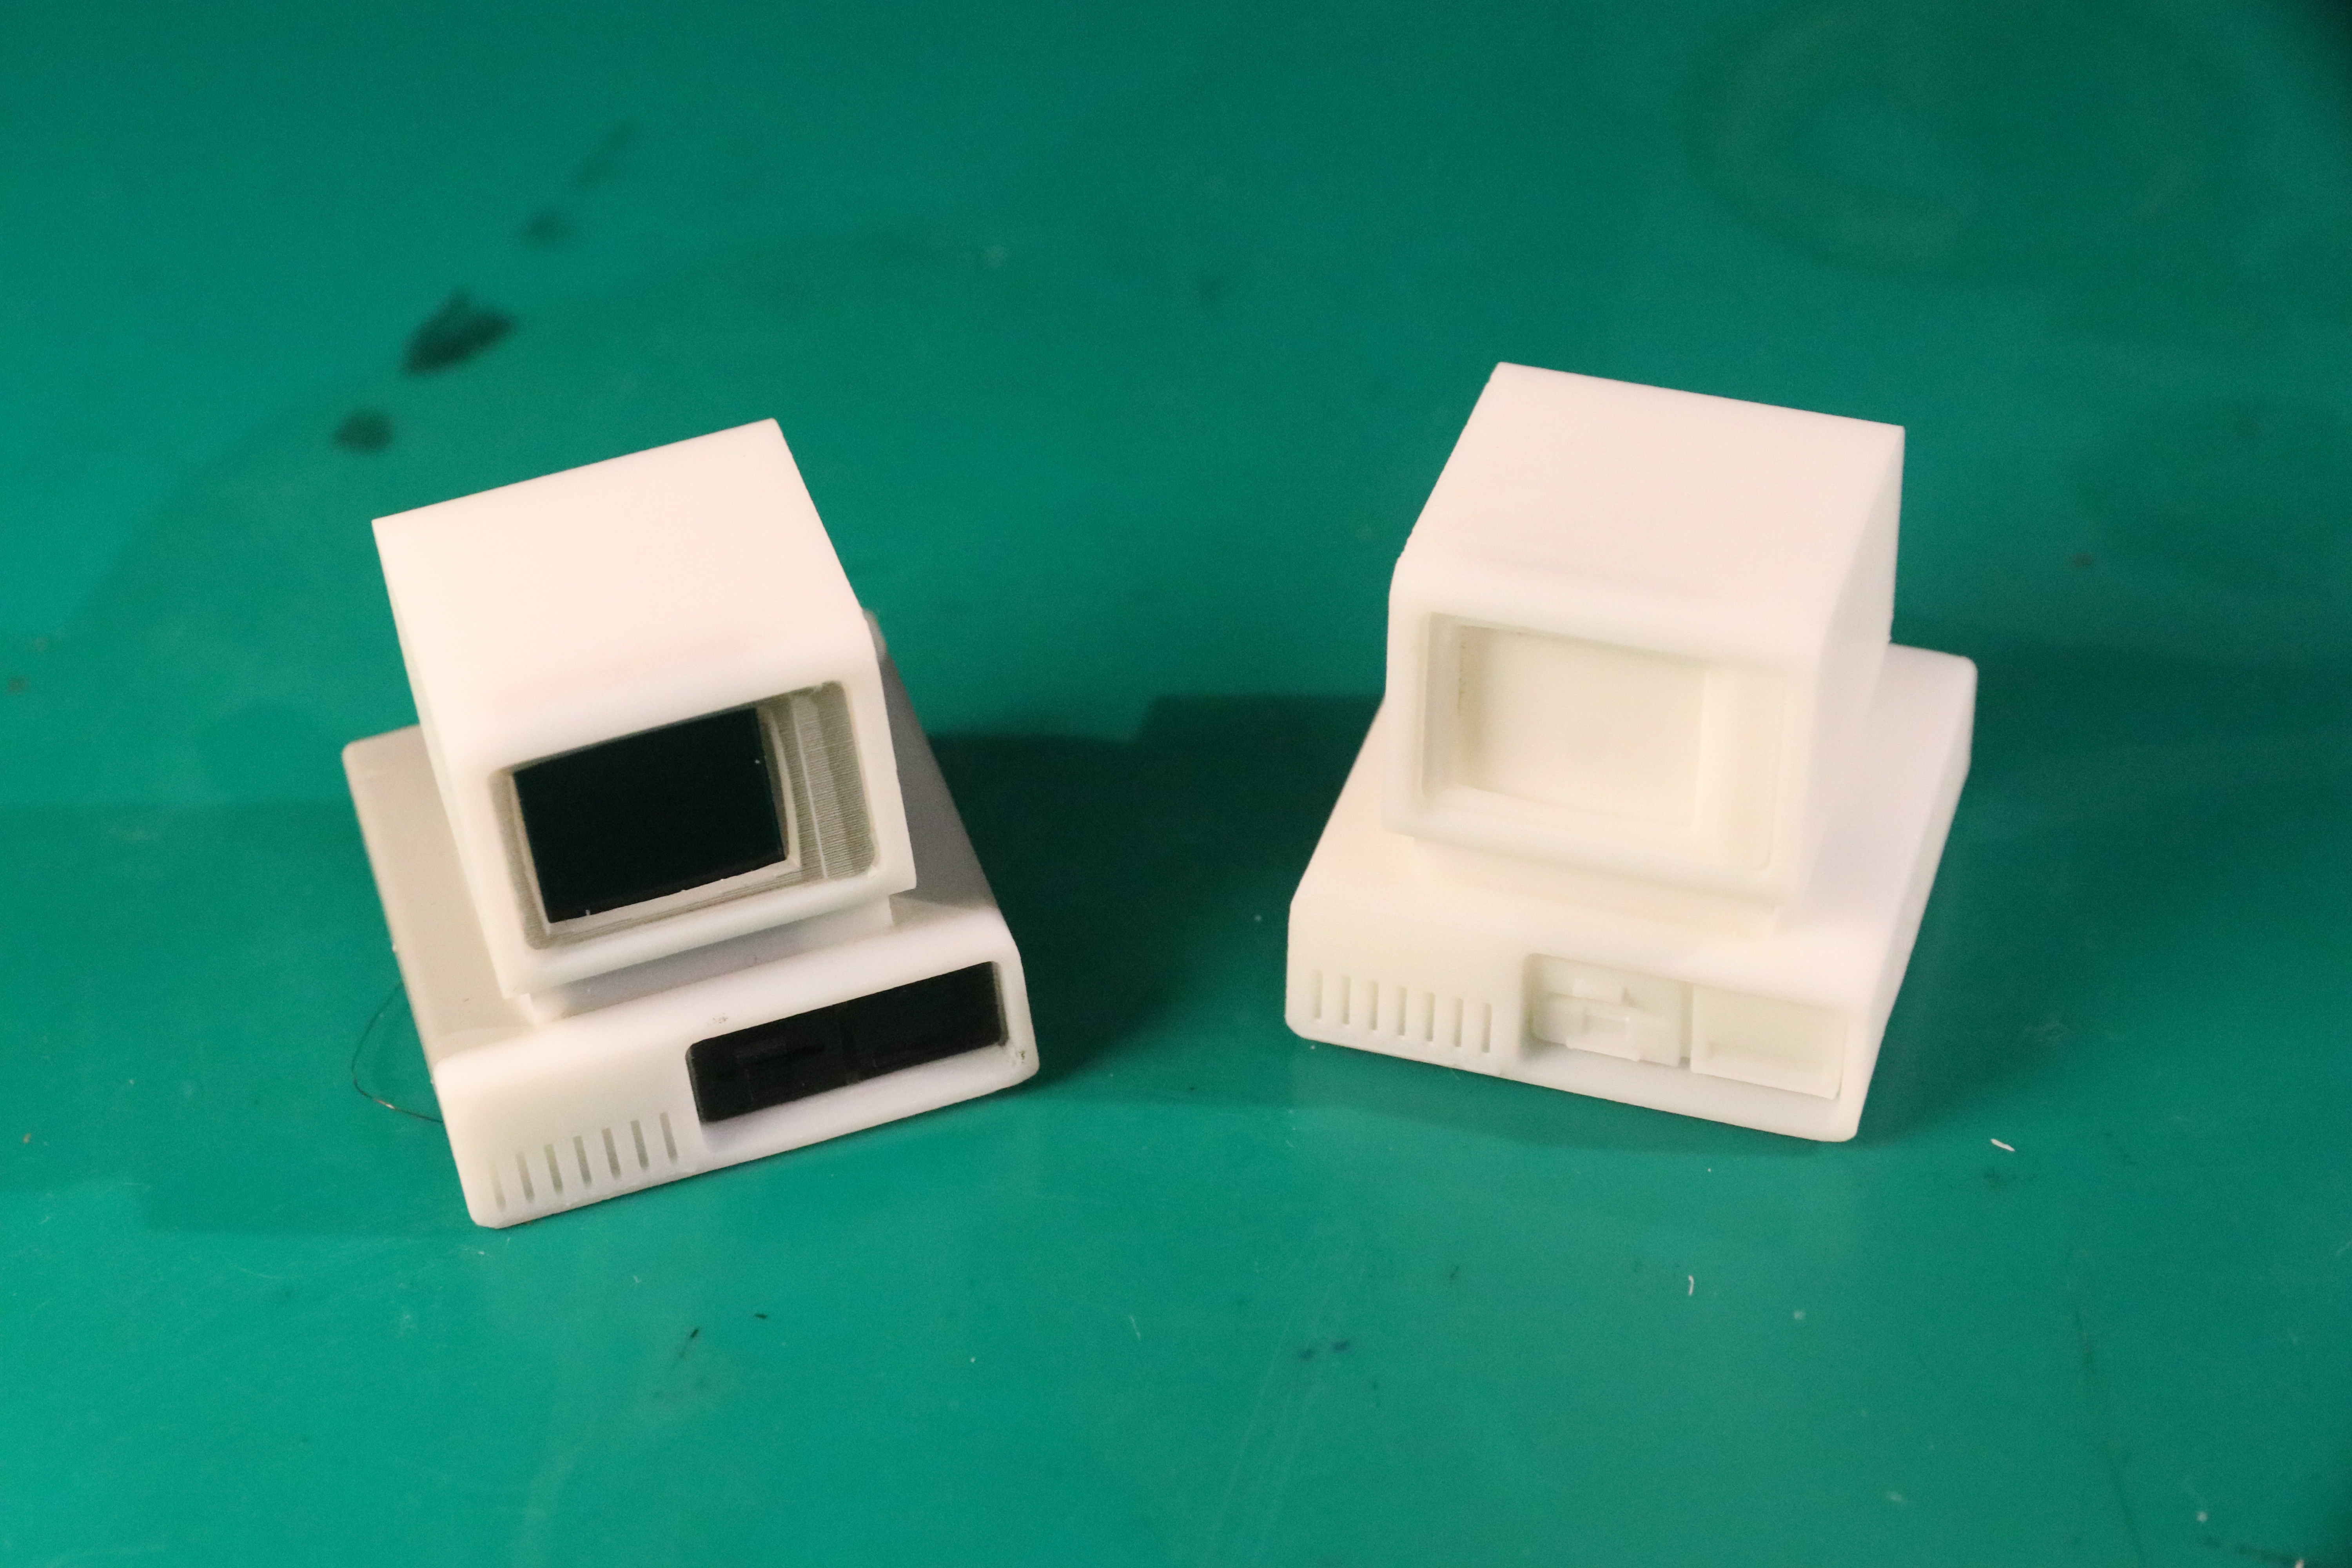
The model is printable on a FDM printer, but I didn't like the line texture that gives much. I intended to print it on my SLA printer, which would have looked a lot better, but that printer decided to die before I got around to printing the model. Instead, I sent the design files to JLC (the same company who made the PCBs) to print. (And for clarity: I'm not sponsored by them.) As SLA printing can't really do multiple colors, I added the grey and black accents by masking off the areas to be painted and then using a model paint rattle can to spraypaint the model. While the white of the resin that remains in the unpainted areas is a bit too white, I'm altogether pretty pleased with the end result.
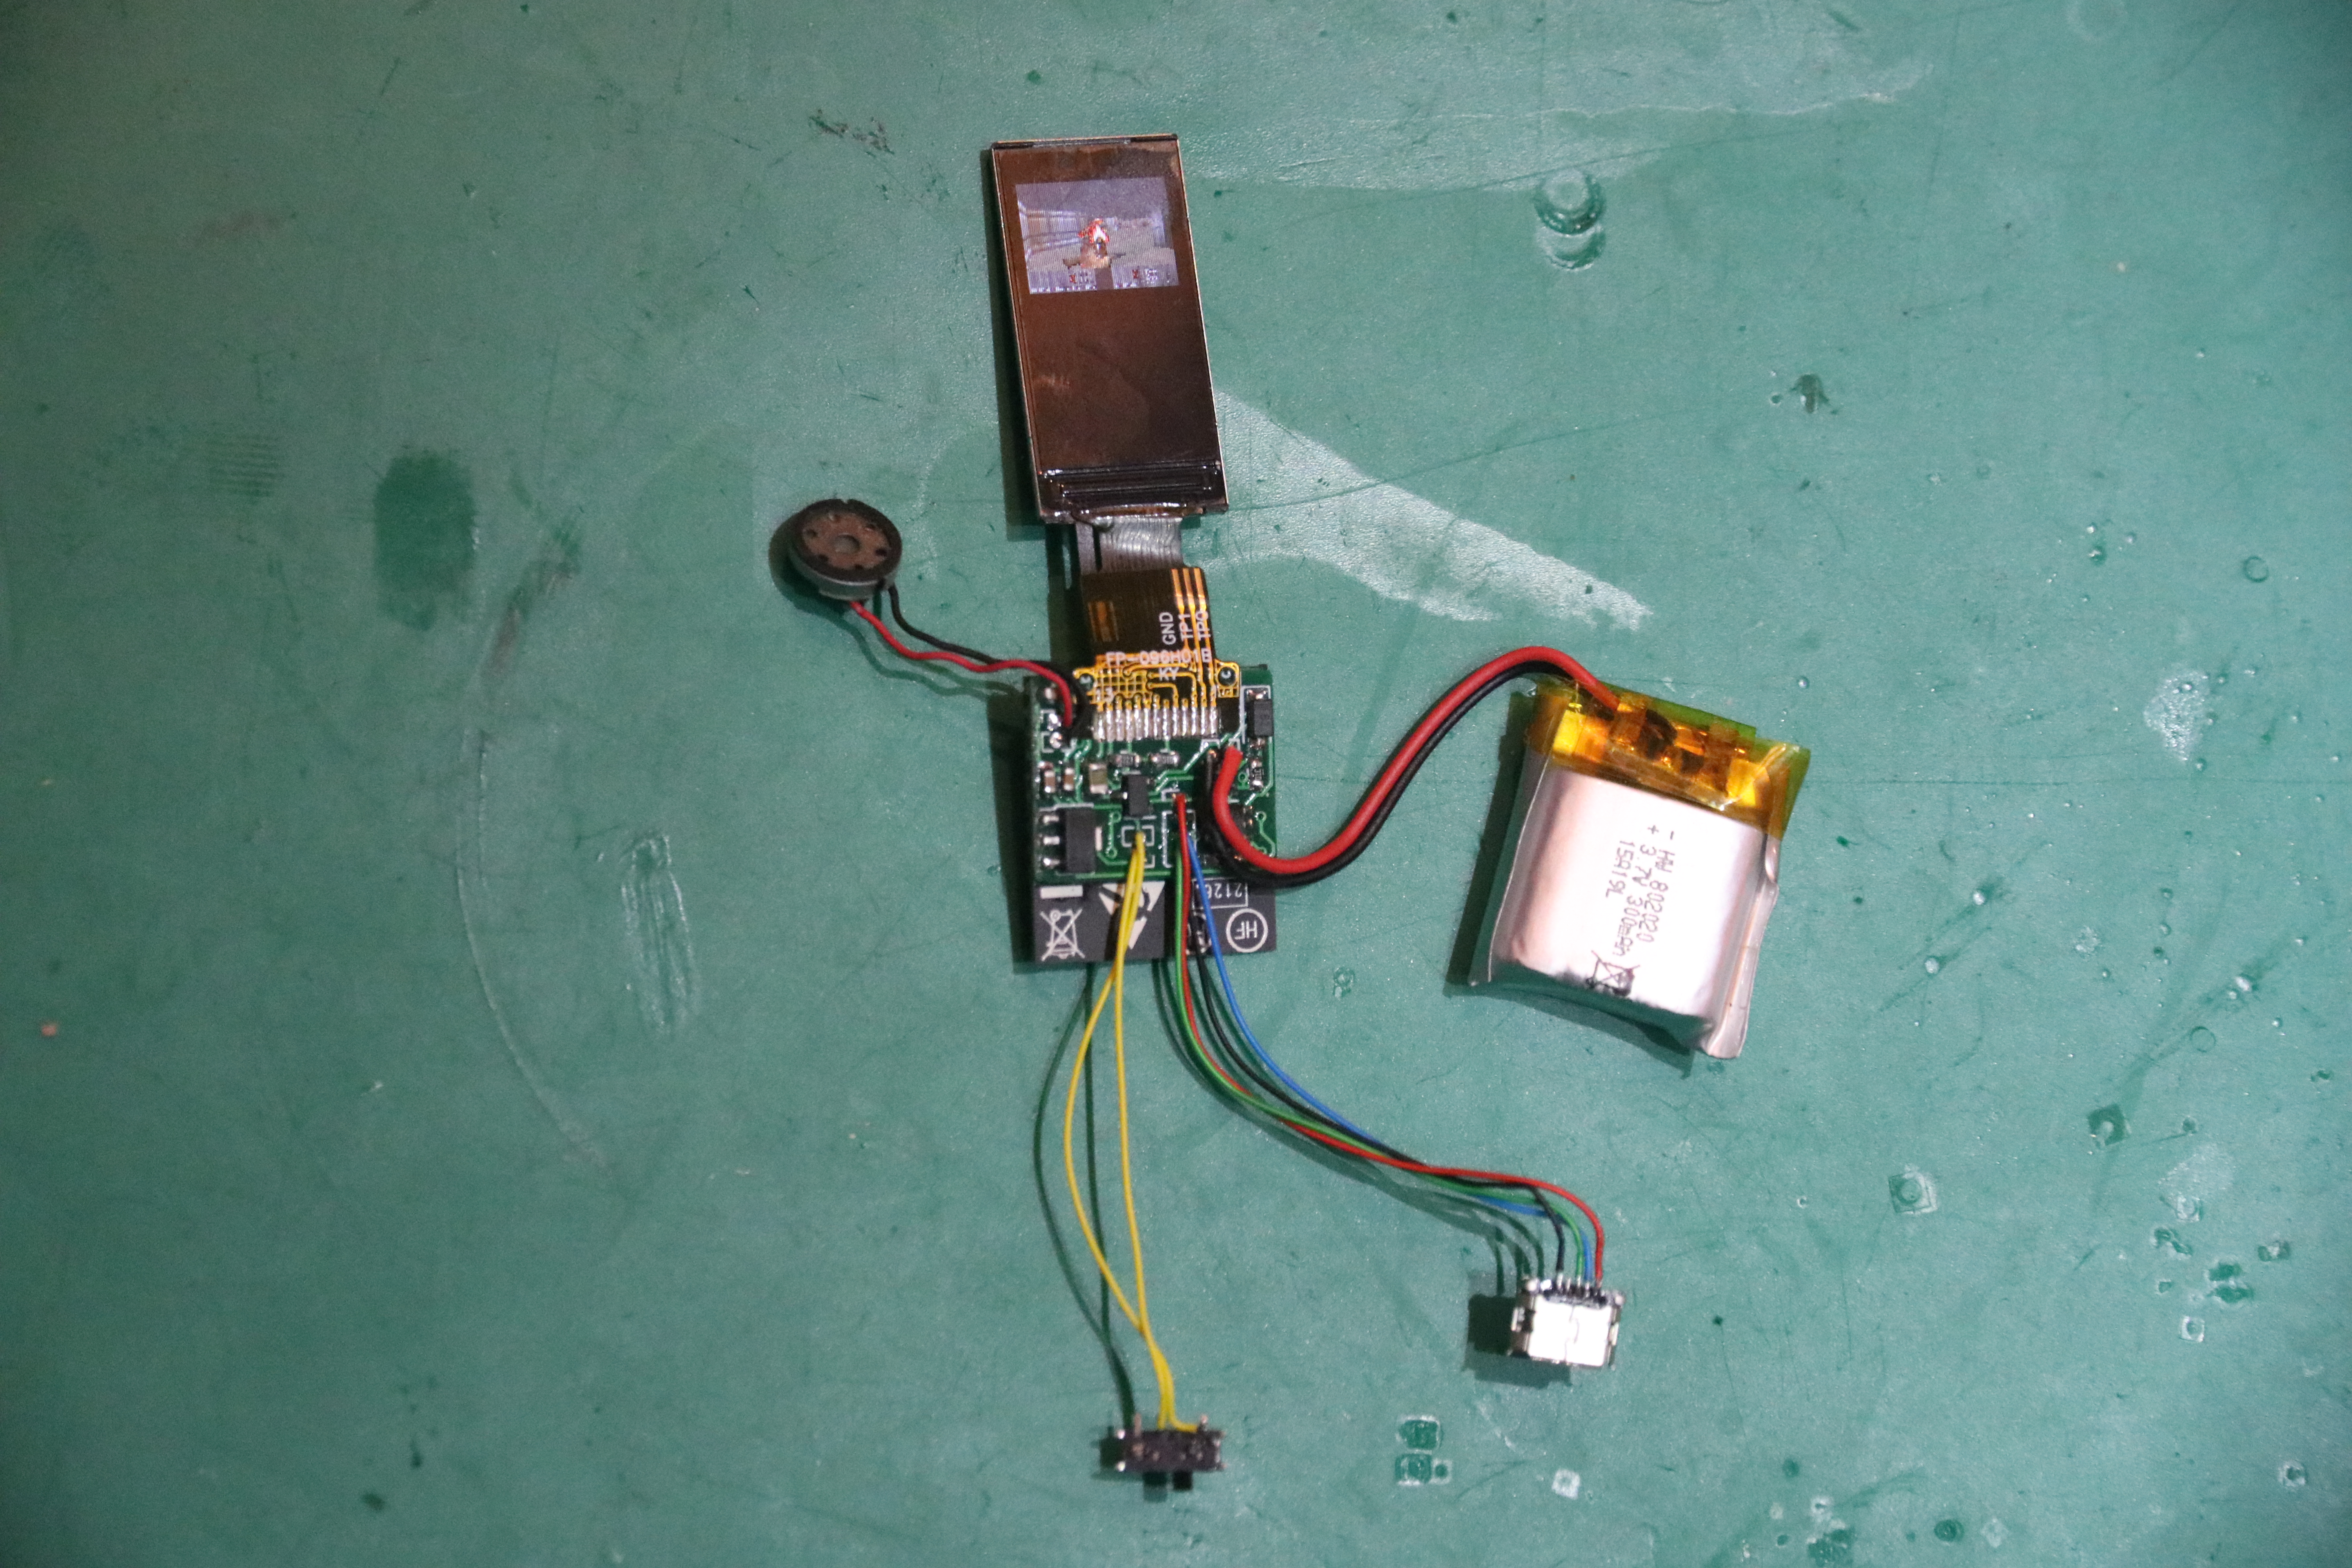
Meanwhile, I soldered all the external parts to the PCB: a tiny speaker, a power switch, a micro-USB connector for charging and programming, and finally the LCD. As I mentioned before, the screen is way larger than the plastic model, spanning almost the entire height of the thing, with only the top being visible through the monitor bezel.
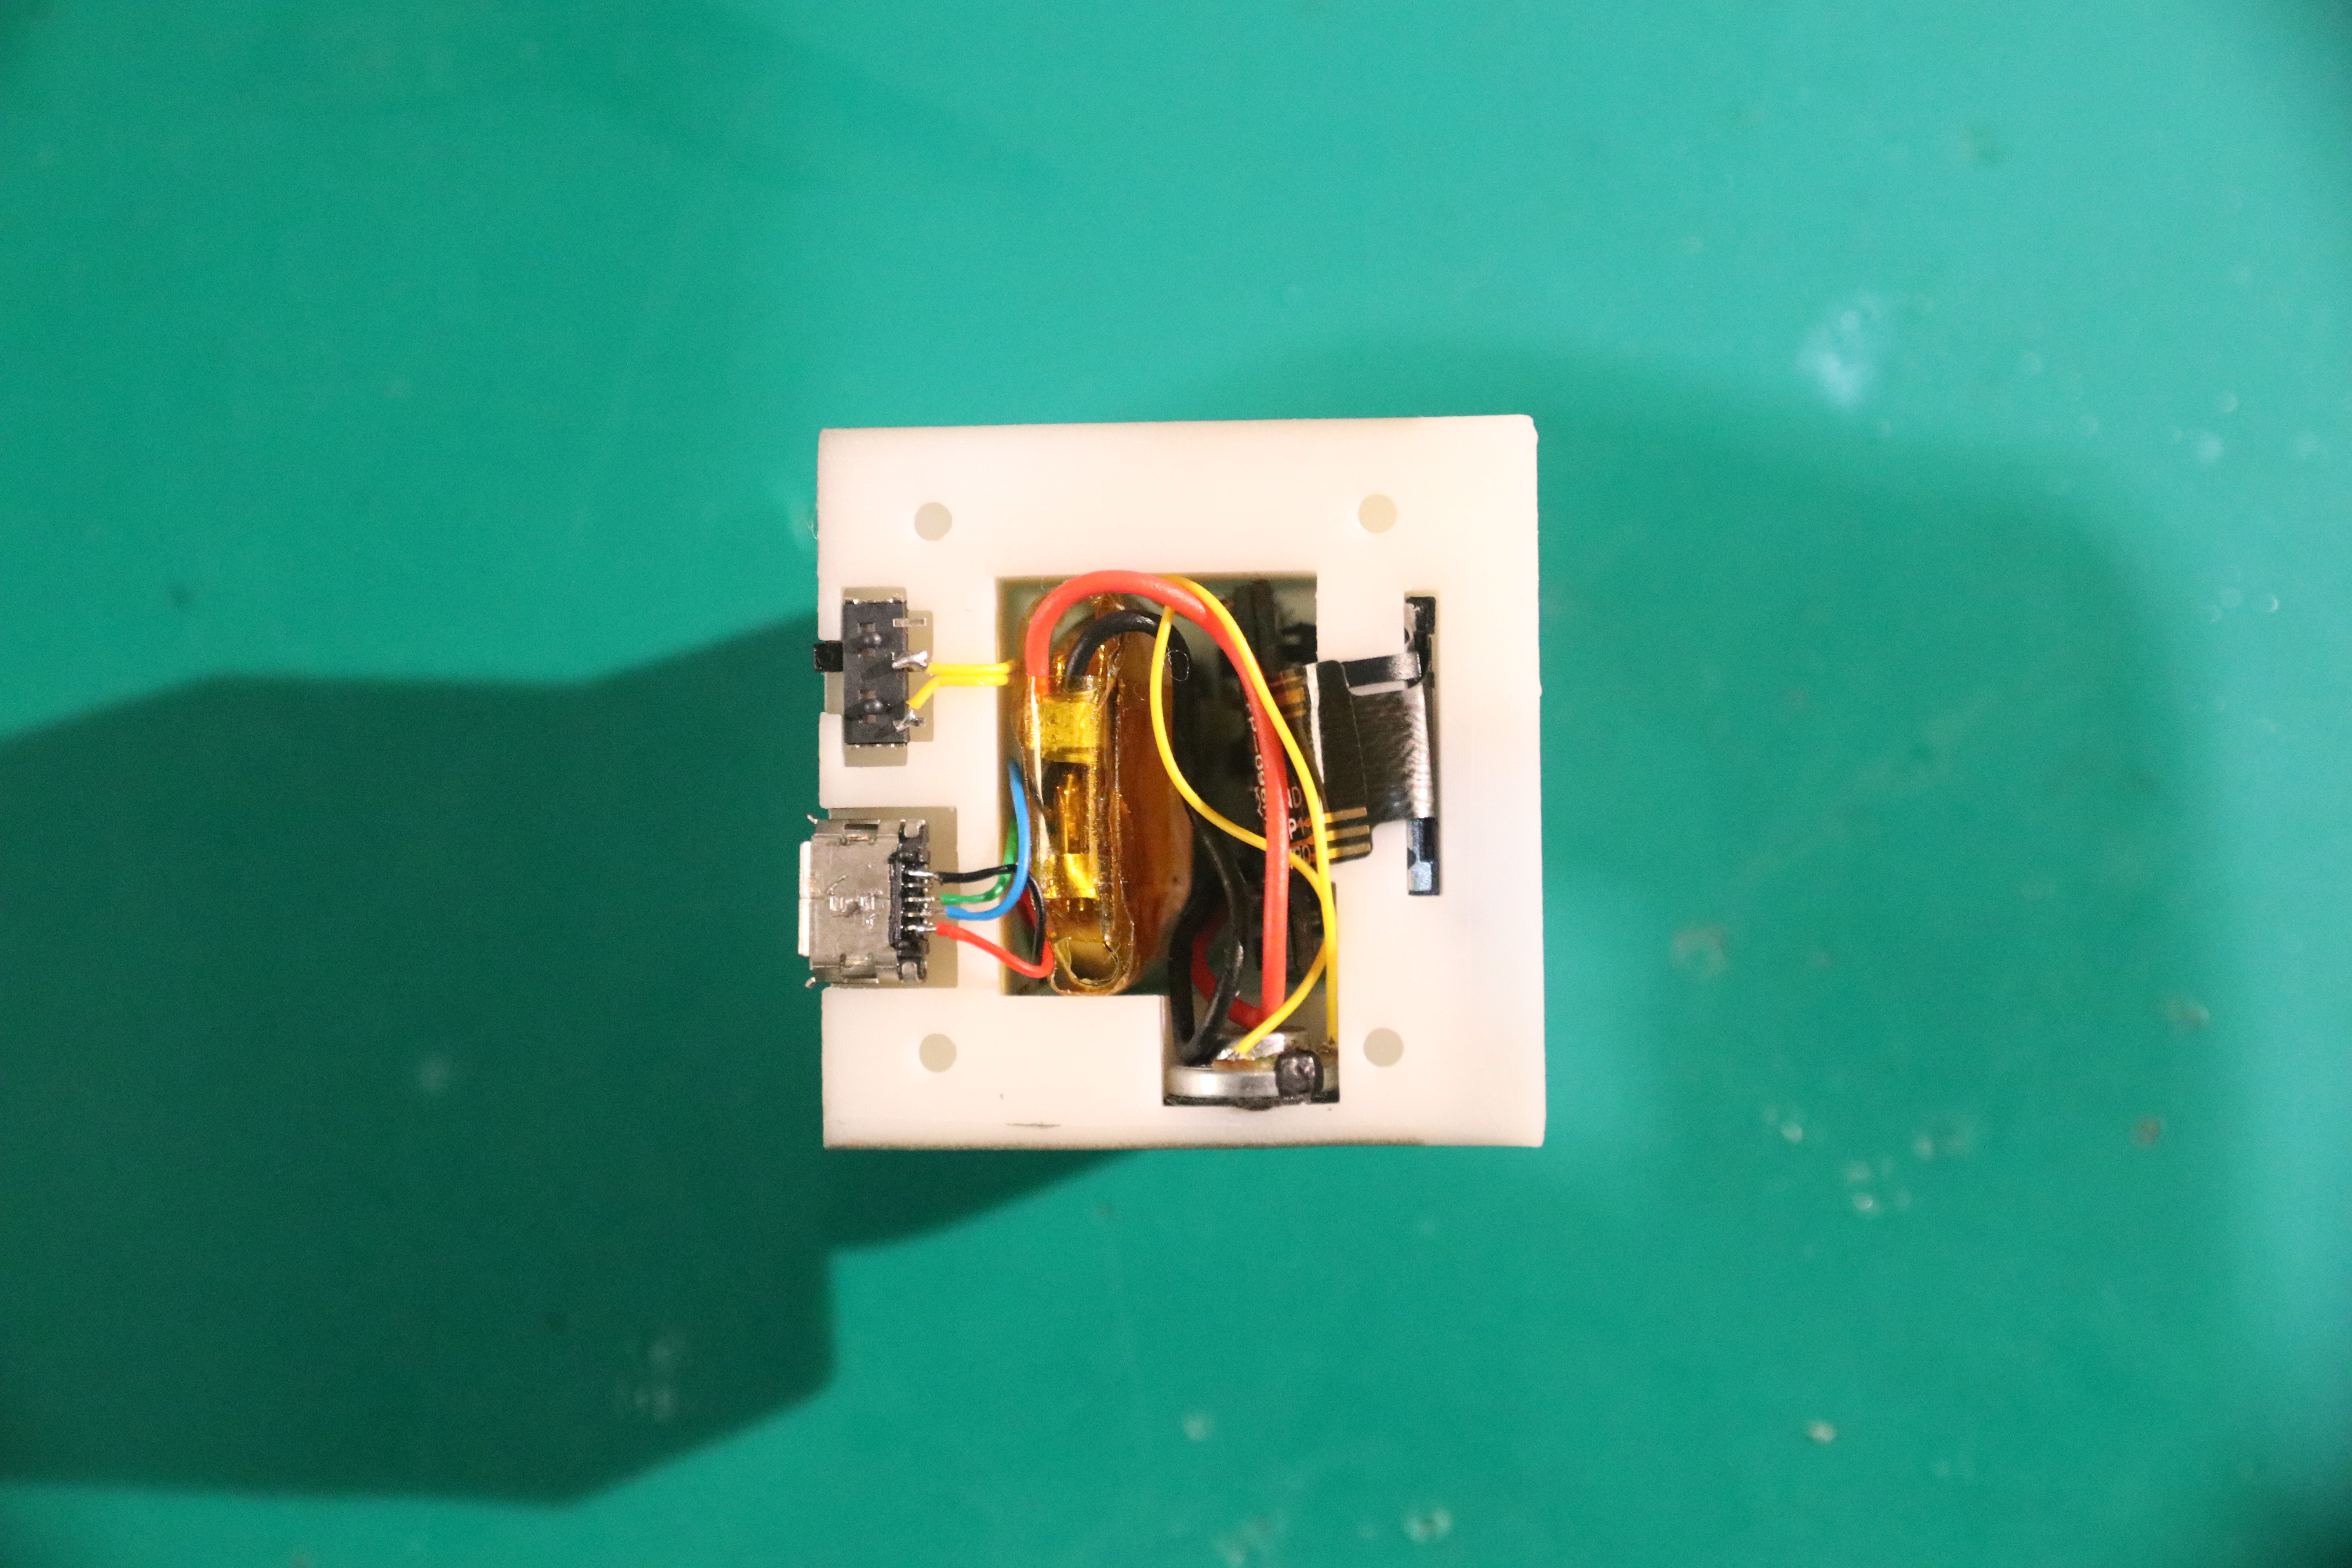
And here is how it all fits into the bottom of the model. The battery and PCB are sandwiched into the main compartment, the speaker is glued to the speaker grille integrated in the model, and the power switch and USB connector are glued into their respective cubbies. The 3d model I printed also includes a thin bottom plate that clicks into the four holes. Unfortunately, that bottom plate was so thin that it turned out a bit too flexible, so in the end I glued that into place as well.