Building, installing, result
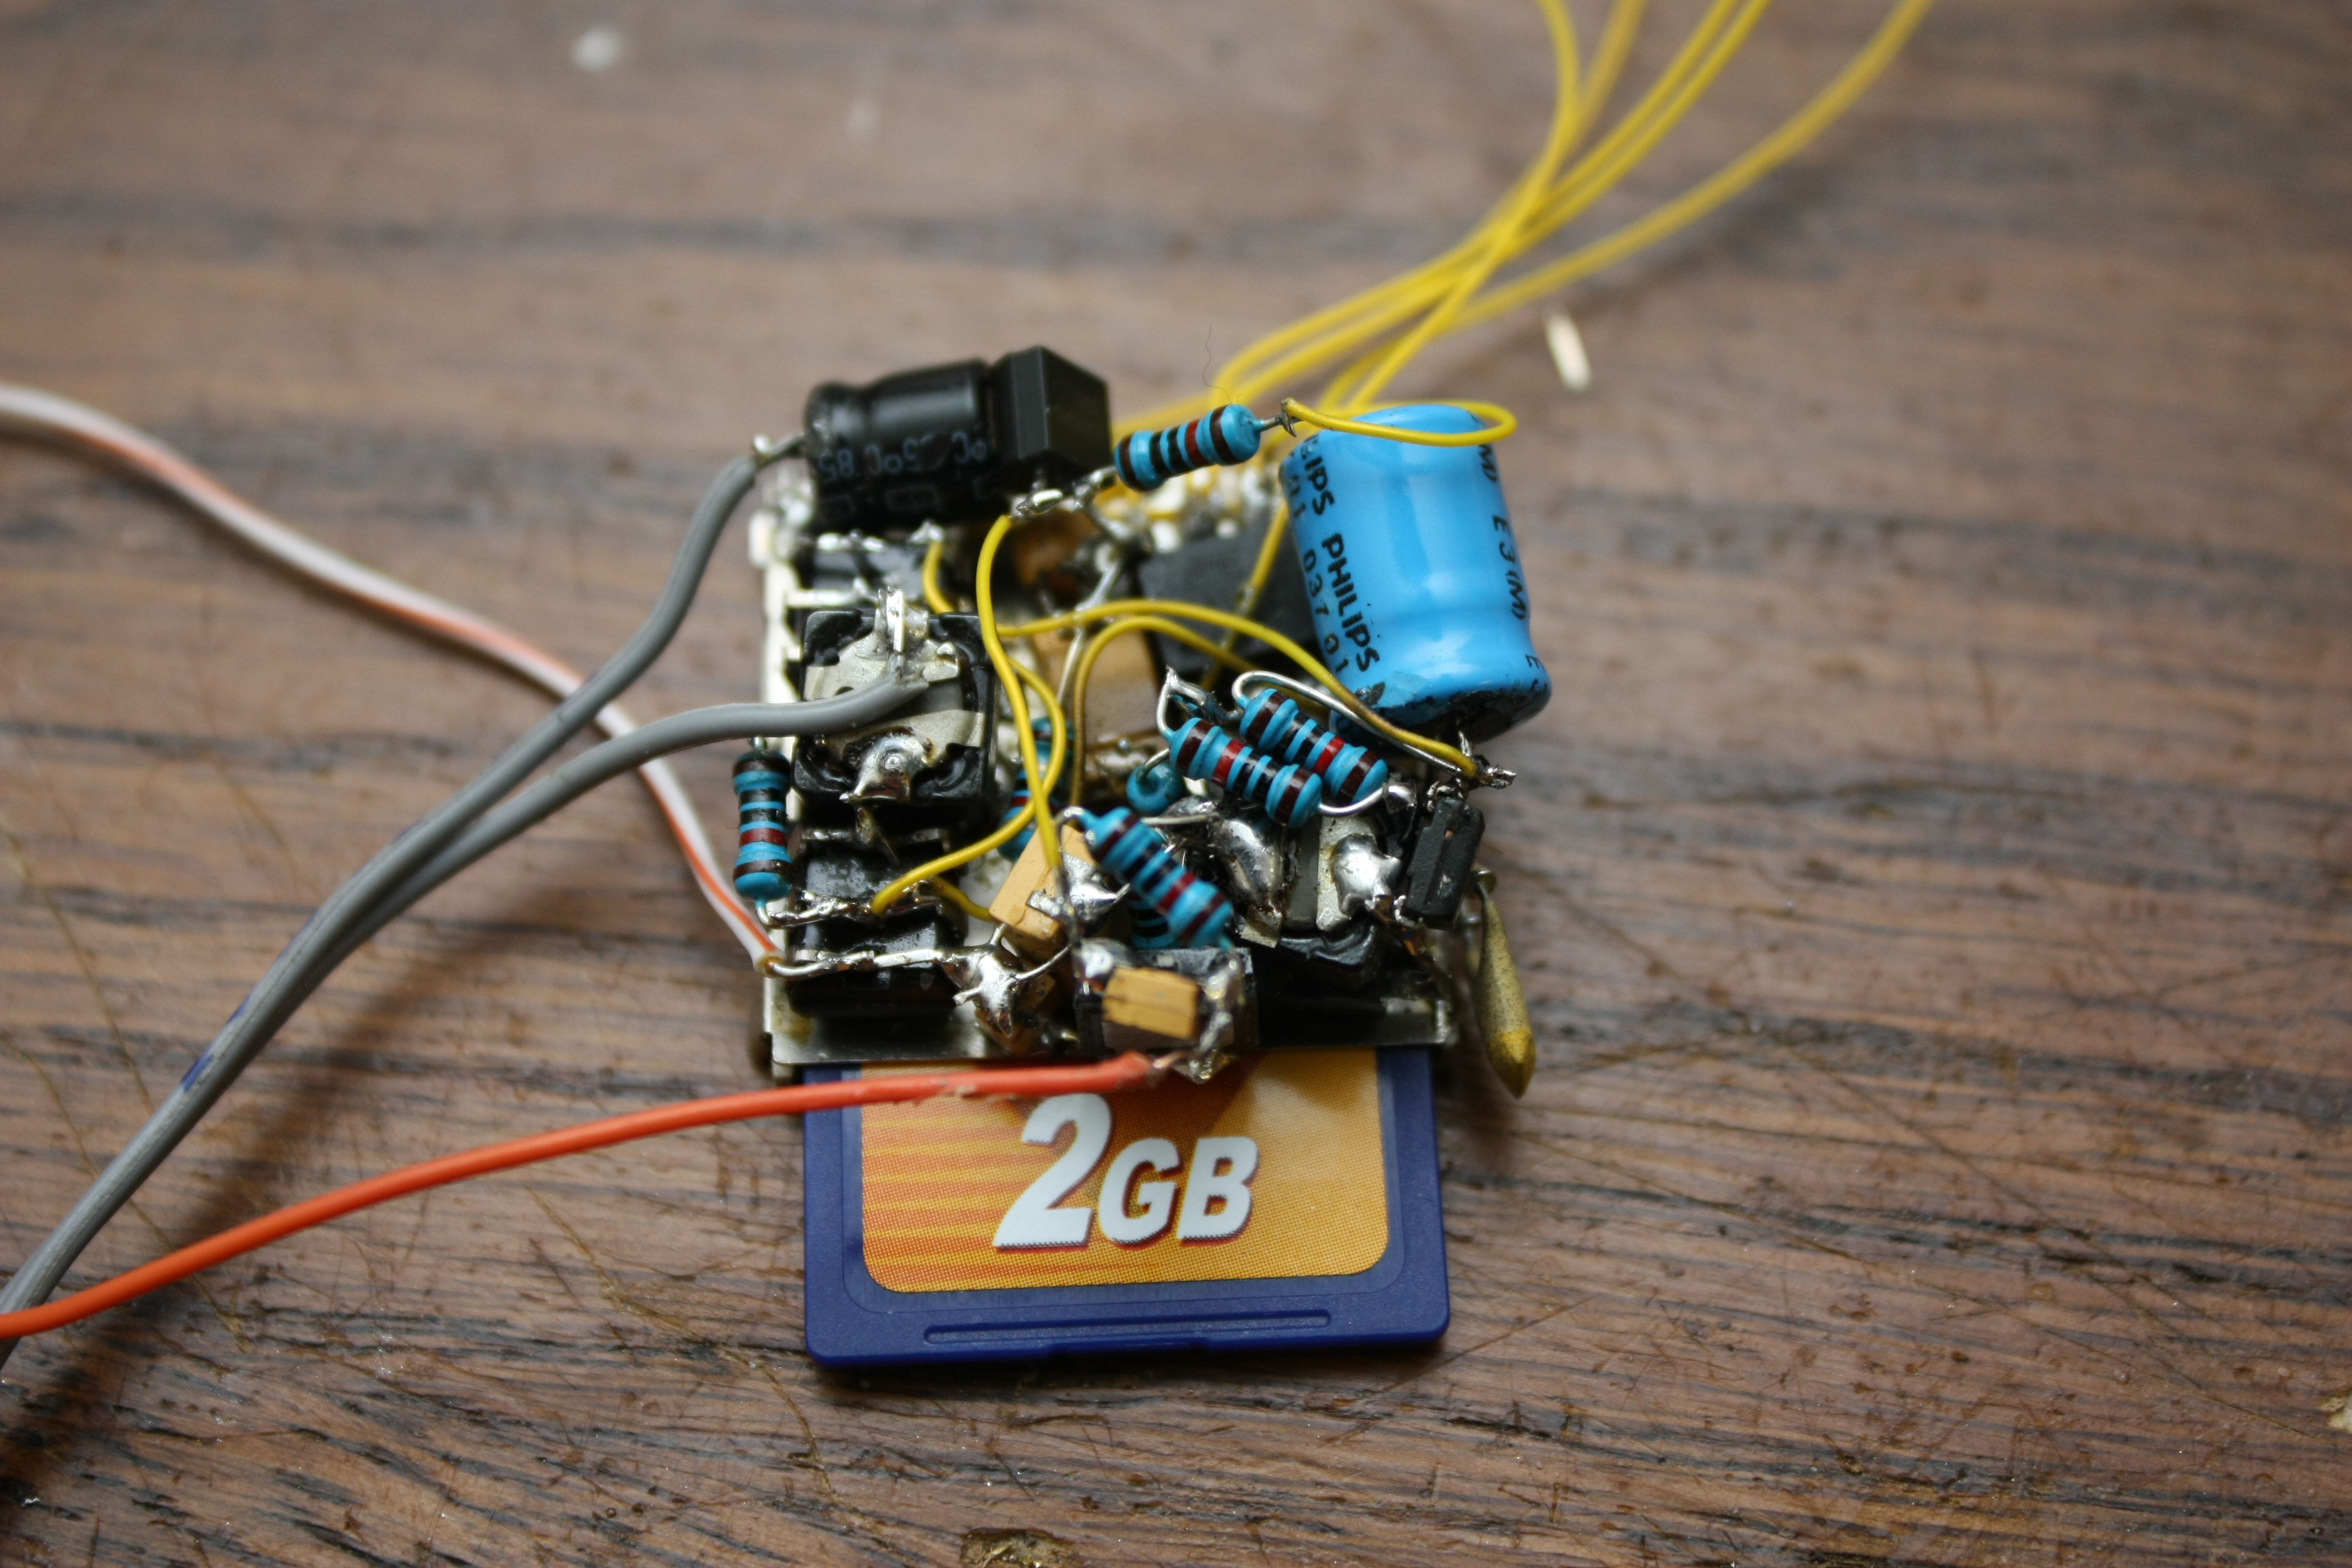
Normally when developing a circuit like this, you start on a breadboard or at least
on a bit of prototyping PCB. I was fairly certain I could get a good result by just
soldering components together dead-bug style to the metal of a SD-card holder. That
worked fairly well when the only chip was the AVR, but in the end... Ah, take a look
for yourself:
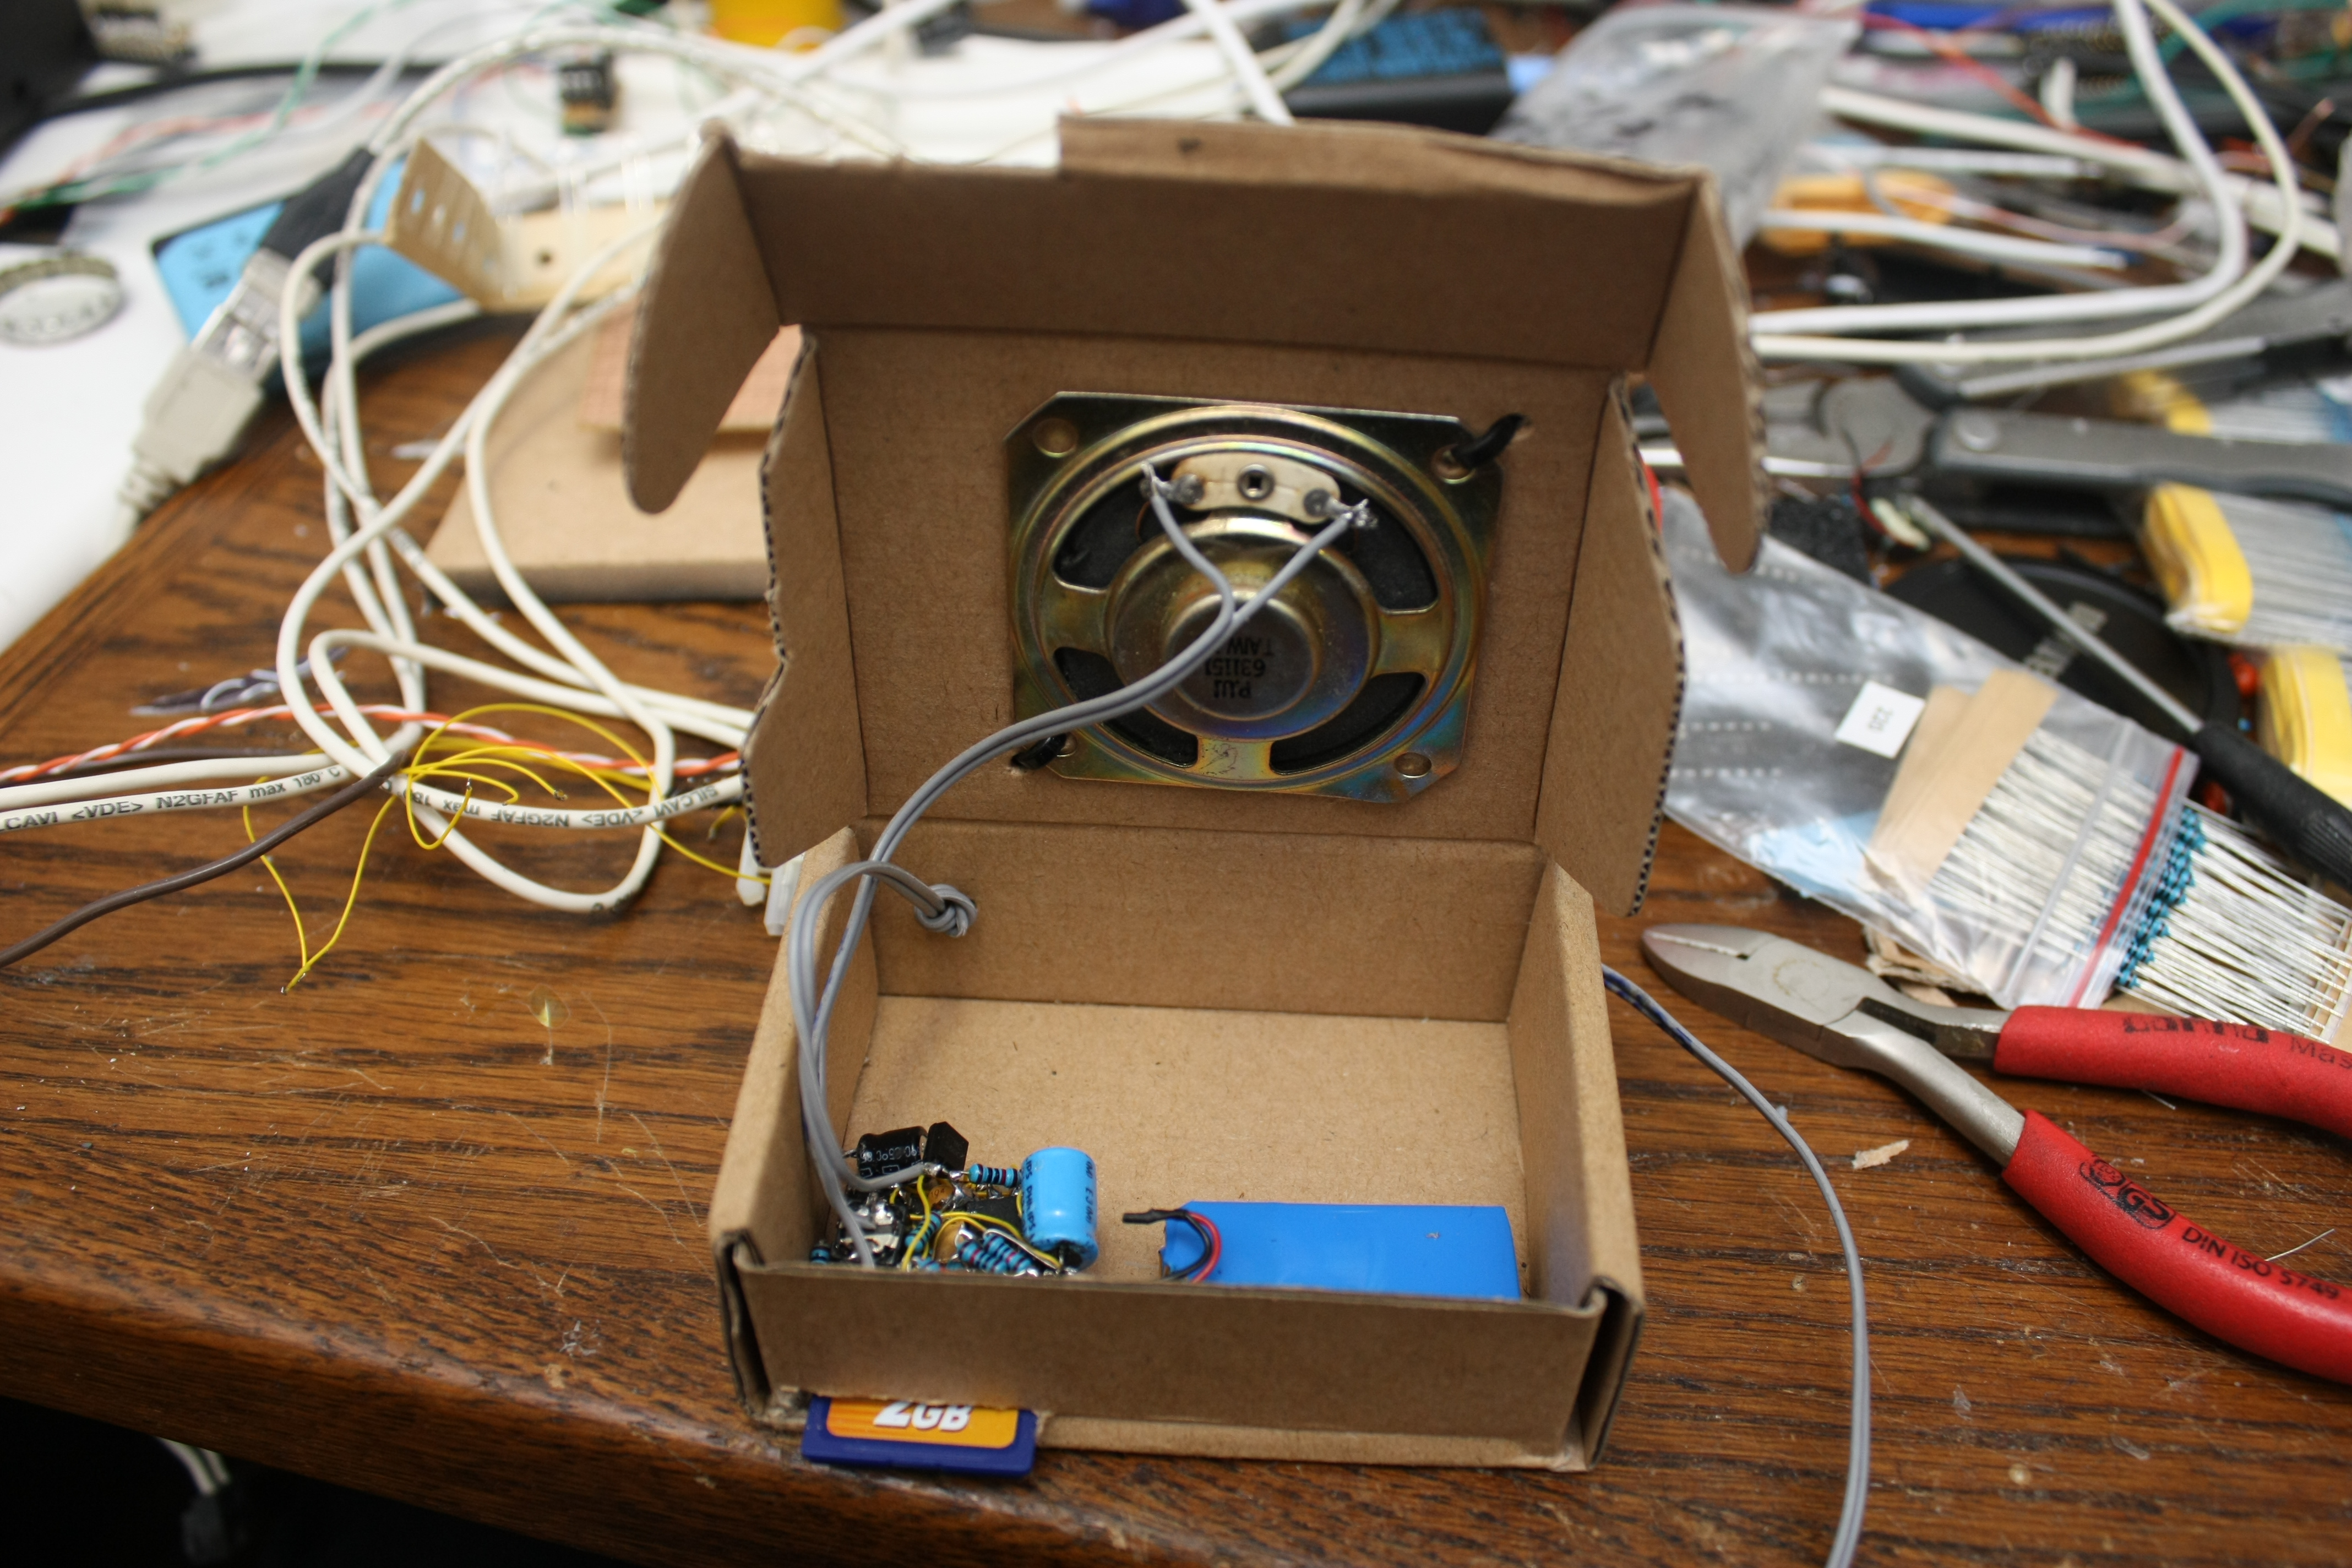
I wasn't sure if everything would fit into the enclosure of the original bell, so
I built everything into a small cardboard box. I had room to spare, but that was a good
thing: the empty space could act as a resonance box, increasing the sound quality and
volume of the speaker by a bit.
I decided to install the doorbell the evening before April Fools. It crossed my mind that my collegues might think the weird-looking new box with electronics inside was a bomb, but I live in the Netherlands and my collegues are a levelheaded bunch of people, so I decided that wouldn't be an issue. When I came to work the next day, the little box got much approval and everyone was happily surprised by it.
To give an indication of the end setup and the sound quality and volume, here's a small demo:
Anyway, as you can see, the little device worked. I'm not sure if I would recommend anyone to build an exact copy of mine because a lot of components are less than ideal: the step-up-converter is overloaded, the L293 isn't an ideal digital amplifier because it isn't quick enough and using a blue led as a 3V power supply is nothing less than a dirty hack.
As usual, the source code is downloadable. It's mostly a modification of the wav-player of ChaN from elm-chan.org which goes under its own BSD-like license. My modifications are also distributed under that license.
« Prev 3
8 commentsNice Work!I love having some time to read(carefully) about your hacks. When you said about the possibility of it being assumed a bomb I remenbered one time when i had to go to the bank and was with a electronics kit in the bag. I was nervous because that the guard would ask to see whats inside of the bag and see a nice 4 digit 7 segment display on the top of some wires and boards, that could be a delicate situation. Hahaha.
When I saw your circuit with the 4 H-Briodges, I immediately asked myself, why you didn\'t drive your speaker in full-bridge configuration. At the cost of just one transistor or CMOS-Inverter you could have saved some energy and the output cap if you use 2/4 of the L293 for each side of the speaker. I\'m sure the speaker would be loud enough with 14V_pp.
Jose: Charging the LiIon-cells is done by connecting them to my lab power supply with the voltage limited ad 4.2V/cell and the current limited to 300mA. I hope they discharge slowly enough that I won\'t have to do it that often.
Great article and even a better hack. You don\'t seem to mention much about the Li-Po, can you tell us a little about how you charge it?
Whoops, forgot to move that into place. Should work now.
Seems like the link for the source is broken. Nice work indeed, anyway
Hi, thanks for sharing the cool hack. As you might know it landed on hackaday.com (which is how I got aware of it). I was impressed by the way you salvaged old parts ;)
Hi or replicated the guide to https://git.vvvvvvaria.org/then/secure-digital-club but I find myself in trouble because I do not work I can have more information or an arduino code to try ... thanks Eduart