Soft/Firmware
As the ESP32C3 is powered from batteries, I tried to make it do as little as possible. It should connect to WiFi, talk to my server, see if there are new images it hasn't downloaded yet and if so download them, figure out what the best image to show is (newest or least times shown), display that and shut down. Obviously there's other things as well that need to be done, like error and low-battery handling.
To connect to WiFi, the device needs a SSID and a password. I didn't want to hardcode this, in case it needed to be adjusted. As such, the firmware comes with a copy of ESP32-WiFi-Manager, modified to fix some bugs. Specifically, when you press one of the buttons on the back of the picture frame while resetting the frame using the other button, it will start an access point that you can connect to. An embedded webserver then gives you an user interface to pick a new SSID and set the password for it.
After the picture frame has connected to WiFi, it tries to fetch a hardcoded URL in order to see what it's supposed to do. The URL also encodes some status data, like the MAC of the device, the battery voltage and the current firmware ID. The server returns the ID of the most up-to-date firmware for that specific device, as well as an index of the ten last images uploaded. Some preferences are also sent, like the timezone and the time the picture frame should try to wake up and run another update.
The picture frame actually has storage for ten images in its flash, and it will replace the oldest ones with newly downloaded images, if the server has images that are not in storage. This way, it always has a stash of recent-ish images, which is good if for whatever reason connectivity drops out. It even allows the picture frame to be taken to a different place; while it will recycle old pictures without a WiFi connection, it'll still show something different every day.
Most of the server-side software isn't that complicated: there's a simple front-end webpage created around Cropper.js which you can open on your phone or PC. It allows you to select a picture and crop out the bit that you'd like to show on the picture frame. There's a bit of Javascript that then crops and scales the picture client-side and sends the resulting data to the server. The server takes this, converts it to raw data for the E-ink display and stores it into a MariaDB database.
When a picture frame connects, the server stores the data it sends so I have a log of battery voltages and I can see if a firmware update actually 'took'. It then checks the MariaDB database for the latest ten images and other information like the last firmware version, encodes that in JSON and sends that back. All that is pretty trivial.
The only actually complicated bit is converting the RGB image into the 7 pretty specific colors that the E-ink display can show. Take this image for example:
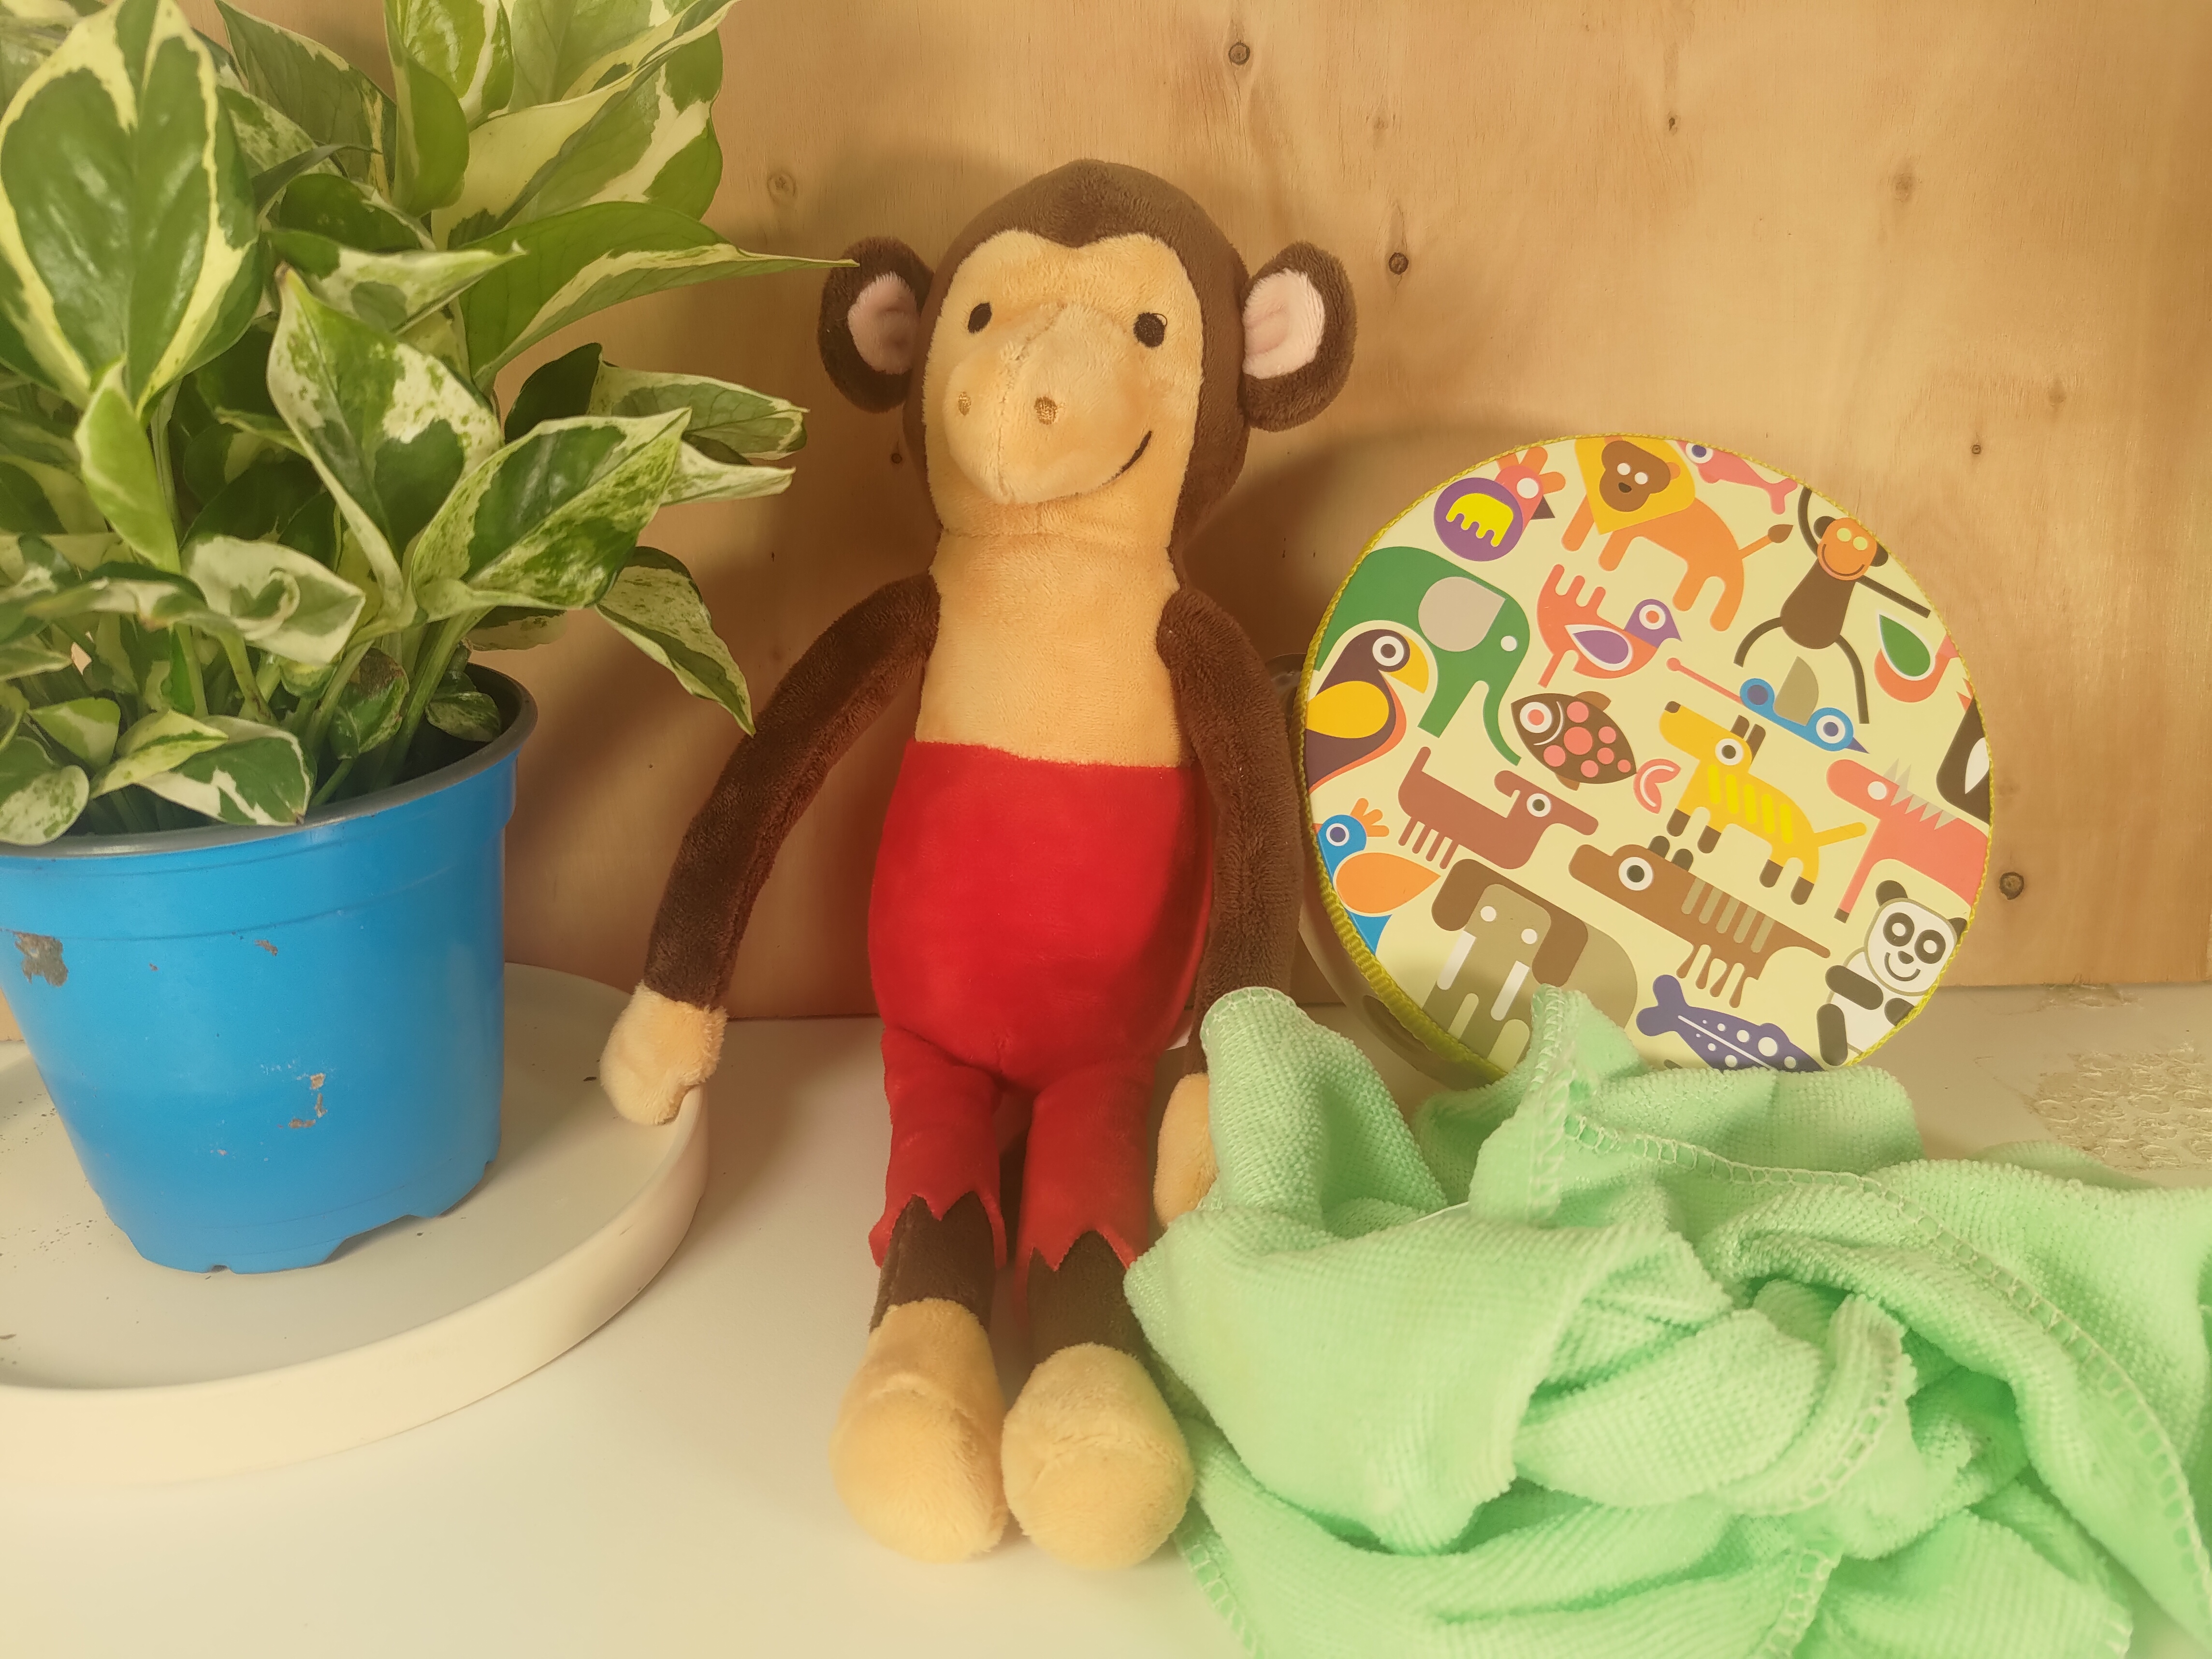
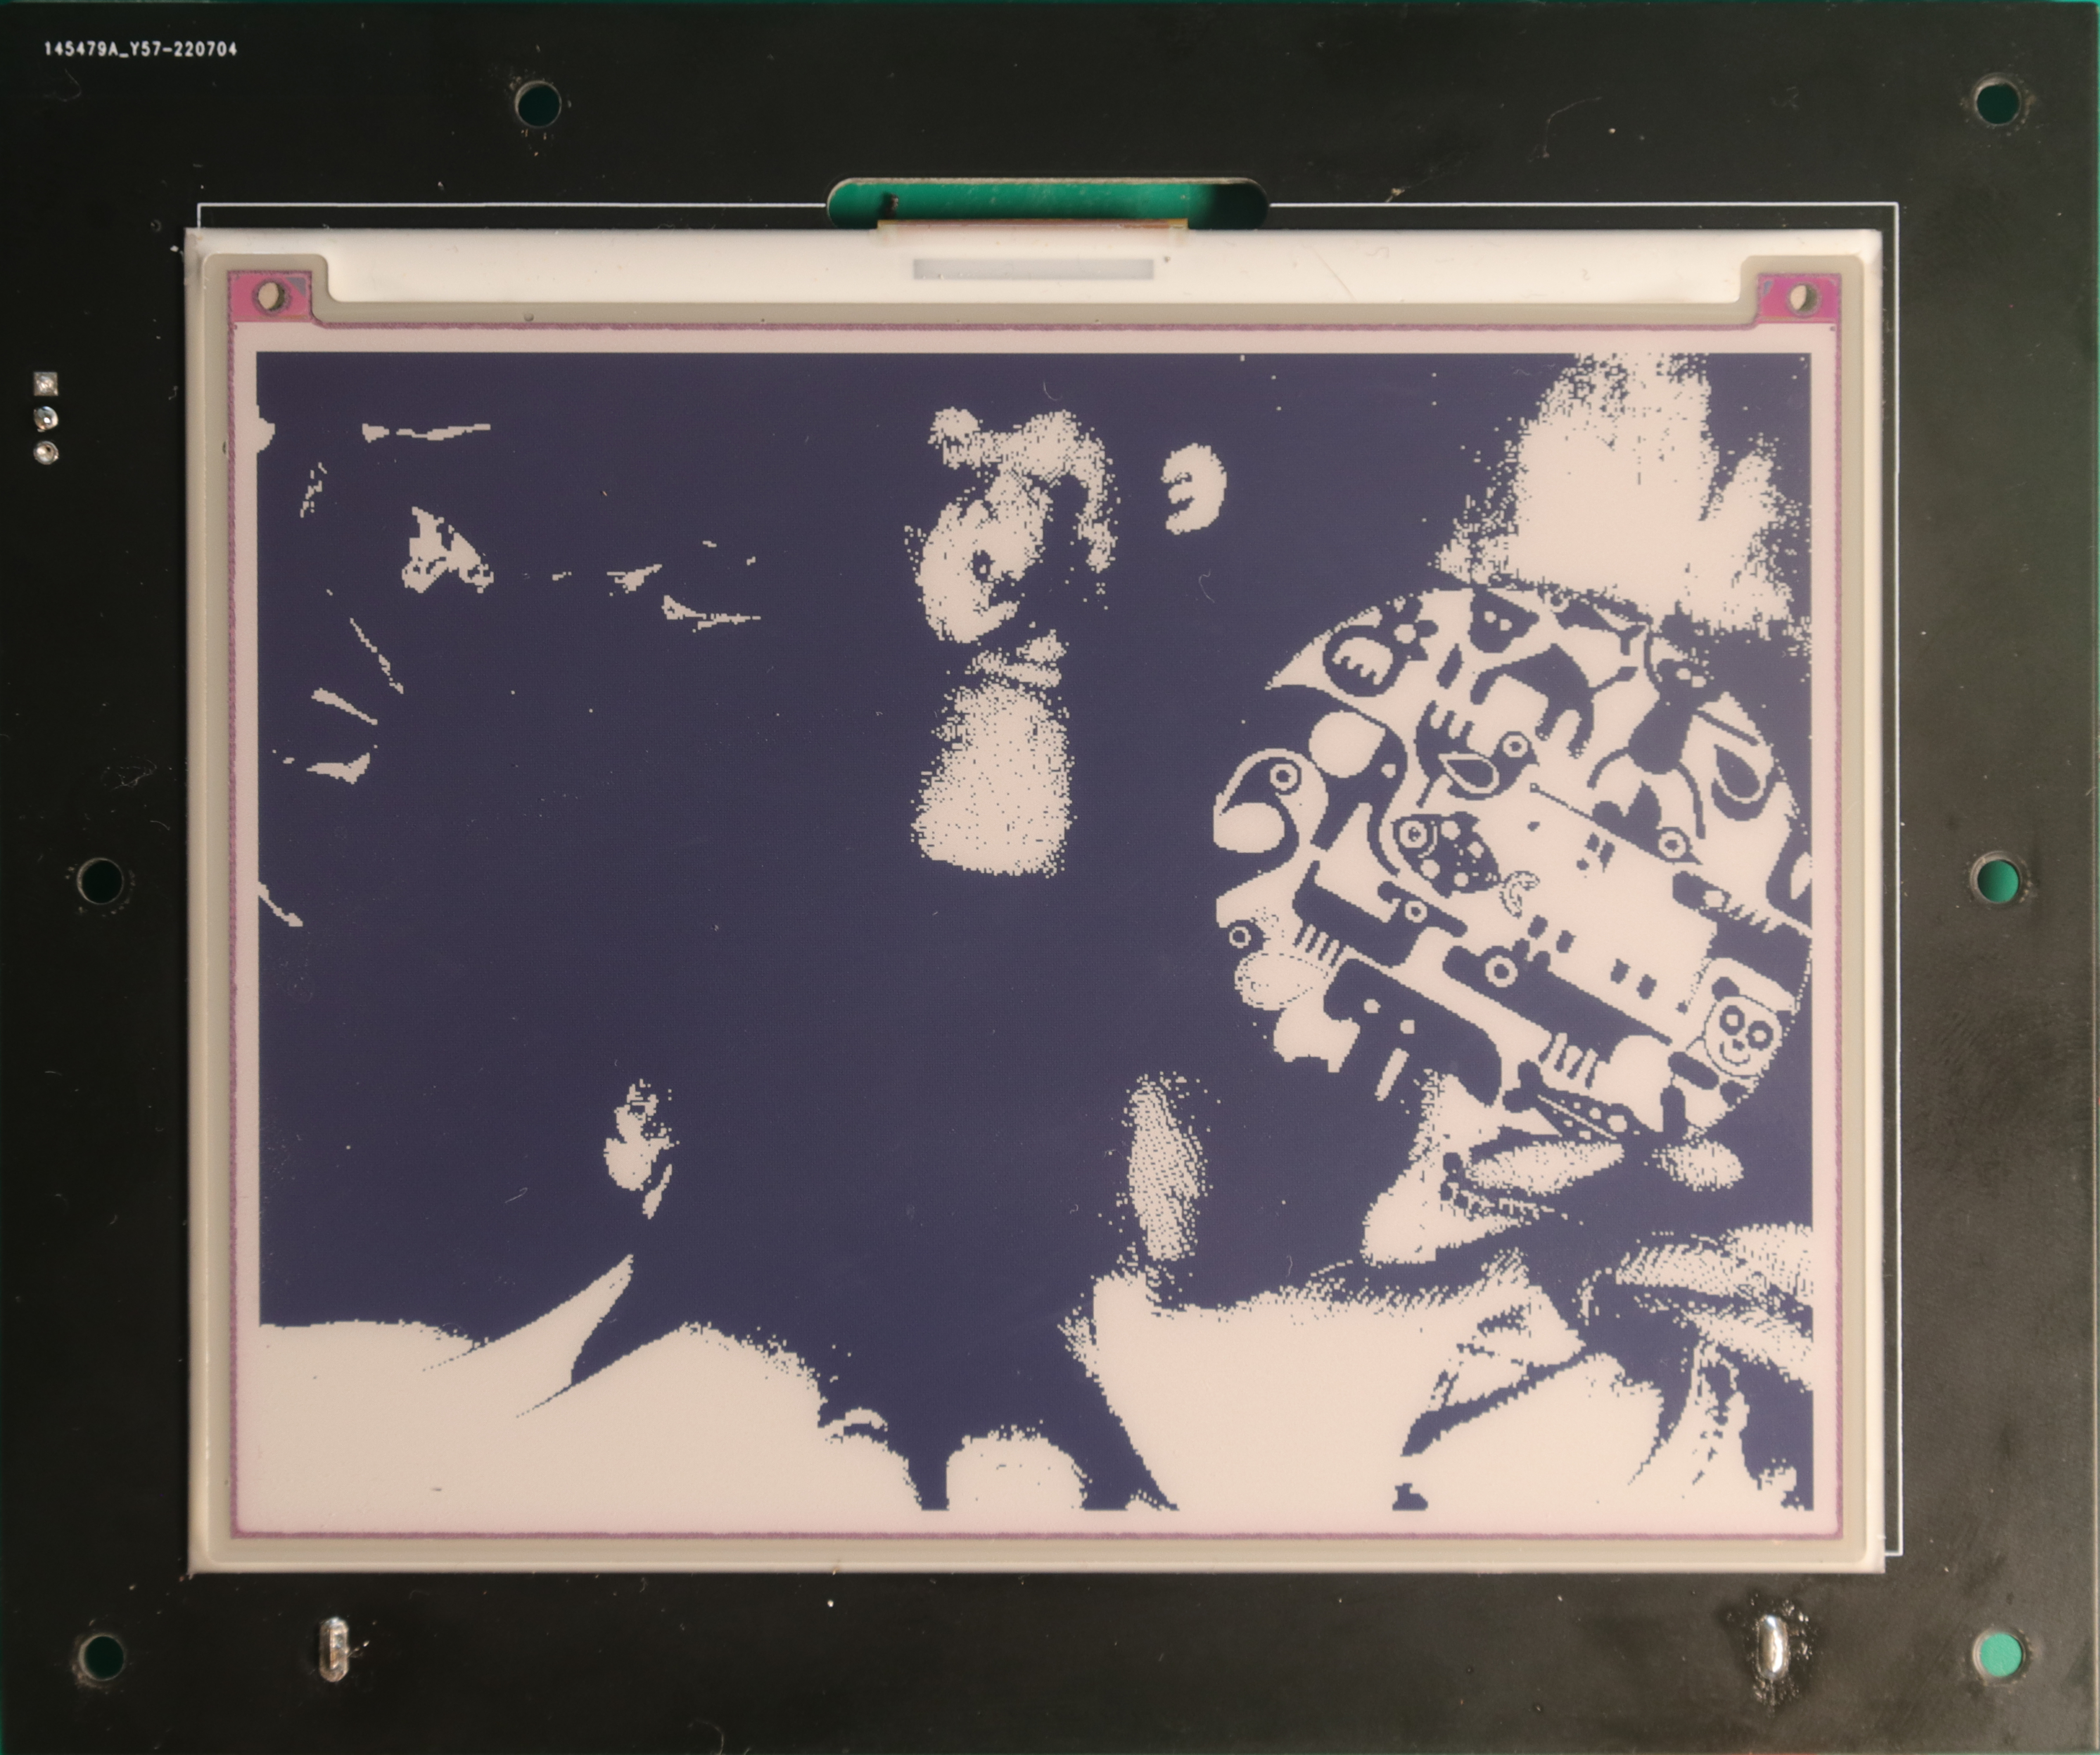
If we wanted to convert this into black and white, we could simply check the luminance (lightness) for each pixel, and if it's closer to black make the result black; if it's closer to white, we'd make the result white. In other words, we take the closest 'color' (restricting the 'colors' to only 100% black or 100% white) and change the resulting picture to that.
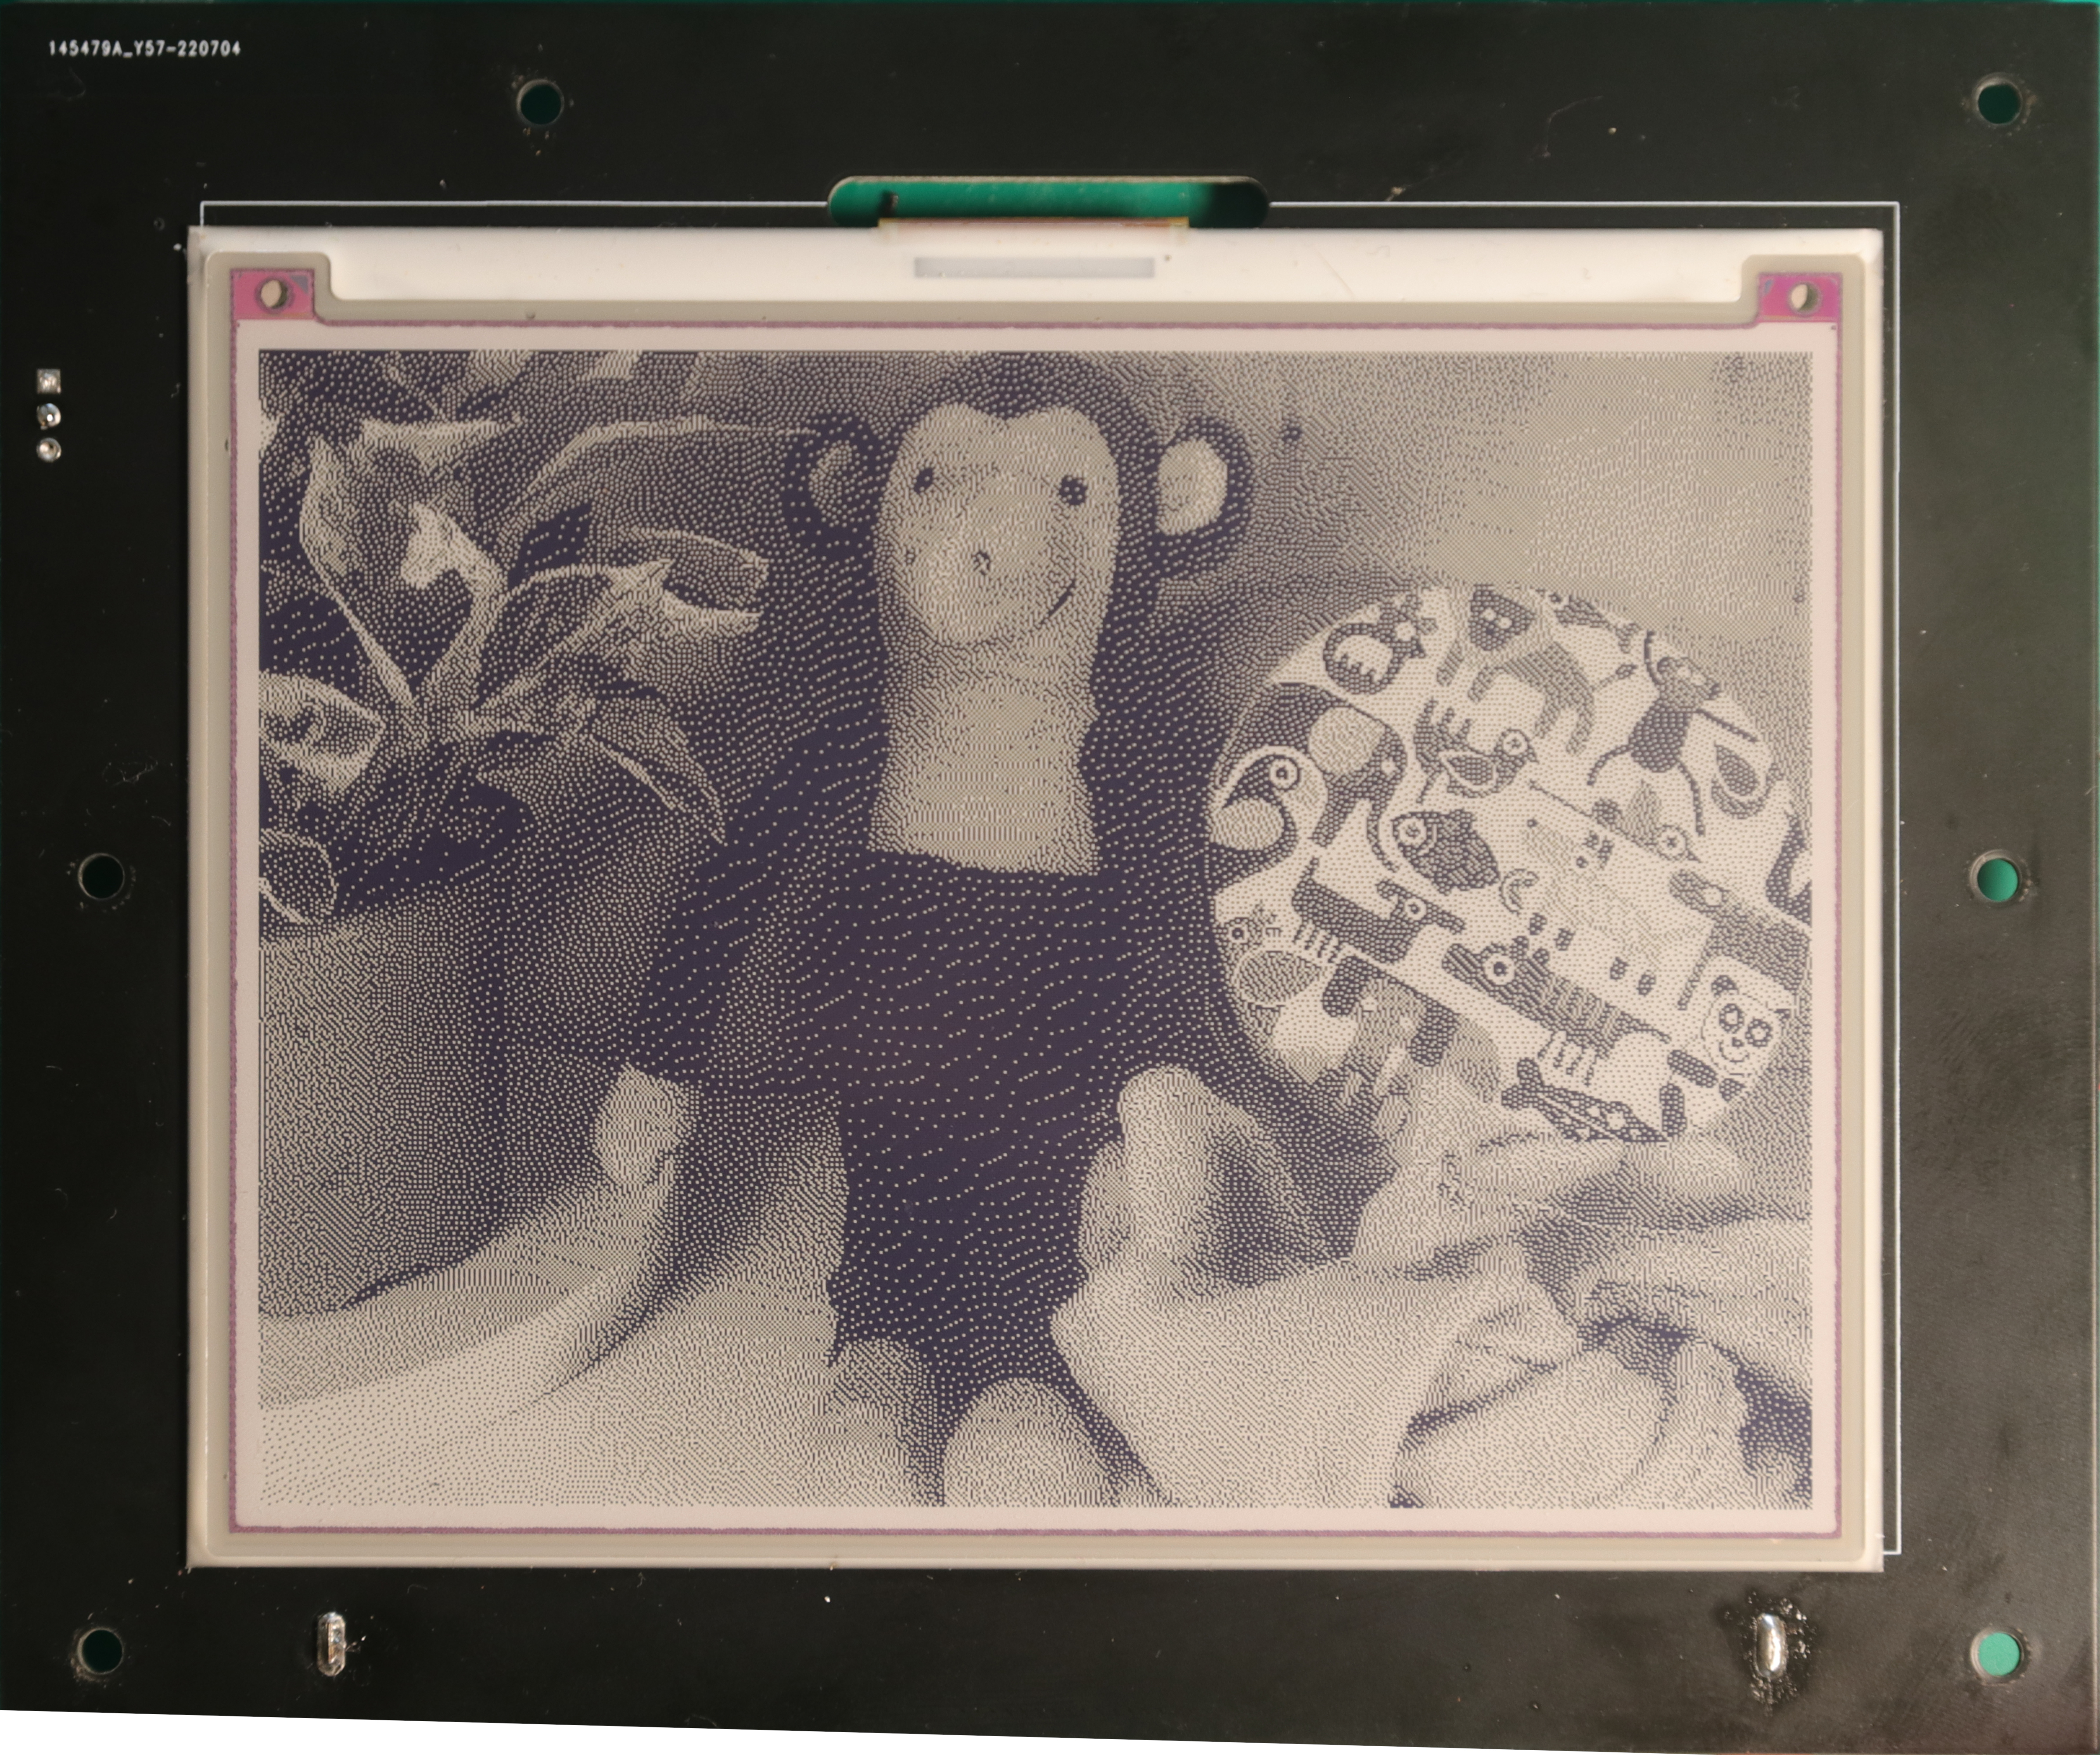
That obviously is not a very close resemblance to the original picture. Even with black and white, we can do better using something called 'error diffusion' Effectively, every time we set a gray pixel black or white, we take the difference between the luminance of the pixel in the original photo and the luminance of the pixel we actually show on the e-ink screen (the 'error' in 'error diffusion') and partially add it to the surrounding pixels (the 'diffusion'). The diffusion process can be done in multiple ways, of which Floyd-Steinberg is the most common, and it renders a pretty good black and white dithered image:
We can use that for our 7-color screen as well. The issue is that the definition of 'closest color' gets a lot more complicated, as well as the definition of 'adding'. Even the definition of 'color' gets hairy, as an E-ink display does not have backlight and as such the perceived colors differ depending on what illuminates it: light it with the flame of a candle and you will see different colors than when the display is seen in bright sunlight.
To get the colors, I took a temperature-adjustable light, set it to 4800K (the average color temperature I think the display will be viewed at), displayed the 7 colors as flat rectangles on the E-ink display and took a picture of it. I imported this into my computer and manually adjusted the colors until the on-screen ones looked as close as I could get to the E-ink ones. I then took the average RGB values of the seven colors and entered them into my program.
To get the 'closest' color out of these seven colors to any pixel in the source image, we need a way to compare two colors, and as we're using actual colors and not just black and white, we can't get away by simply using the luminance anymore. A quick-and-dirty way to compare two colors is to see the (linearized) RGB-space as a three-dimensional space and use the Euclidian distance to measure how close two colors are. With this model, adding colors can be done by simply adding the RGB values. If we modify the Floyd-Steinberg dithering to use this to pick the closest color, we get a decently acceptable image.

That's actually not bad! However, there are a few strange color artifacts. The most obvious one is that the flower pot is not the same shade of blue: this is because the E-ink display simply doesn't have the available colors to replicate that shade; no algorithm can compensate for that. But there's more weirdness in the form of strange color banding, for instance in the shadow under the monkeys left arm, and the belly of the monkey is more orange than in the original picture.
The thing about calculating color differences in RGB space is that your eyes don't actually work in linear RGB space. The difference between two colors is actually a lot harder to define, and there have been multiple attempts to do this. One of the earliest approaches is to convert the RGB colors to CIELAB color space and take the difference. This approach is widely advised on the Internet, but it turns out it doesn't really give good results for colors that are not fully saturated. For me, the best approach turned out to use the CIEDE2000 standard. This is one of the more up-to-date perception models, and while it's not trivial to calculate, it does give the best results. It's a good thing I already decided to do this server-side, so I wouldn't have to drain the batteries while doing this expensive calculation.
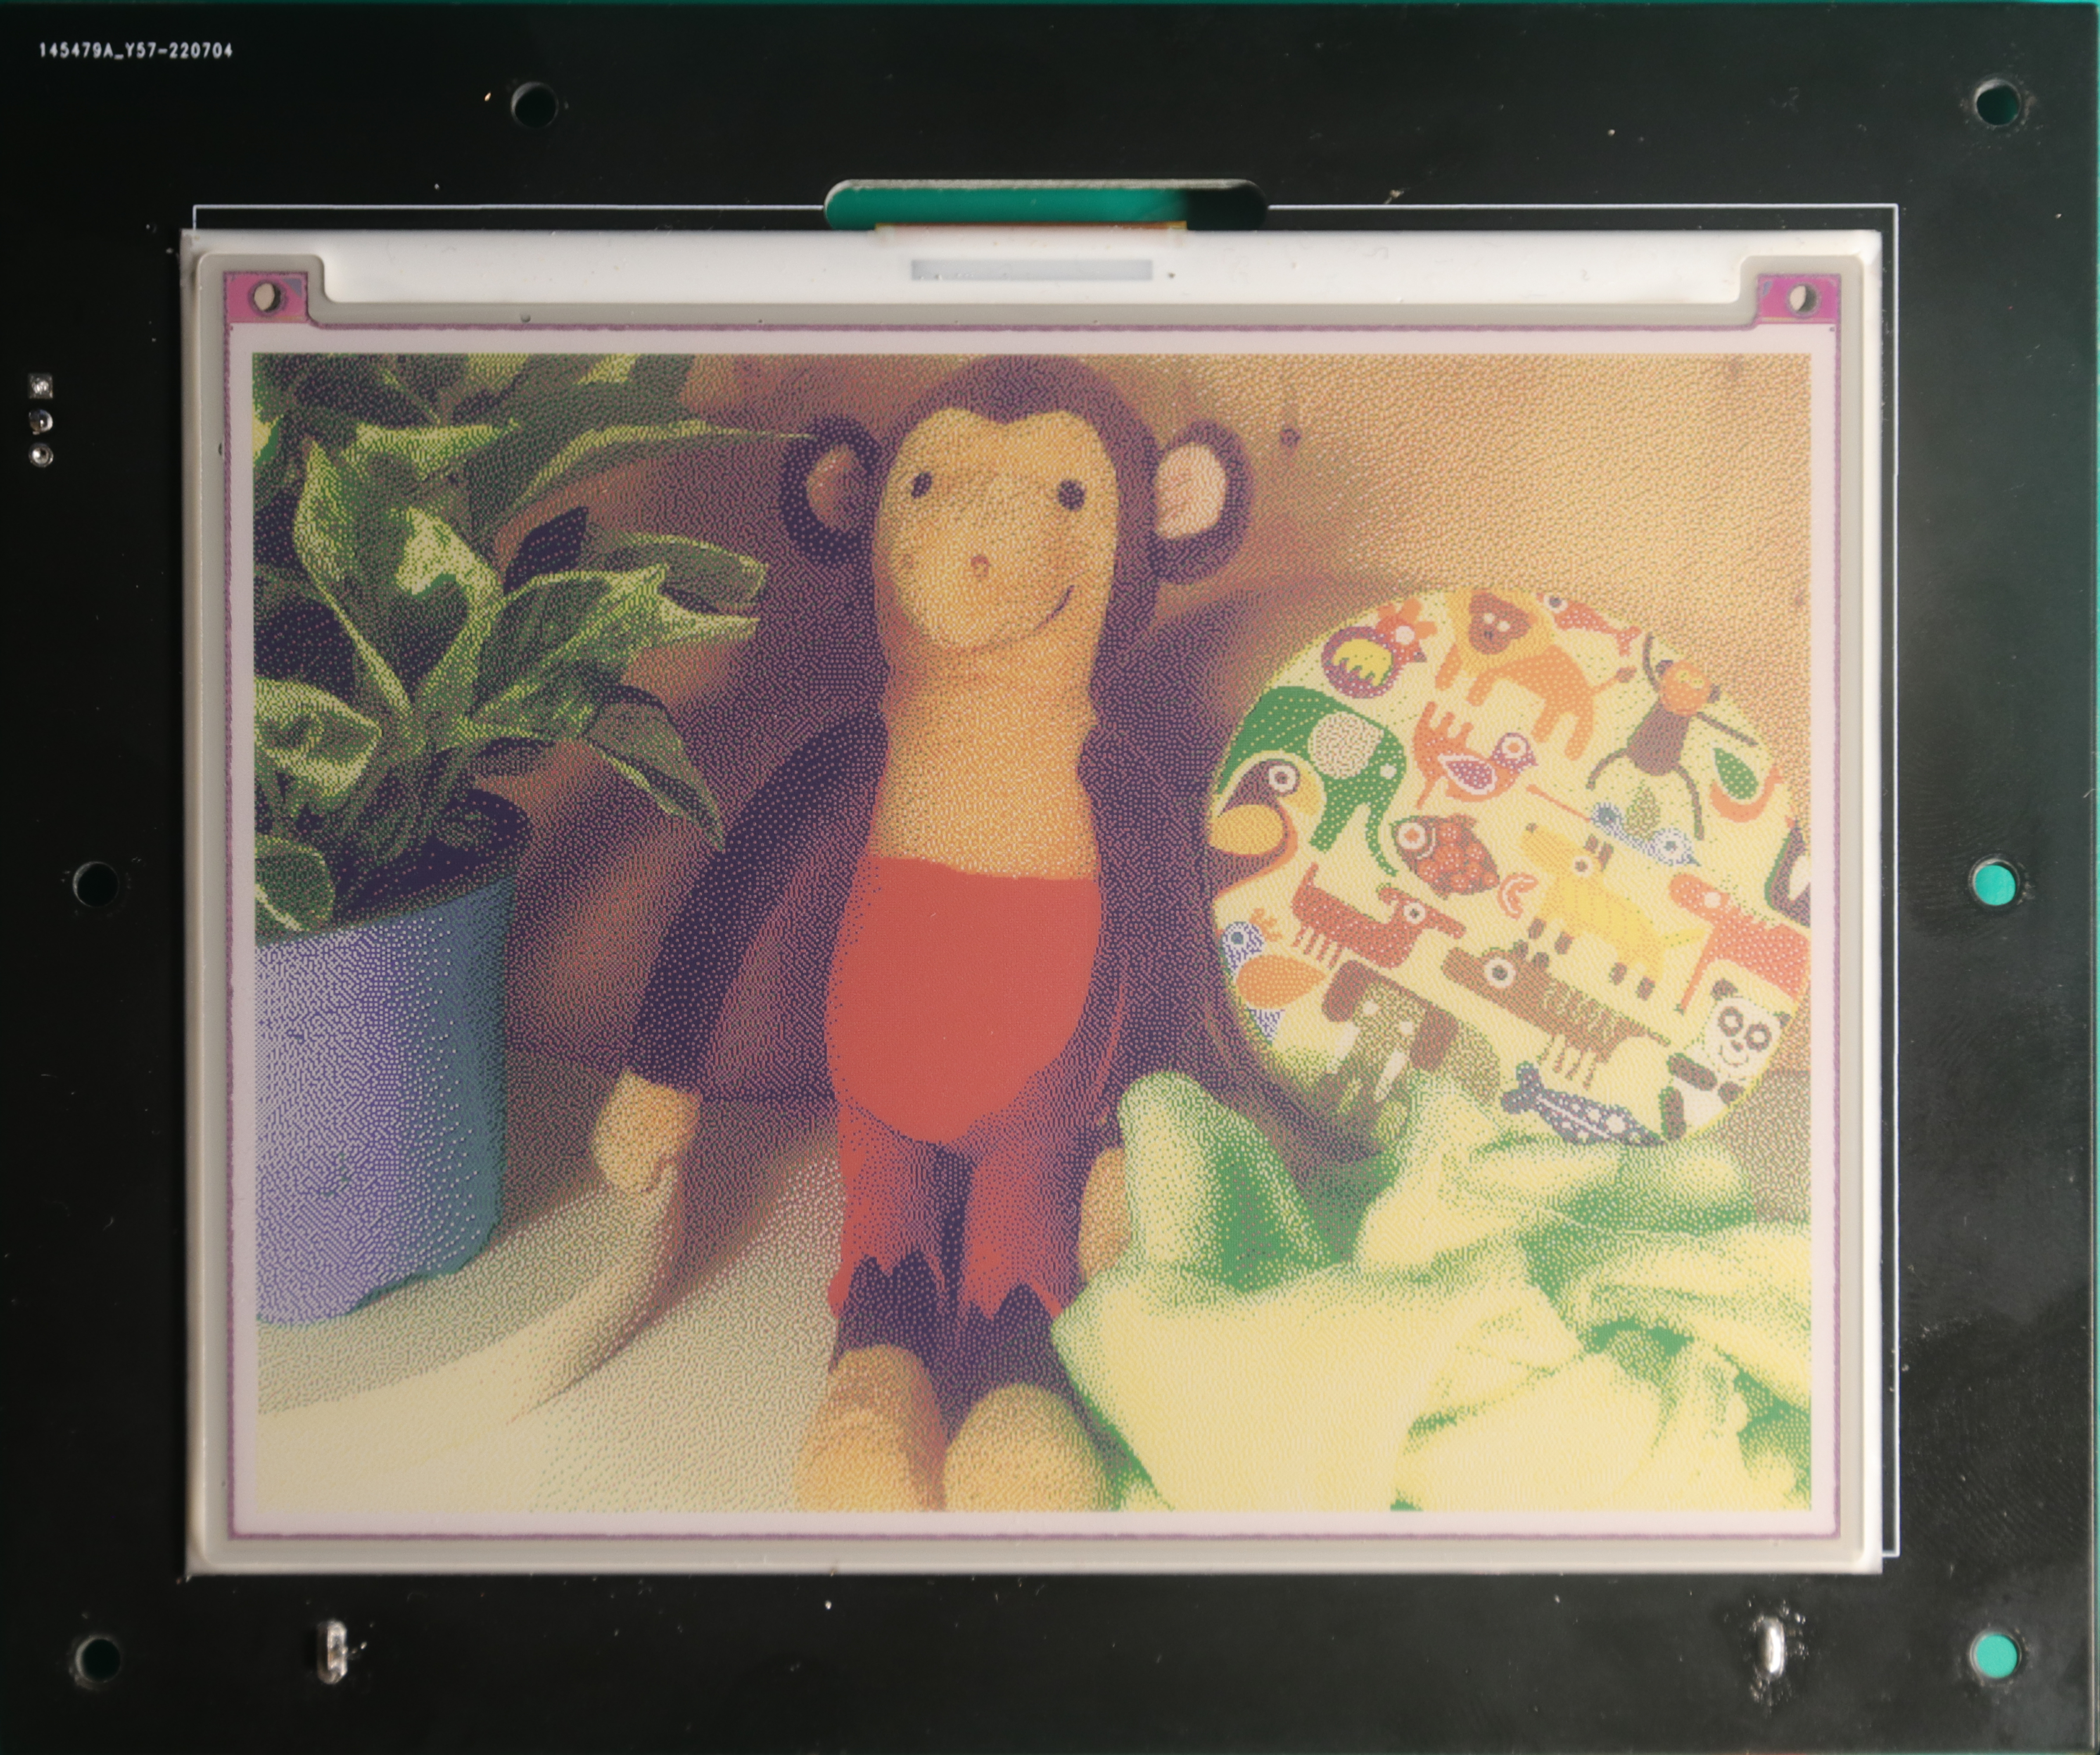
Note that the color banding in the shadows is gone, and the monkeys belly is a more proper shade of red. There's still flaws in the picture, like the color of the flower pot, but as I mentioned before, this is because the E-ink simply does not have the colors available to properly display that particular hue.
(On a side-note, I still do the error distribution part of the process in RGB. I tried also moving this to CIELAB, but the results I got weren't better, and it uses a fair bit more processing time.)
All of this logic is implemented in a simple C program, for speed. After the picture has been cropped in Javascript on the client (using cropper.js, it's sent to the server where the PHP script calls this C program to convert the image into E-ink pixels; that then is stored in a MariaDB table for the picture frames to pick up whenever they connect.

The webpage is also suited for mobile use, so when I or anyone else with access to the page snaps a particularily nice image, we can immediately crop it and queue it up for distribution to all the picture frames out there.