Mechanics
Apart from a board an an E-ink display, I also needed an enclosure and a battery. For the battery, I wanted something that wouldn't need to be charged every few days, but would last a couple of months when the E-ink display would be refreshed every once in a while. I also wanted something I could easily buy and replace. In the end, I decided to look at replacement batteries for mobile phones and tablets: they are flat and can be tucked away behind the E-ink screen, often have a fairly high capacity and a replacement battery can be bought easily and cheaply. After browsing around, I decided on standardizing on the battery for a Samsung Galaxy Note II. These batteries are only 4.5mm thick but can still store an impressive 3100mAh.
For the enclosure, I decided a bit of material on the back to protect the PCB and hold the battery would be enough. I have a lasercutter, and cutting something nice from acrylic is pretty easy, so I decided to test that first.
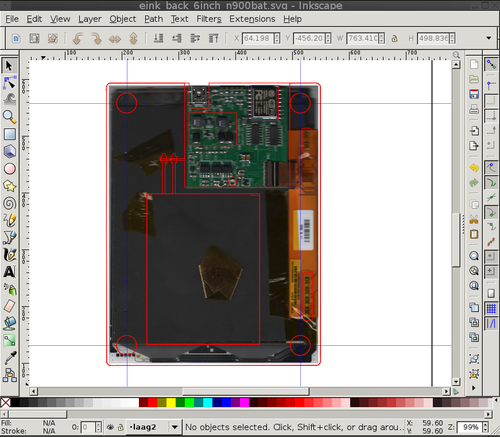
Lasercutting something, as with all manufacturing processes, means you have to measure your existing
components first, insuring they go well together. With all the bits and bobs sticking out of the PCB and
E-ink panel, this would be quite a bit of work. As a shortcut, I decided on putting the entire thing
under my scanner, put the image in Inkscape, scale it to the real size of the thing and work from there.

For the non-critical measurements, this worked just fine; for others like the battery compartment, I still needed exact measurements. This saved a fair amount of measuring though. For the battery contacts, I decided pogo pins, held in place by slots in the acrylic, would be the way to go. It would also be nice if the device could actually be put on a whiteboard, so I also included holes where I could later glue magnets into.
In the end, I had cut-out plans that would net me three pieces of acrylic. Two of them would be glued to
each other and the E-ink display to form the base of the thing; the third one is a backplate held in
place by magnets so I could still access the electronics. The PCB is sandwiched between the acrylic and the
E-ink display and the battery fits fairly snugly in its compartment so it can't fall out.
And this is everything combined. The magnets are in place, not only sticking the backplate to the
rest of the device, but also providing the force that keeps it all stuck to a whiteboard. I also added
four silicone feet so the device doesn't slide down or damage the whiteboard.