Minimal version
In order to make it easy for others to use these printer cartridges in their own projects, I also have a minimal version of the driver. It is missing all the peripheral support and hacks the prototype code has, but the architecture is cleaned up and it should be a solid base to build upon. It comes with a simple example program that prints out 'HELLO!' in either color or black when a button is pressed.
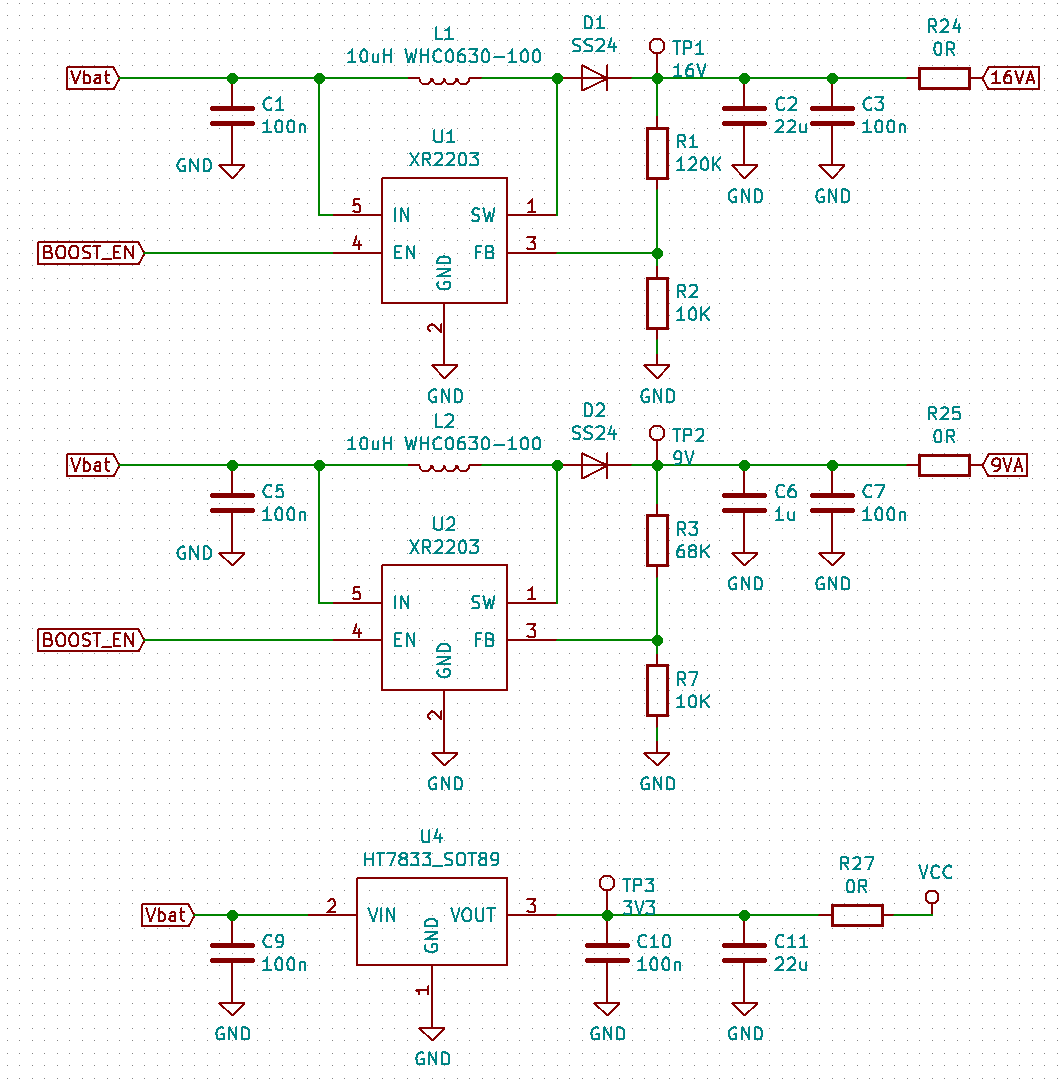
I haven't made dedicated hardware for this, but effectively you can re-use the hardware on the previous page: just take the power supply, the ESP32 and the level converters and implement them in your own circuit. Re-using the entire prototype as described on the previous page is also possible: just make sure to hardwire BOOST_EN high in order to keep the 9V/16V boost converters enabled. (This is how I debugged the code.)
The code itself can be found on Github and is structured as a standard ESP-IDF project. The main driver code is contained in components/printcart, the code that reads out the button and decides when to fire the nozzle, as well as initialization code, is all contained in main/main.c. In the example, the nozzle data is read out of an embedded rgb image.
The architecture is as follows: printcart_i2s.c contains a simple driver for the parallel mode of the I2S peripherals of the ESP32. It allocates two buffers and clocks the 16-bit words in the buffers out at a speed of 3.3MHz to up to 16 GPIO pins. (Here, these GPIO pins are connected to the level converters that drive the printer cartridge.) Every time a buffer is fully clocked out, the driver will call a callback to re-fill the buffer.
The callback is located in printcart_buffer_filler.c. What it does is grab nozzle data from a nozzle data queue, and passes this to a function in printcart_genwaveform.c that converts this nozzle data into signals using a template. The template is dependent on the type of cartridge (color or black) and can be edited by loading tools/waveform_editor.html up in a browser.
On the other side of the nozzle data queue is the loop routine in main.c. This waits until a button is pressed, and when this happens, it generates nozzle data by parsing a simple image file, converted to raw rgb and embedded in the flashed binary, and scanning it from left to right. This way, you can press the button while sweeping the cartridge over the paper and print out the contents of the image on one band of ink.
The end result looks something like this:

It's pretty visible here that the black cartridge spans about twice the height as the color cart (0.7cm vs 1.5cm),
so if you don't need color and want good visibility, the black cart probably is what you want. Also note
that there's a define in main.c that switches between the two cartridges; the code can work with both.
I'm not entirely sure why the black cart has some smears in it: perhaps my waveform has an error, perhaps
my cart is just a bit tired from testing. The printed out data is nice and recognizable, however.