Design
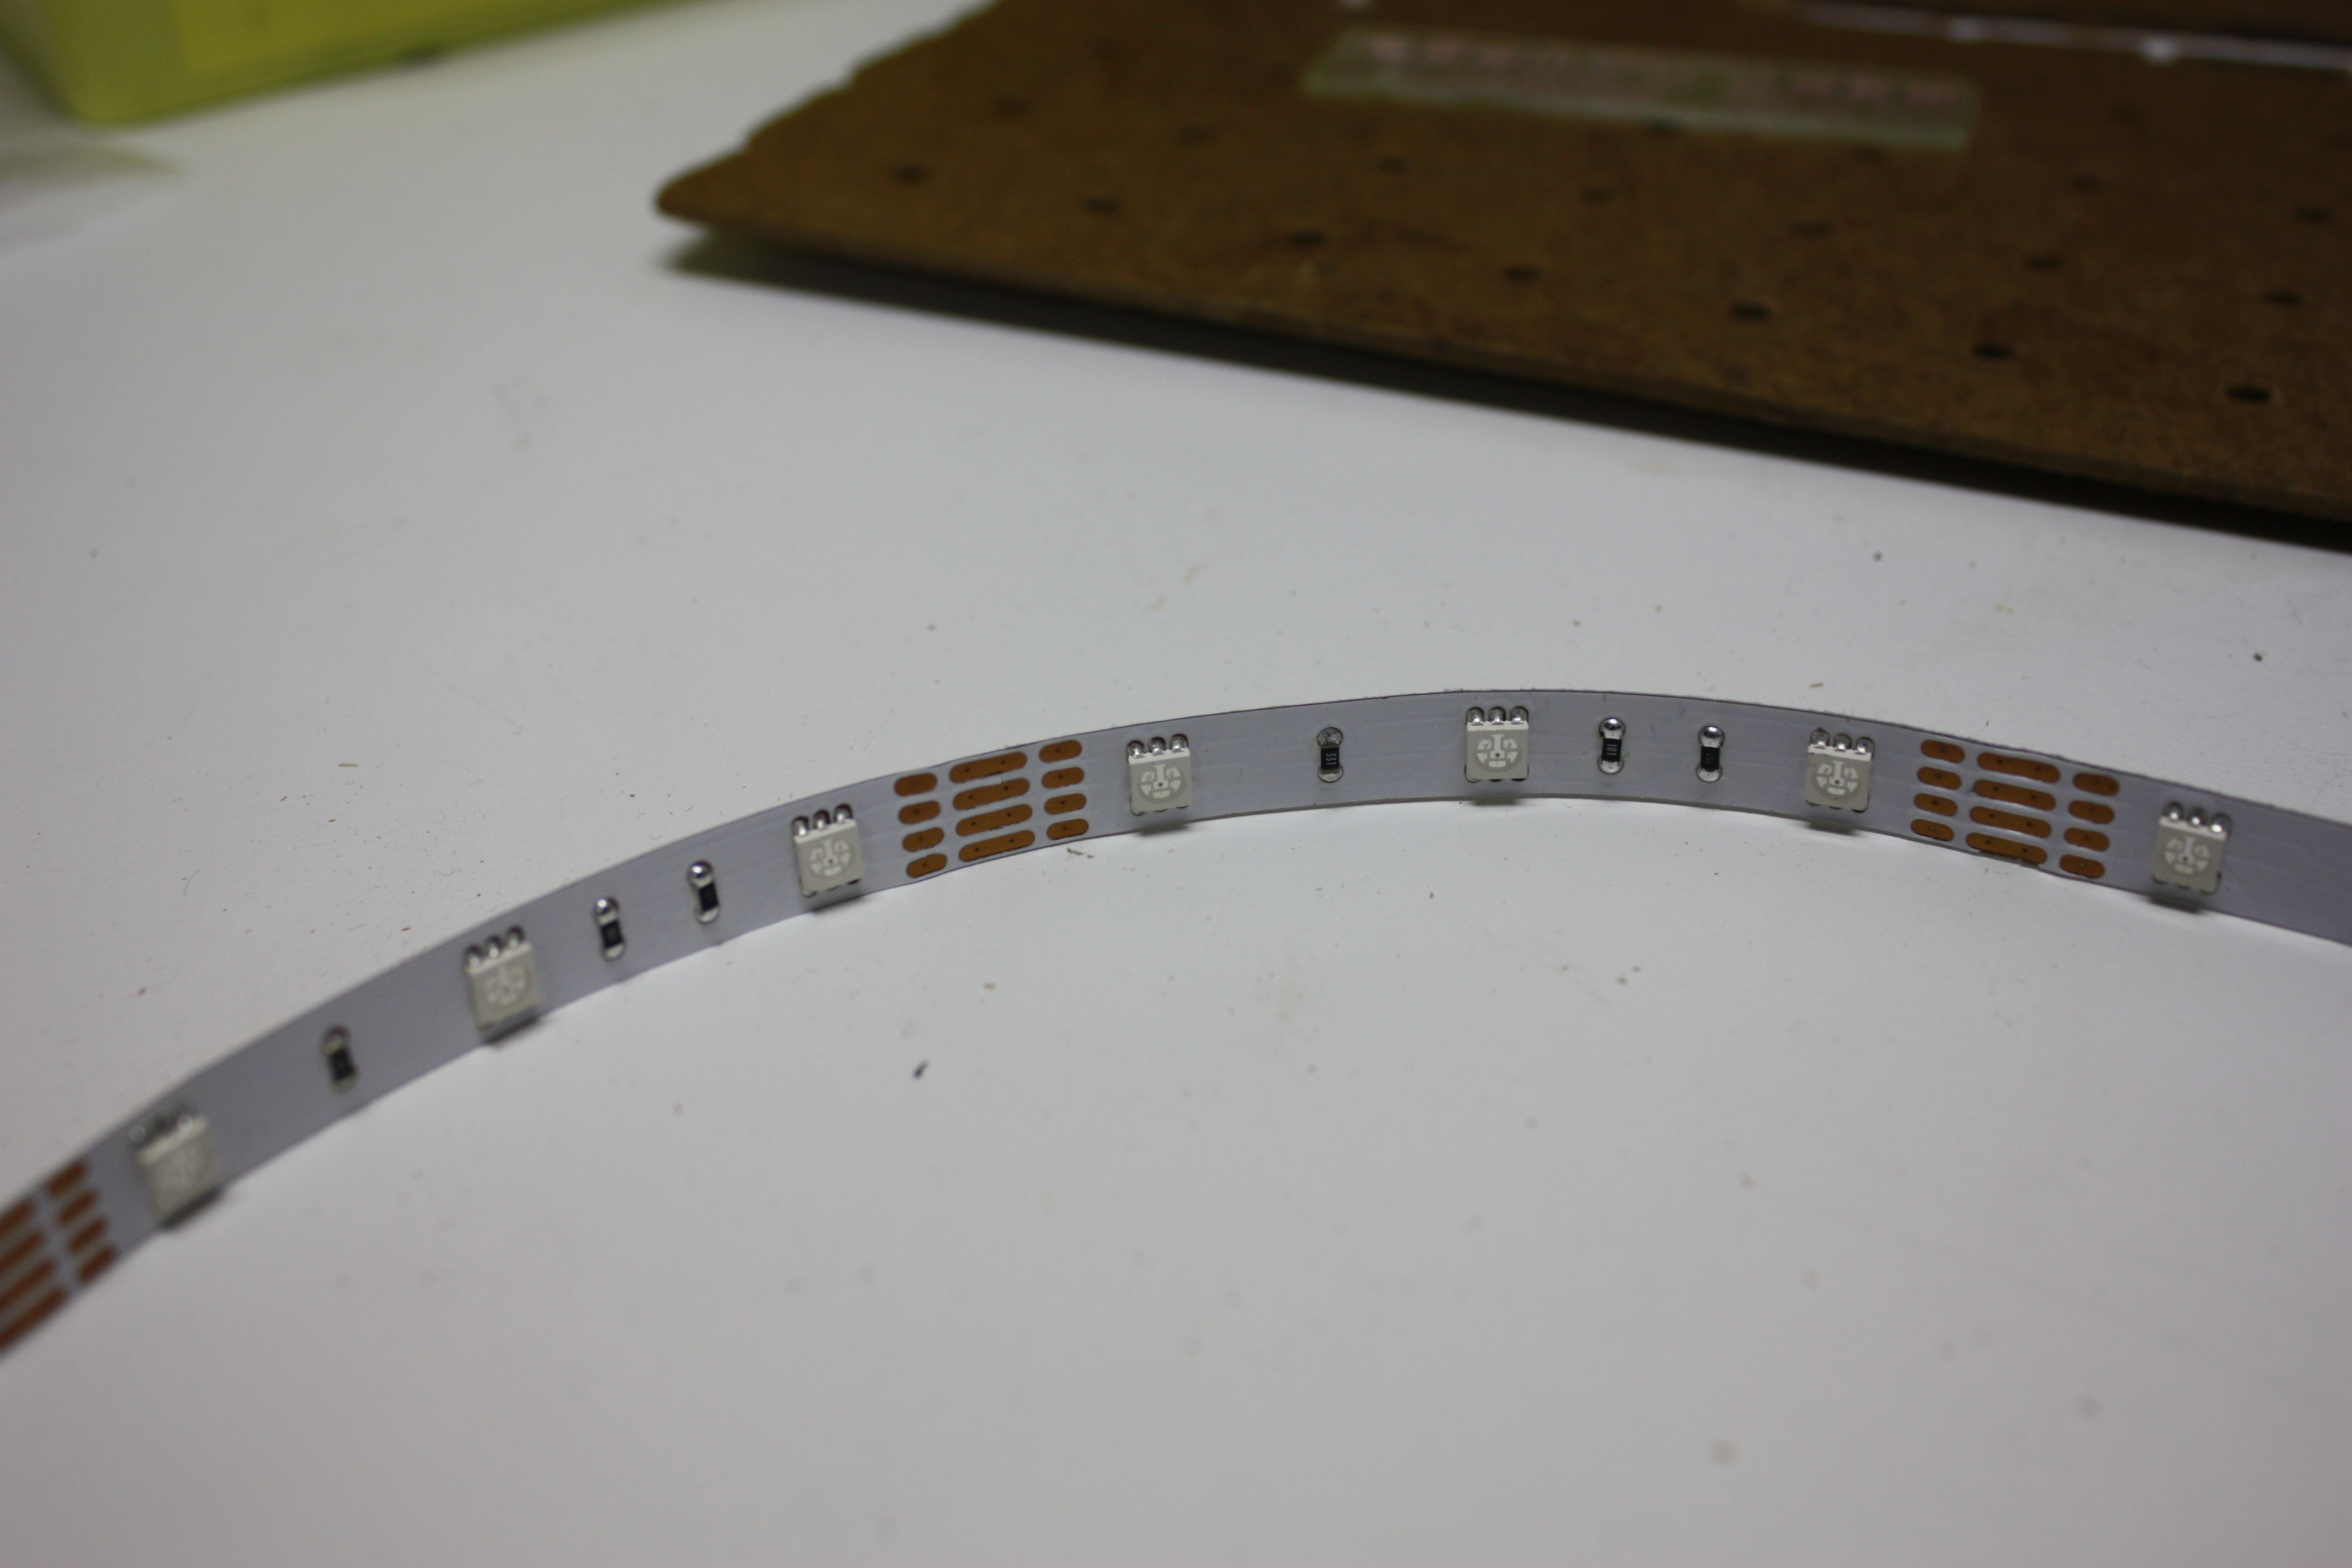
I had 7 meter of wall to light up, so I started by reading some reviews. I wanted a LED strip which had RGB-leds, was small, bright and had good color mixing. The leds shouldn't have any integrated lenses either: I wanted to use the wall for diffusion and lenses would just have made the individual LEDs stand out more. I ended up buying from the guy running this webshop. It is a LED-strip running on 12V, with 36 leds per meter. The LEDs are tiny but bright PLCC RGB-leds. The shop sells other electronic components too, so I decided to buy the rest of the needed electronics there too.
After a wait of about 2 months (the LEDs had to come all the way from China, and customs had to have a look inside the package too...) I received a nice, big package filled with electronics. I immediately got the LED-strips and connected it to a power supply. The LEDs didn't disappoint: the light coming from it was quite bright and the color mixing was so good that, with all 3 RGB-colors on, you couldn't distinguish it from a white LED even when you looked directly into it! Not bad for E17/m and less than 50 cents a led.
Now, the easy way to make this work was to slap the leds to the wall and connect a pre-built RGB-controller to it. I decided against that: while a wall lit by a single colour must be beautiful, to have a gradient or an animation on it would be even more stunning. Besides, where would be the fun in taking on a project like this and then not making a challenge out of it? That's why I decided on cutting the 7 meter into 14 pieces, all which could be controlled individually.
To cut down on the amount of wires, I decided to make 7 boards to control the LEDs. They all have a microcontroller and 6 logic-level MOSFETs on them: that way, the microcontroller can PWM every channel of the strips. Throw in a MAX485 for RS485-based serial communication and a 78L05 for the microcontrollers power and we have a board that can run on 12V, has 2 lines for the color settings and can control 2 pieces of LED-strip. Throw 7 together and you have 14 RGB-channels ready to go.
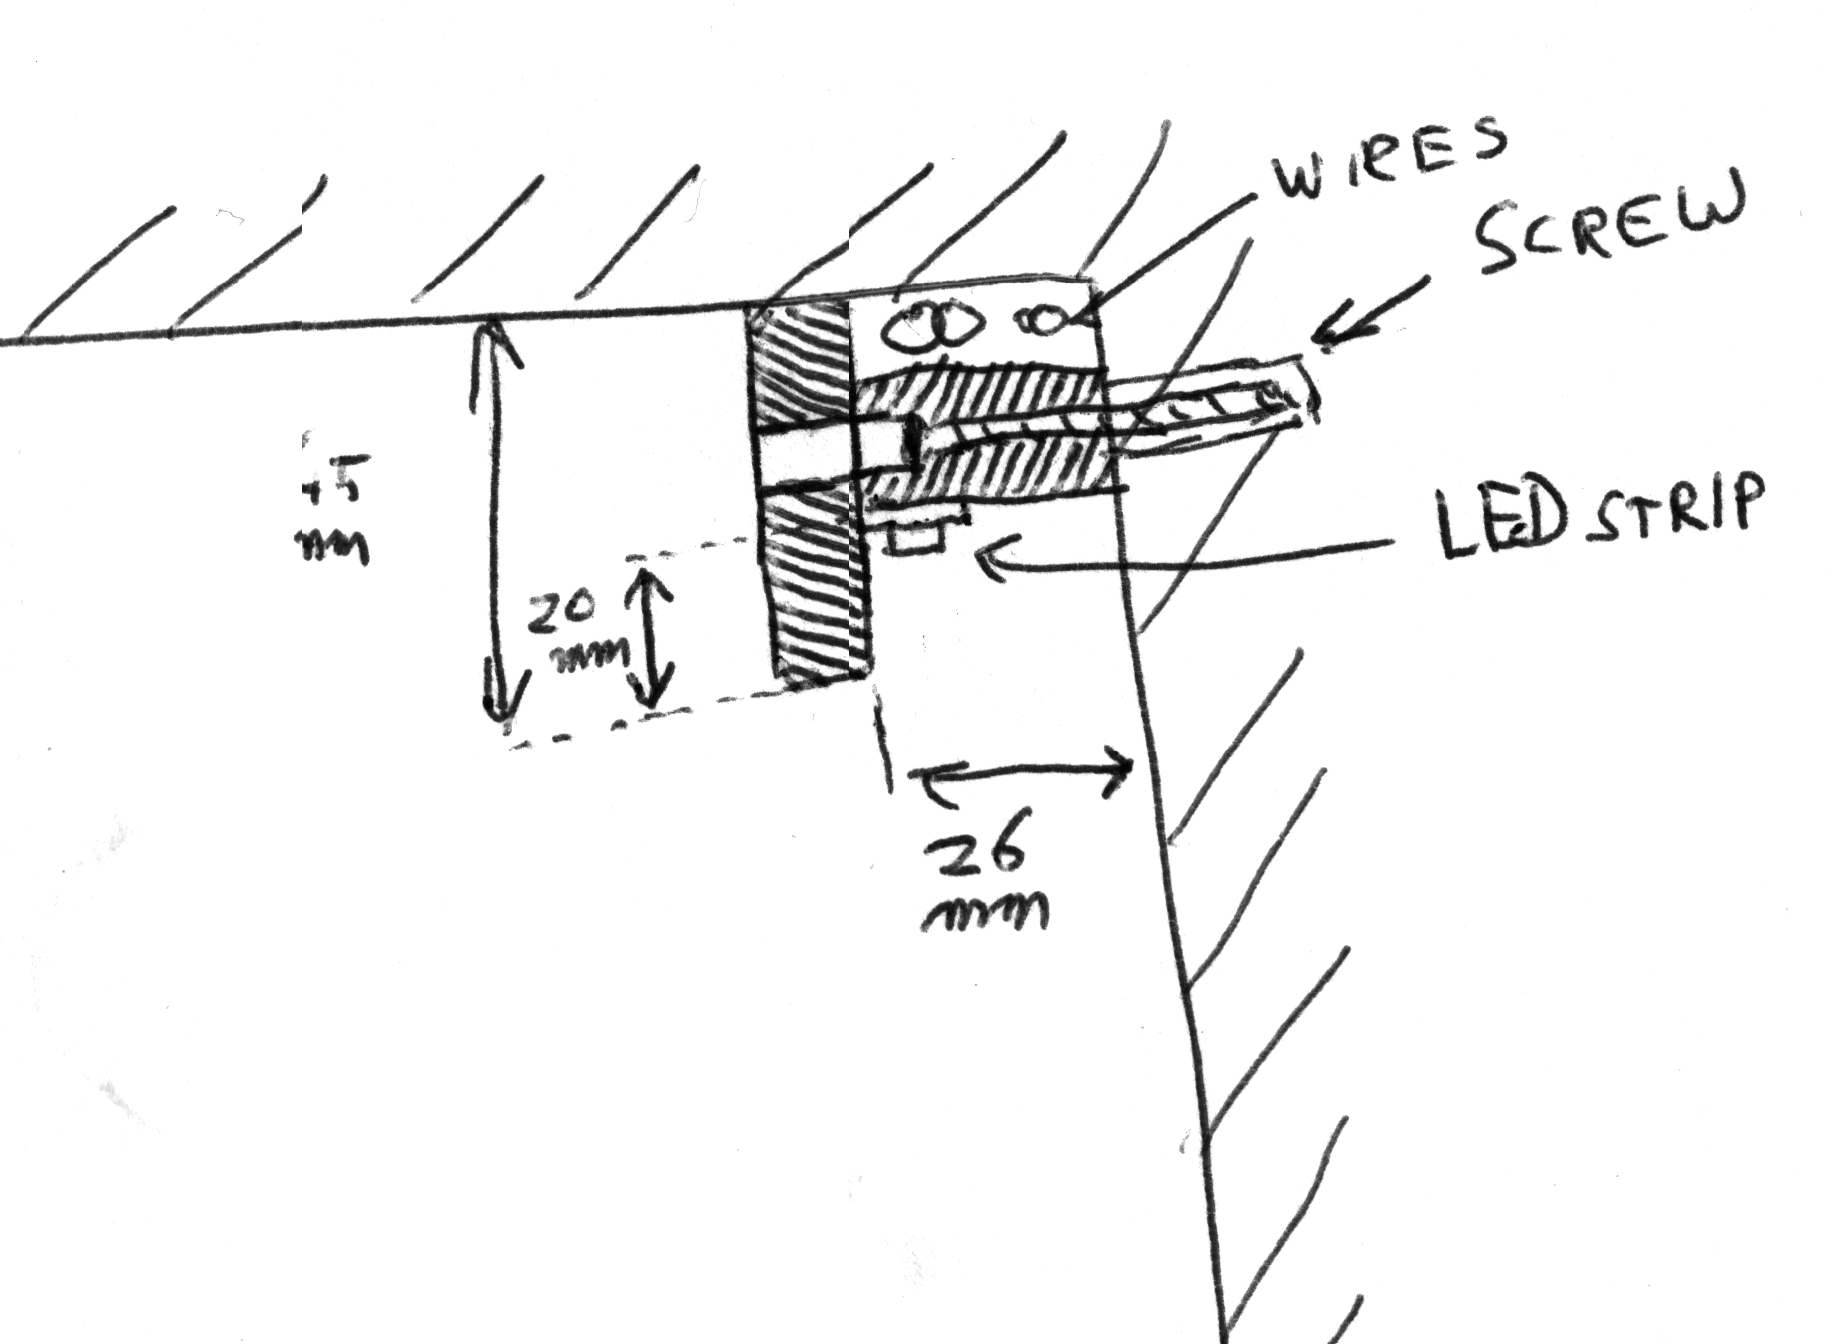
Now for the mechanics. I decided I wouldn't want to look directly into the LEDs;
they are bright little buggers and looking directly into them could ruin your
dark vision. To accomplish this, I found a piece of cheap but good-looking
wood-with-plastic-on-it material
to hide them behind. After some tests involving a sample of that material, some
wood, a piece of the led-strip and more white ducktape than I care to remember,
I ended up with a construction that mixes the light nicely without losing too
much of its intensity:
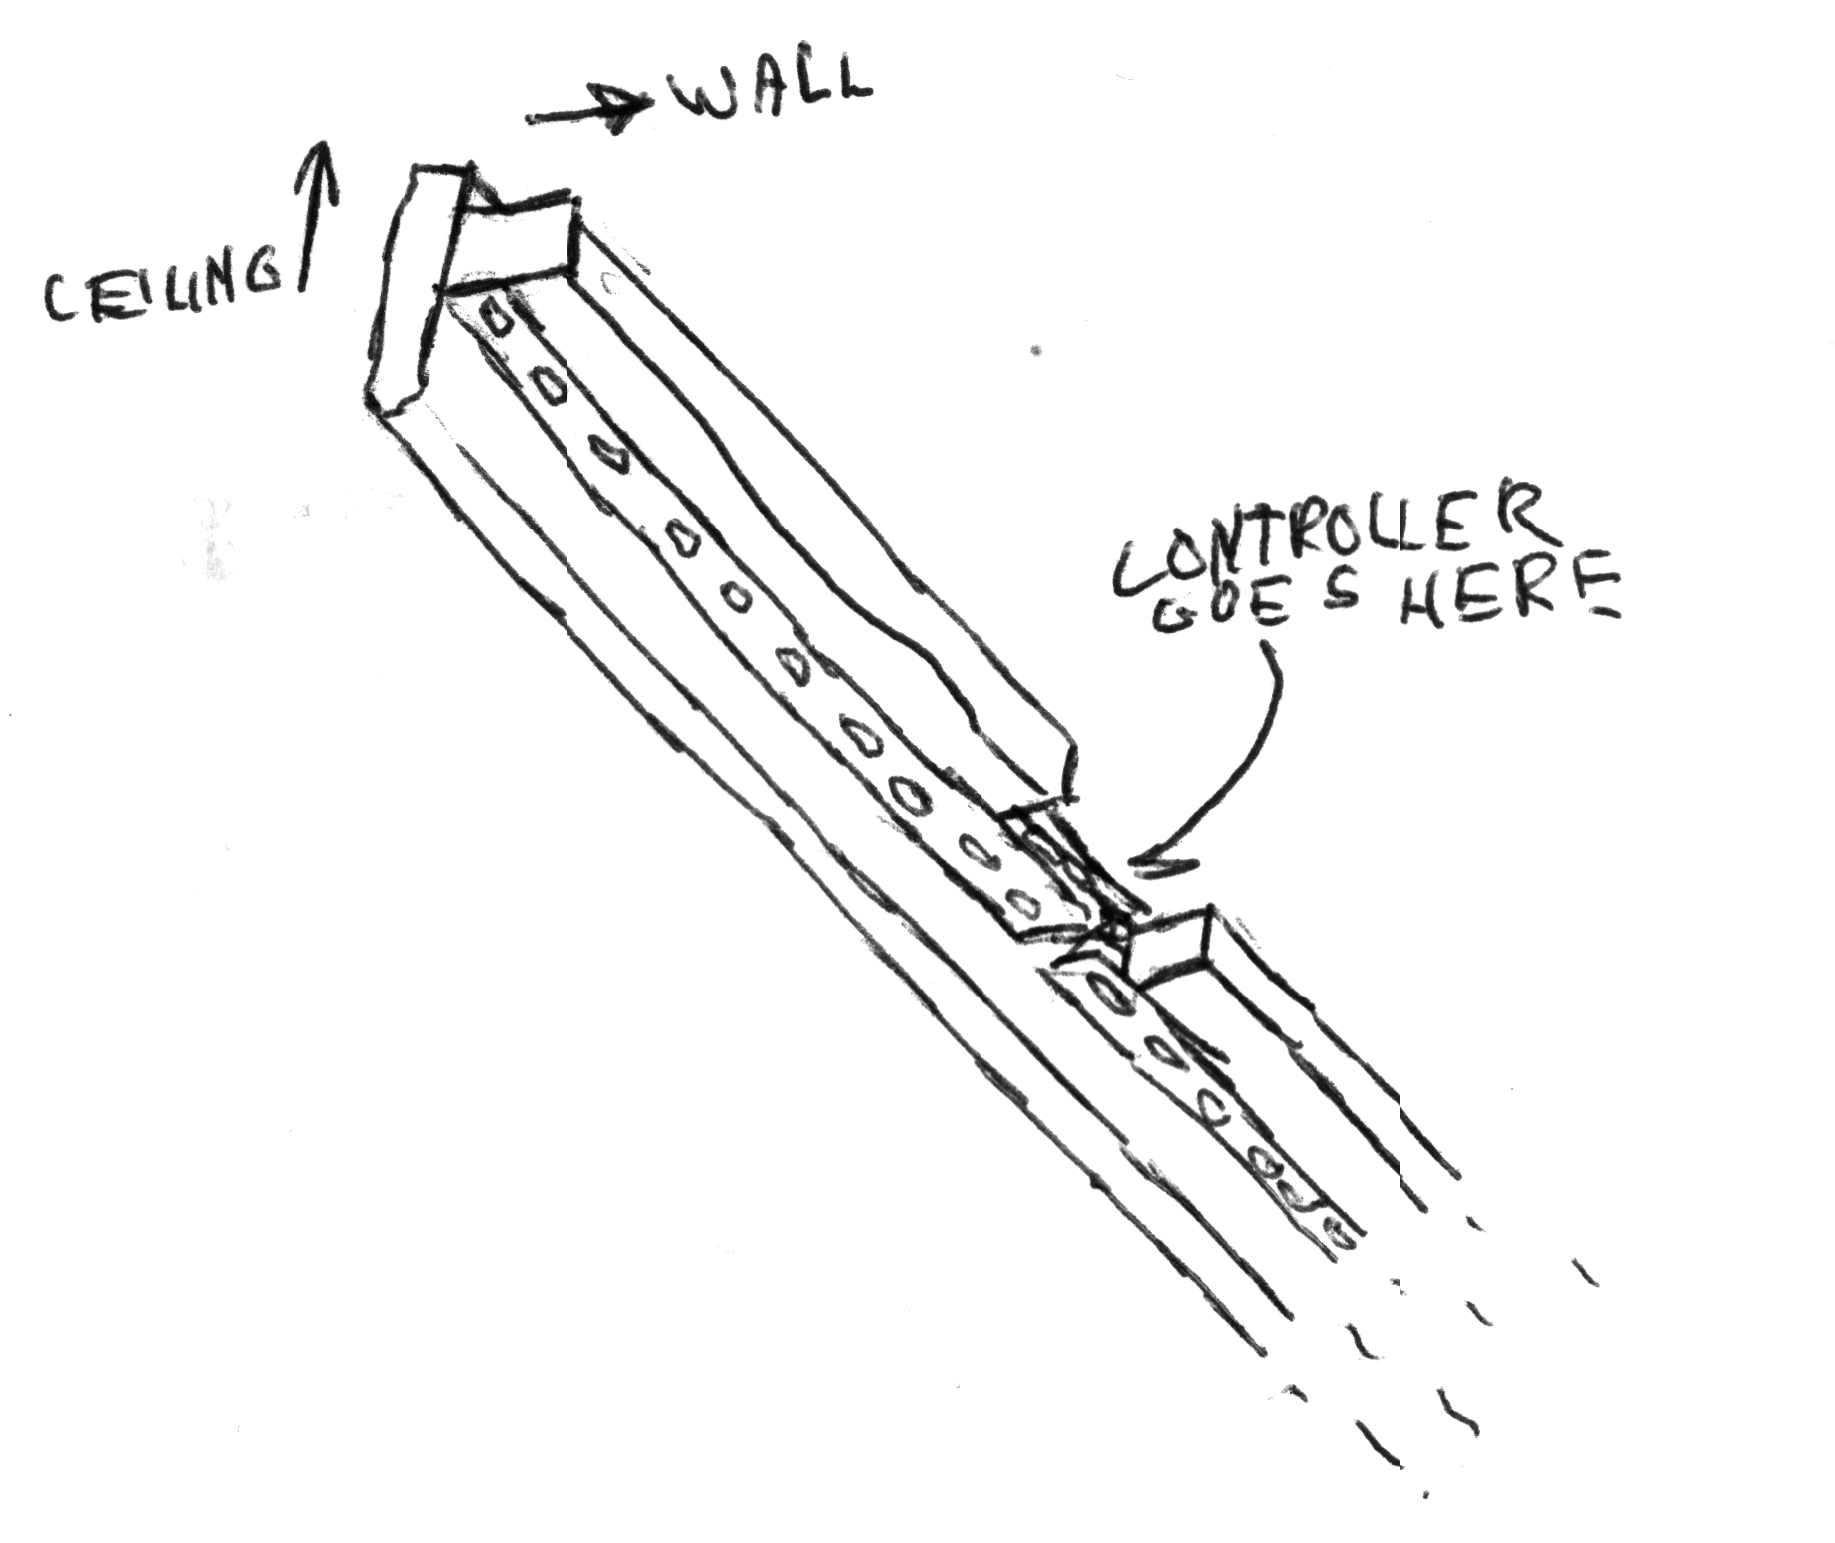
As you may be able to make out, the LEDs are hidden by the plasticized wood exterior. On that, some cheaper wood is glued which functions both as a spacer between the exterior wood and the wall, and as something to stick the LEDs on. The construction is screwed to the wall with screws which are embedded in the wood, so the holes can be filled with white paste to make them invisible.
The electronics are hidden, too: the spacer wood can be removed in some places to make space for the PCBs and there's space for the wiring too.