A case
When I finished the display, I knew what to do with the Raspberry Pi: Make an arcade cabinet! One of the more important pieces of an arcade cabinet, even for one as small as I intended to make, is the housing. Luckily, I've been looking for a good excuse to lasercut something ever since a FabLab opened near my home town.
My design is inspired by various (normal-sized) arcade cabinet plans you can find online. I basically jotted down the dimensions, drew a few designs using pencil and paper until I found something I thought would look good, then copied the design to Inkscape. Inkscape isn't really a CAD-program, but for 2d purposes like this, it works fine, and I was already familiar with it.
In Inkscape, I also made the 'fingers' used to friction-fit the case together. The idea of a friction fit is that you make 'fingers' on the side of the parts you want to join, with the distance between the fingers chosen so the fingers on the opposing side only just fit between them. By then using some force to join the two parts, you can make a solid connection without glue. The problem in designing for a friction fit ia the tolerance: you have to know exactly how much material is 'burned away' by the lasercutter to get the fingers to exactly fit.
Because I didn't know the thickness of the material that gets burned away (aka the
'kerf' of the laser cutter) I used the 'clone' functionality of Inkscape to derive
all the edges from one master edge. That way, I could always adjust the fingers for
a change in kerf later. All in all, the design looked like this:

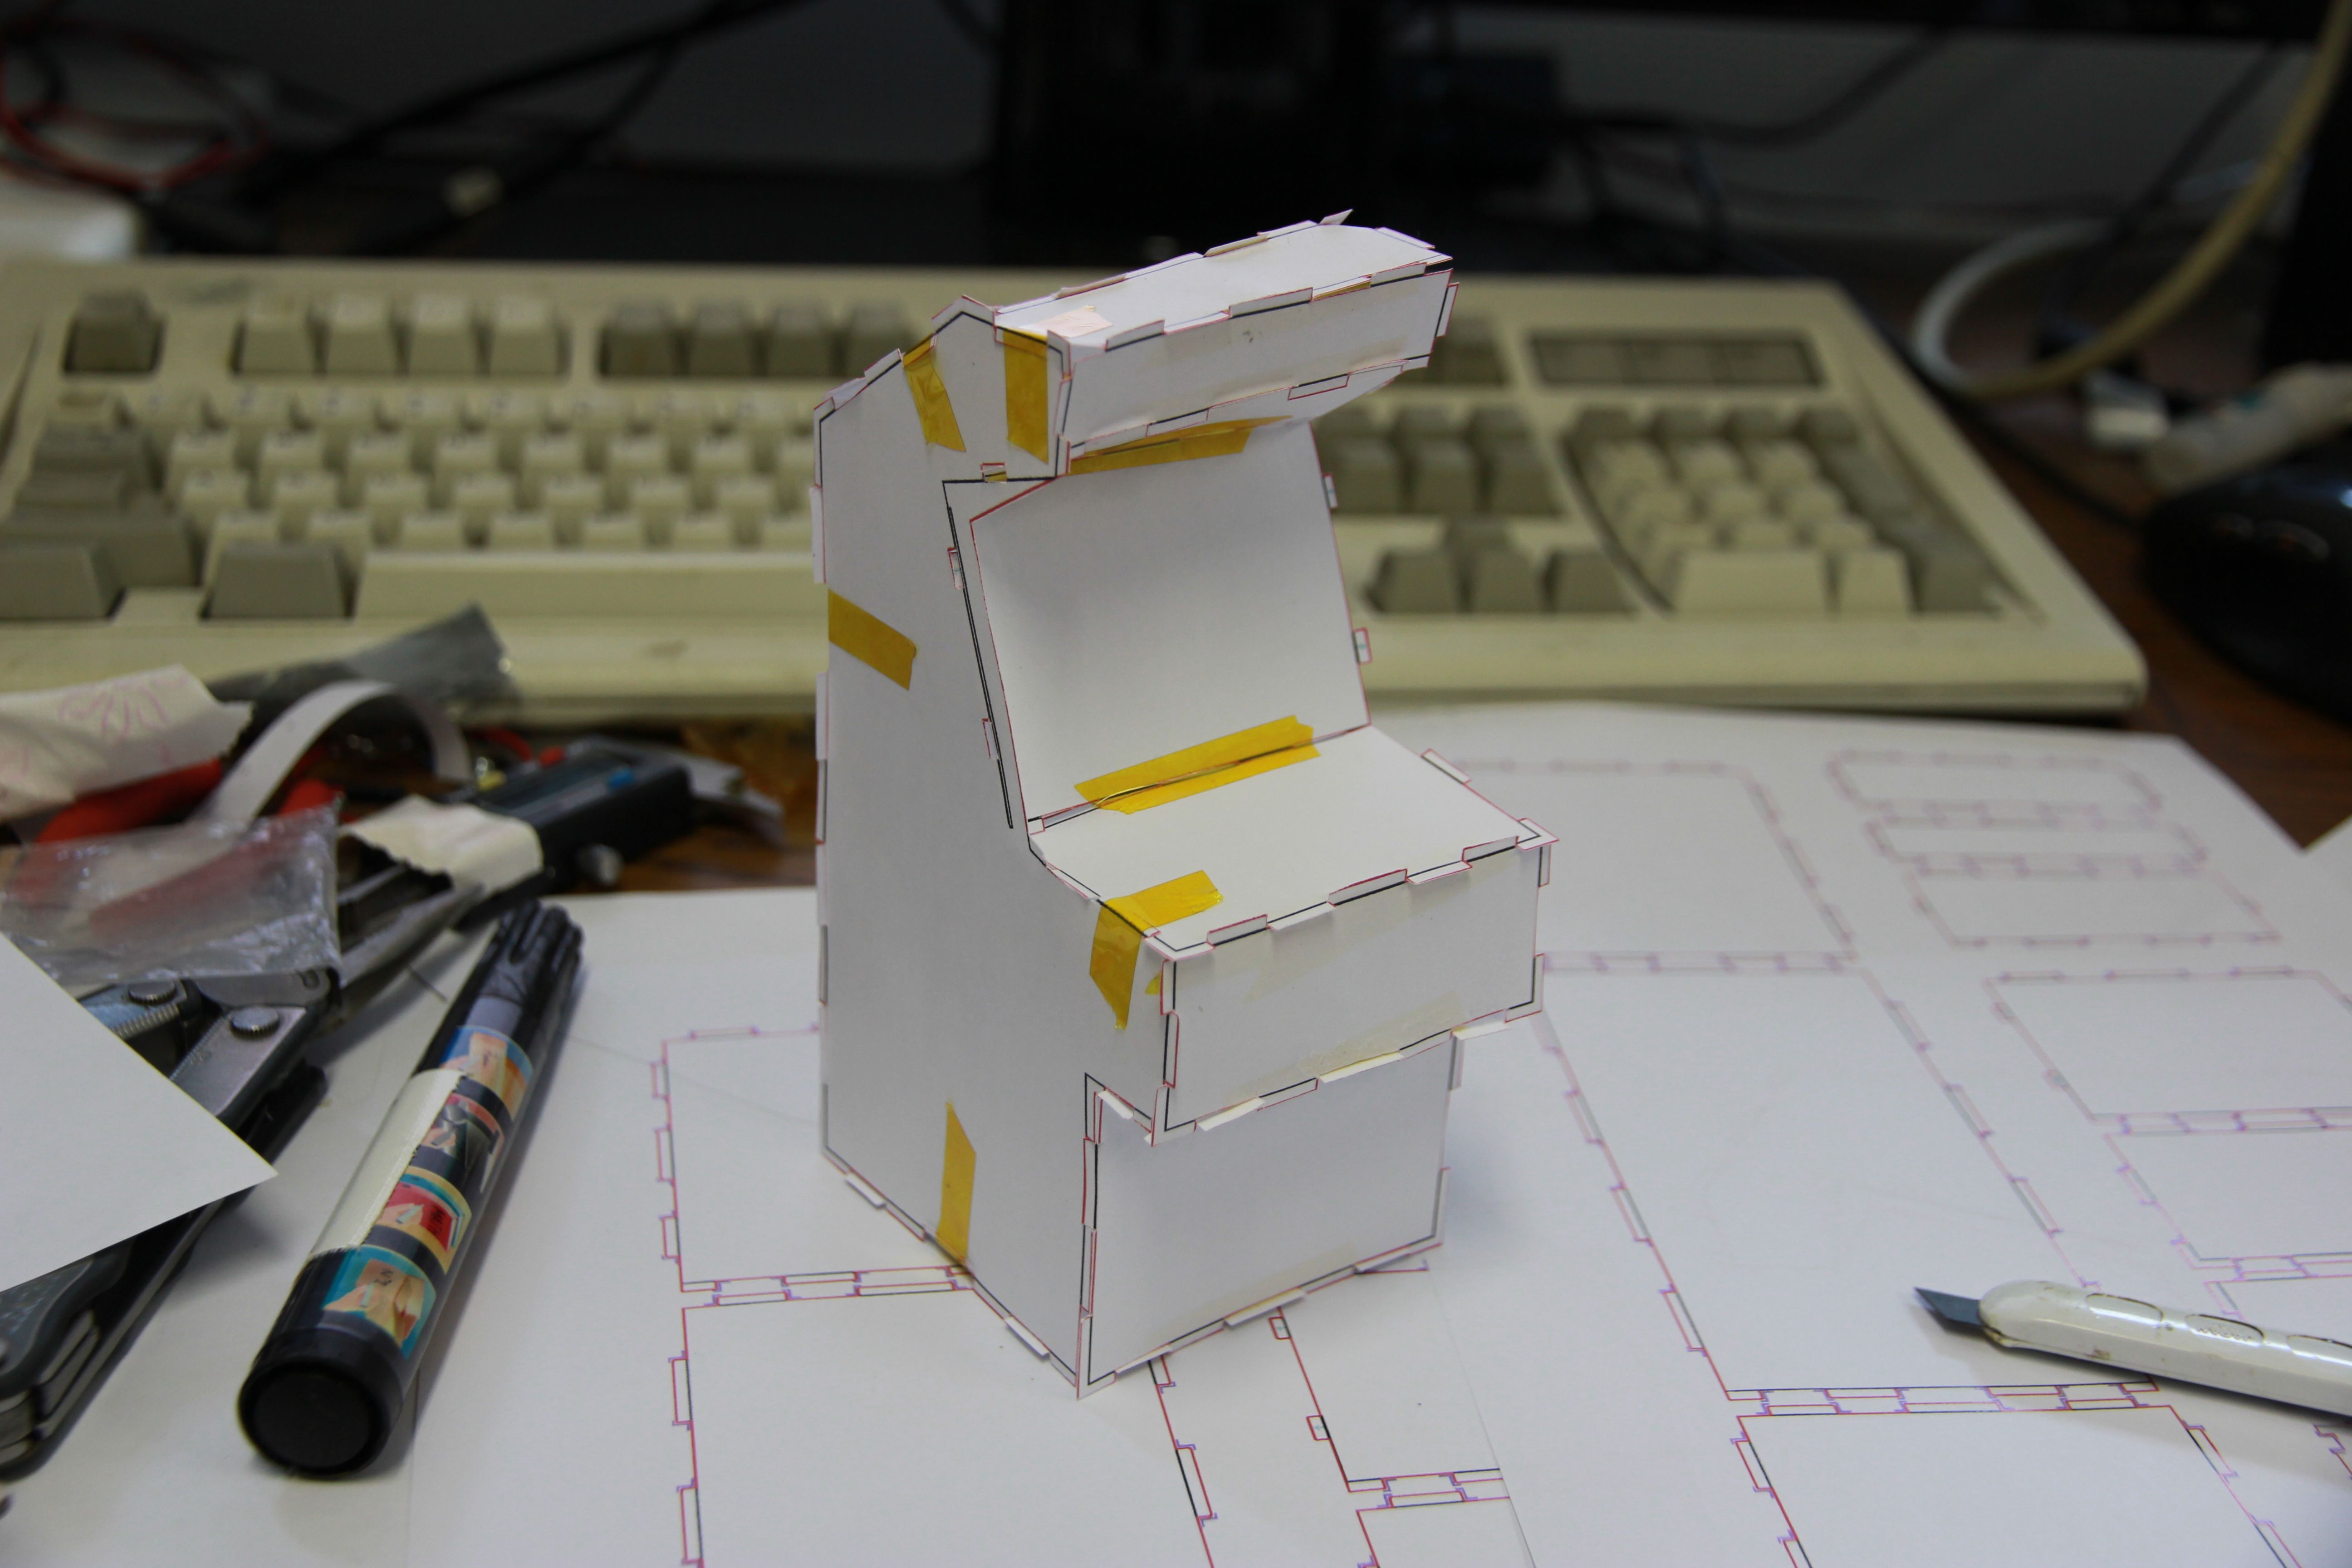
To be absolutely sure I didn't make any huge mistake in the design, I first built a
mock-up design from cut-out paper. That already looked reasonably well, so I decided the
designs had a good shot at actually coming out right.
With the designs finished, I went to the Fablab. The nice people there helped me
set up the laser cutter and also told me the laser width was 0.1mm, so the kerf should
be that. So, the laser cutter went to work... and I gotta say, it's a weird
feeling to see a design you've slaved over for hours being made real in a few
minutes:

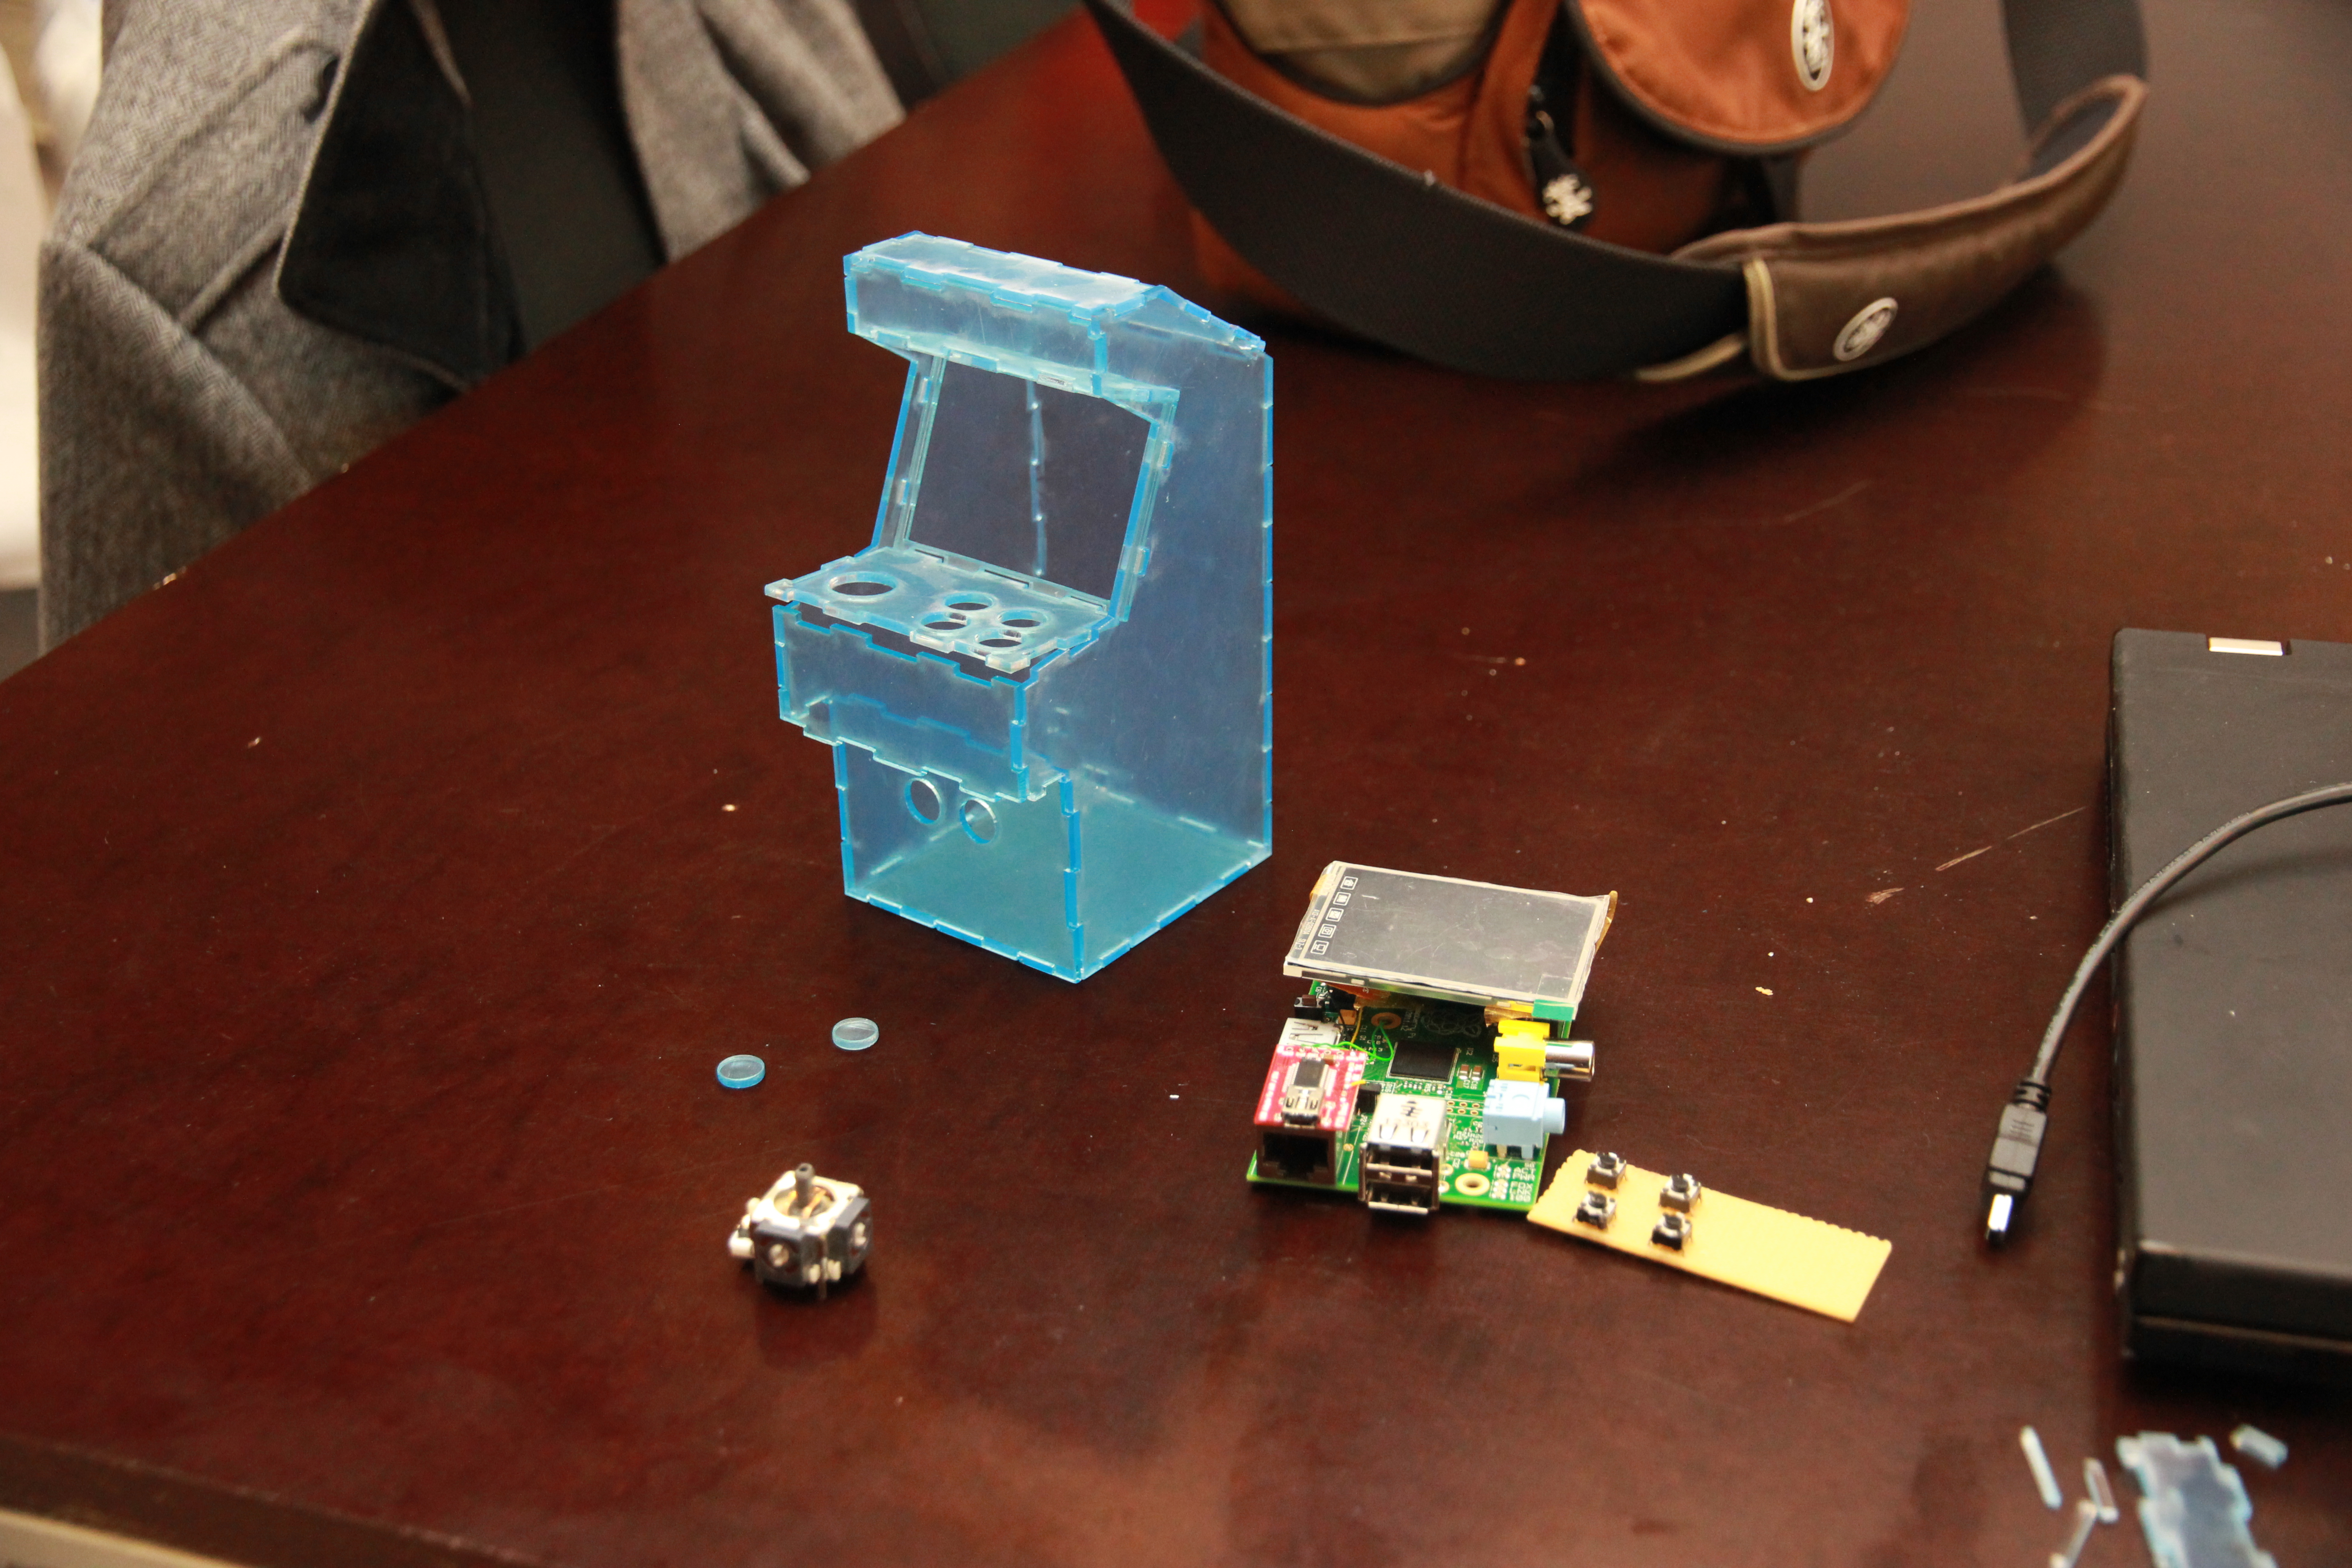
I ofcourse had to immediately put it together... and found out a few things were
wrong: I had a couple of dimensions wrong (I fixed that in the plans you can download
here), but I also found the kerf was bigger than the
0.1mm of the width of the laser: it seems the heat melts away a bit more of the
acrylic material. I decided I could fix those issues at home, though.
Ofcourse, the plans are again downloadable. These plans aren't directly feedable to a random laser-cutter, by the way: you'll have to adjust the kerf and see if the lasercutter you use needs a certain setting for the lines that are to be cut. The plans are CC-BY-SA licensed and I'd like to hear from you if you do something awesome with them.