Hacking in the SATA-ports.
But before diving into that, I wanted to know if I could get the SATA port to work.
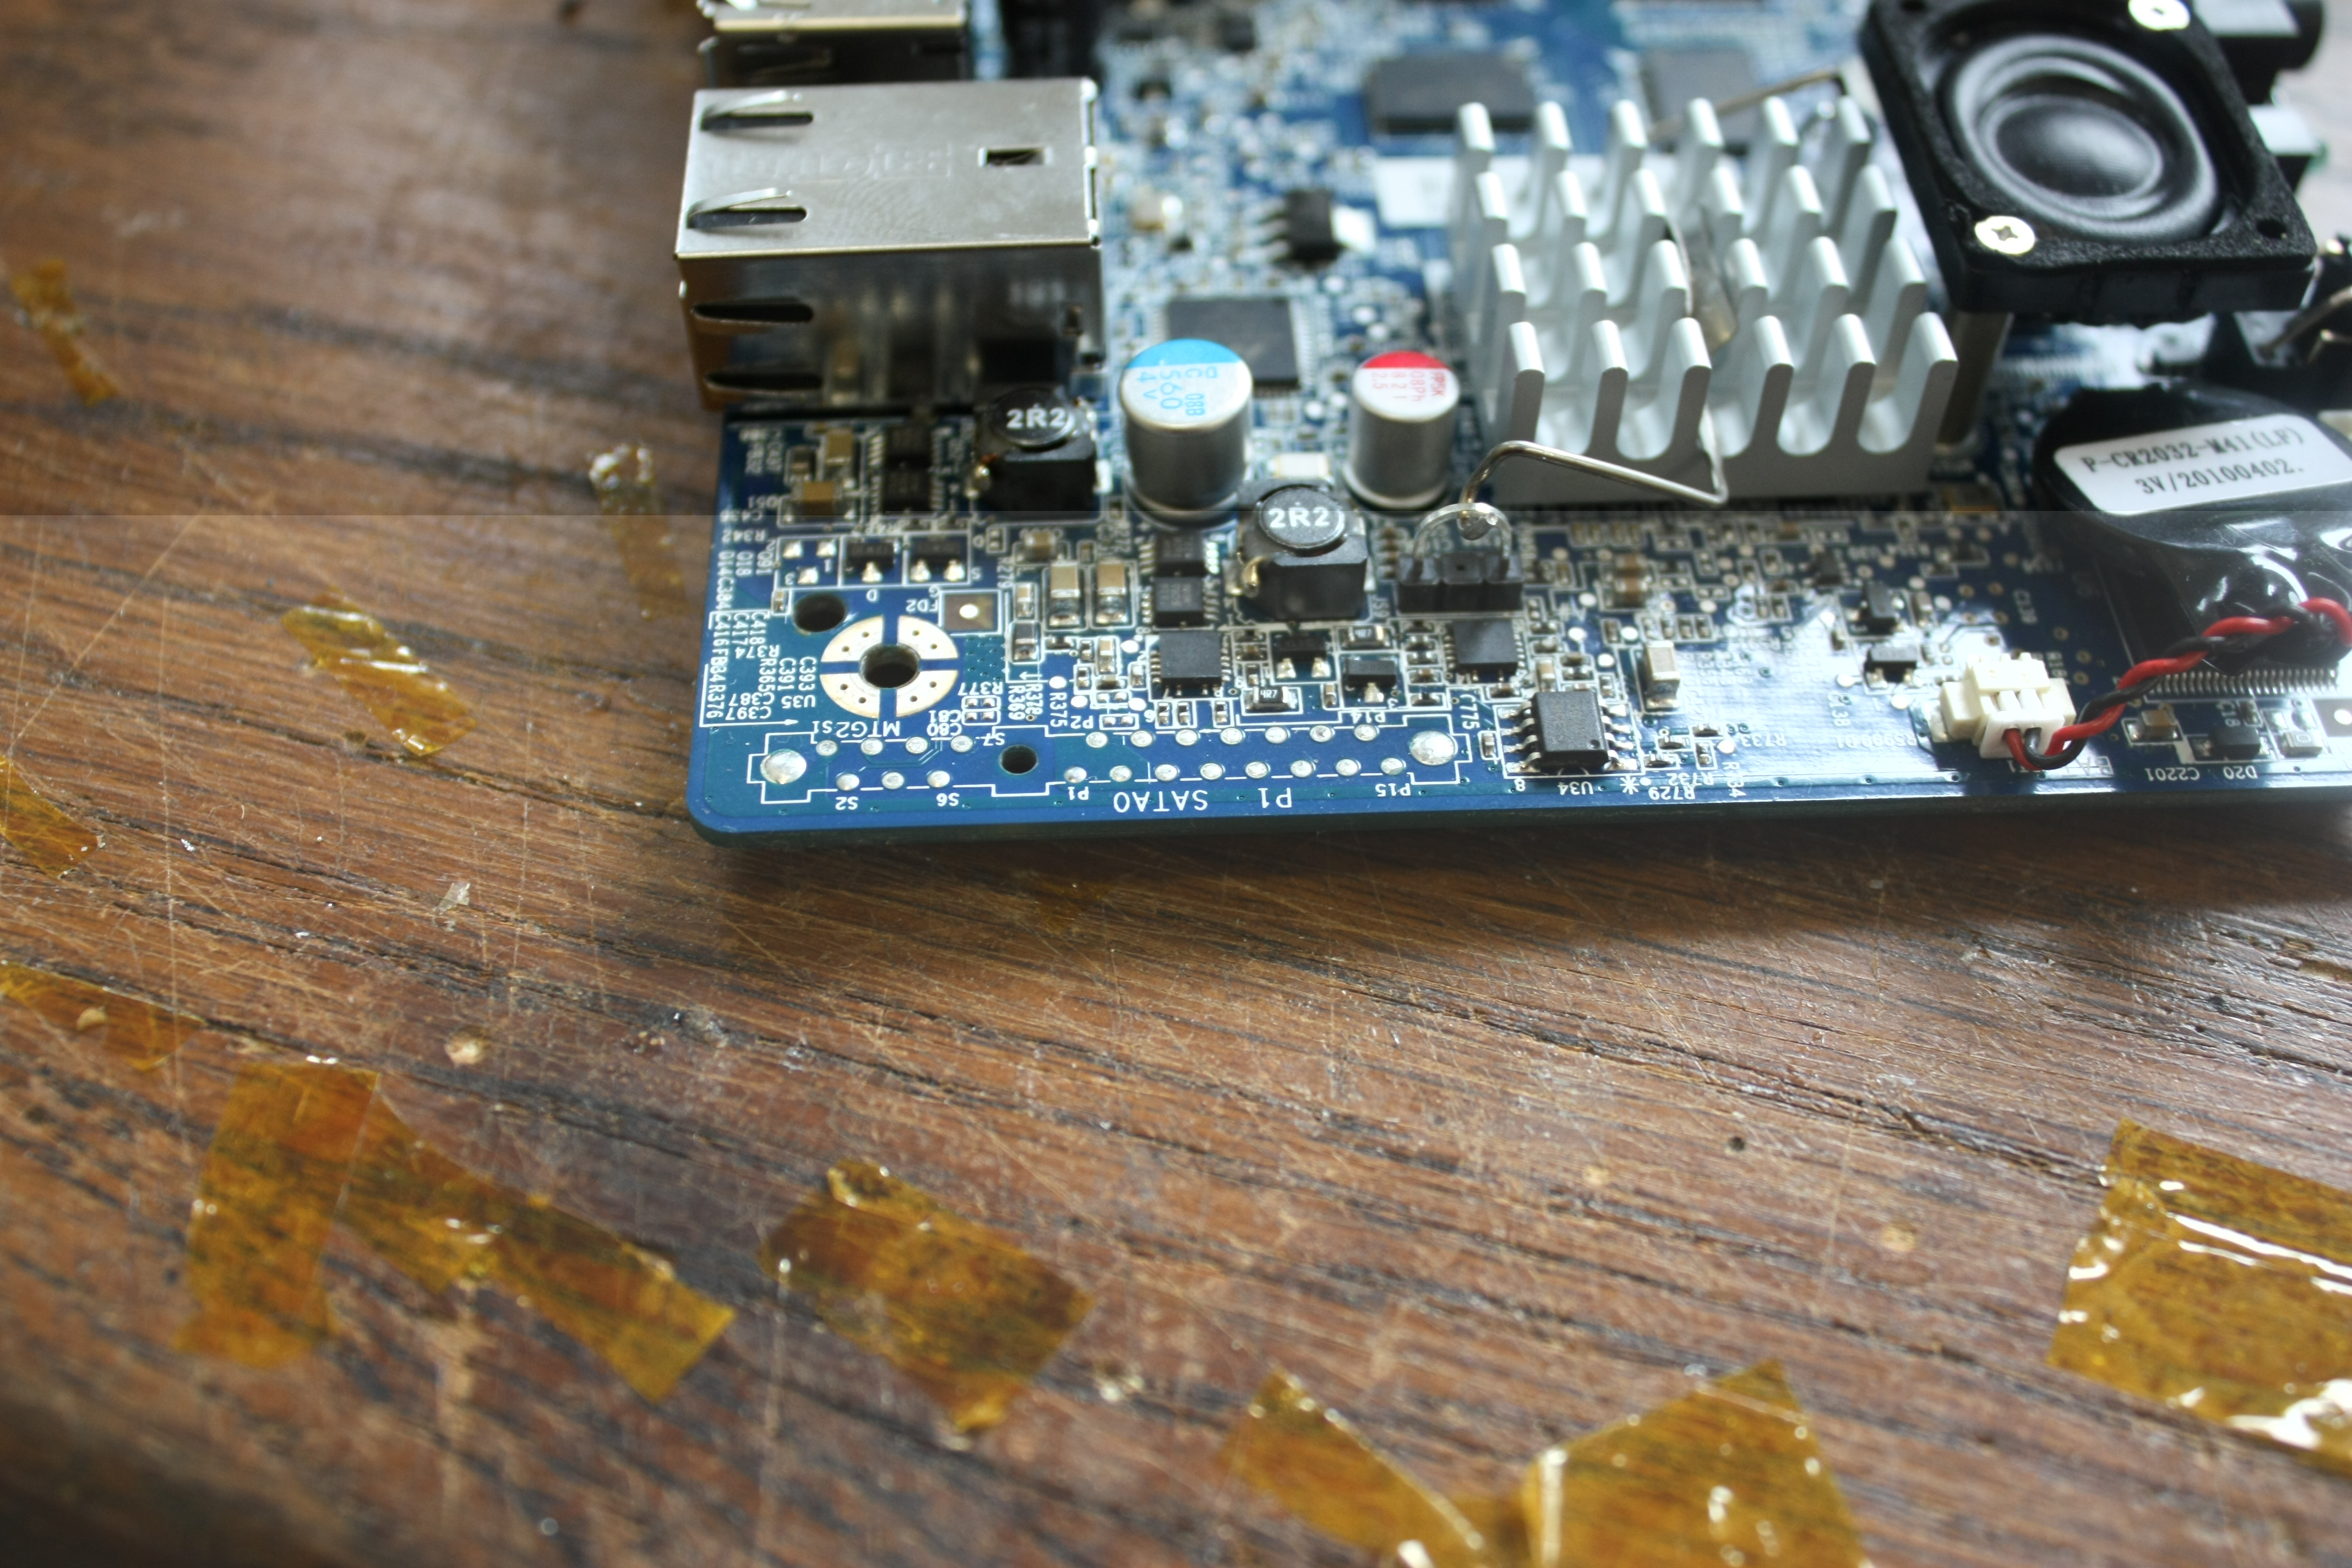
From the images of the thin client I saw online, I noticed that it has pads
for a SATA-port. My original idea was that I could solder a SATA-connector
onto that and then use a SATA port multiplier to connect it to the two HDs in
my server.
What I hadn't noticed was that HP, in all their wisdom, decided not to connect
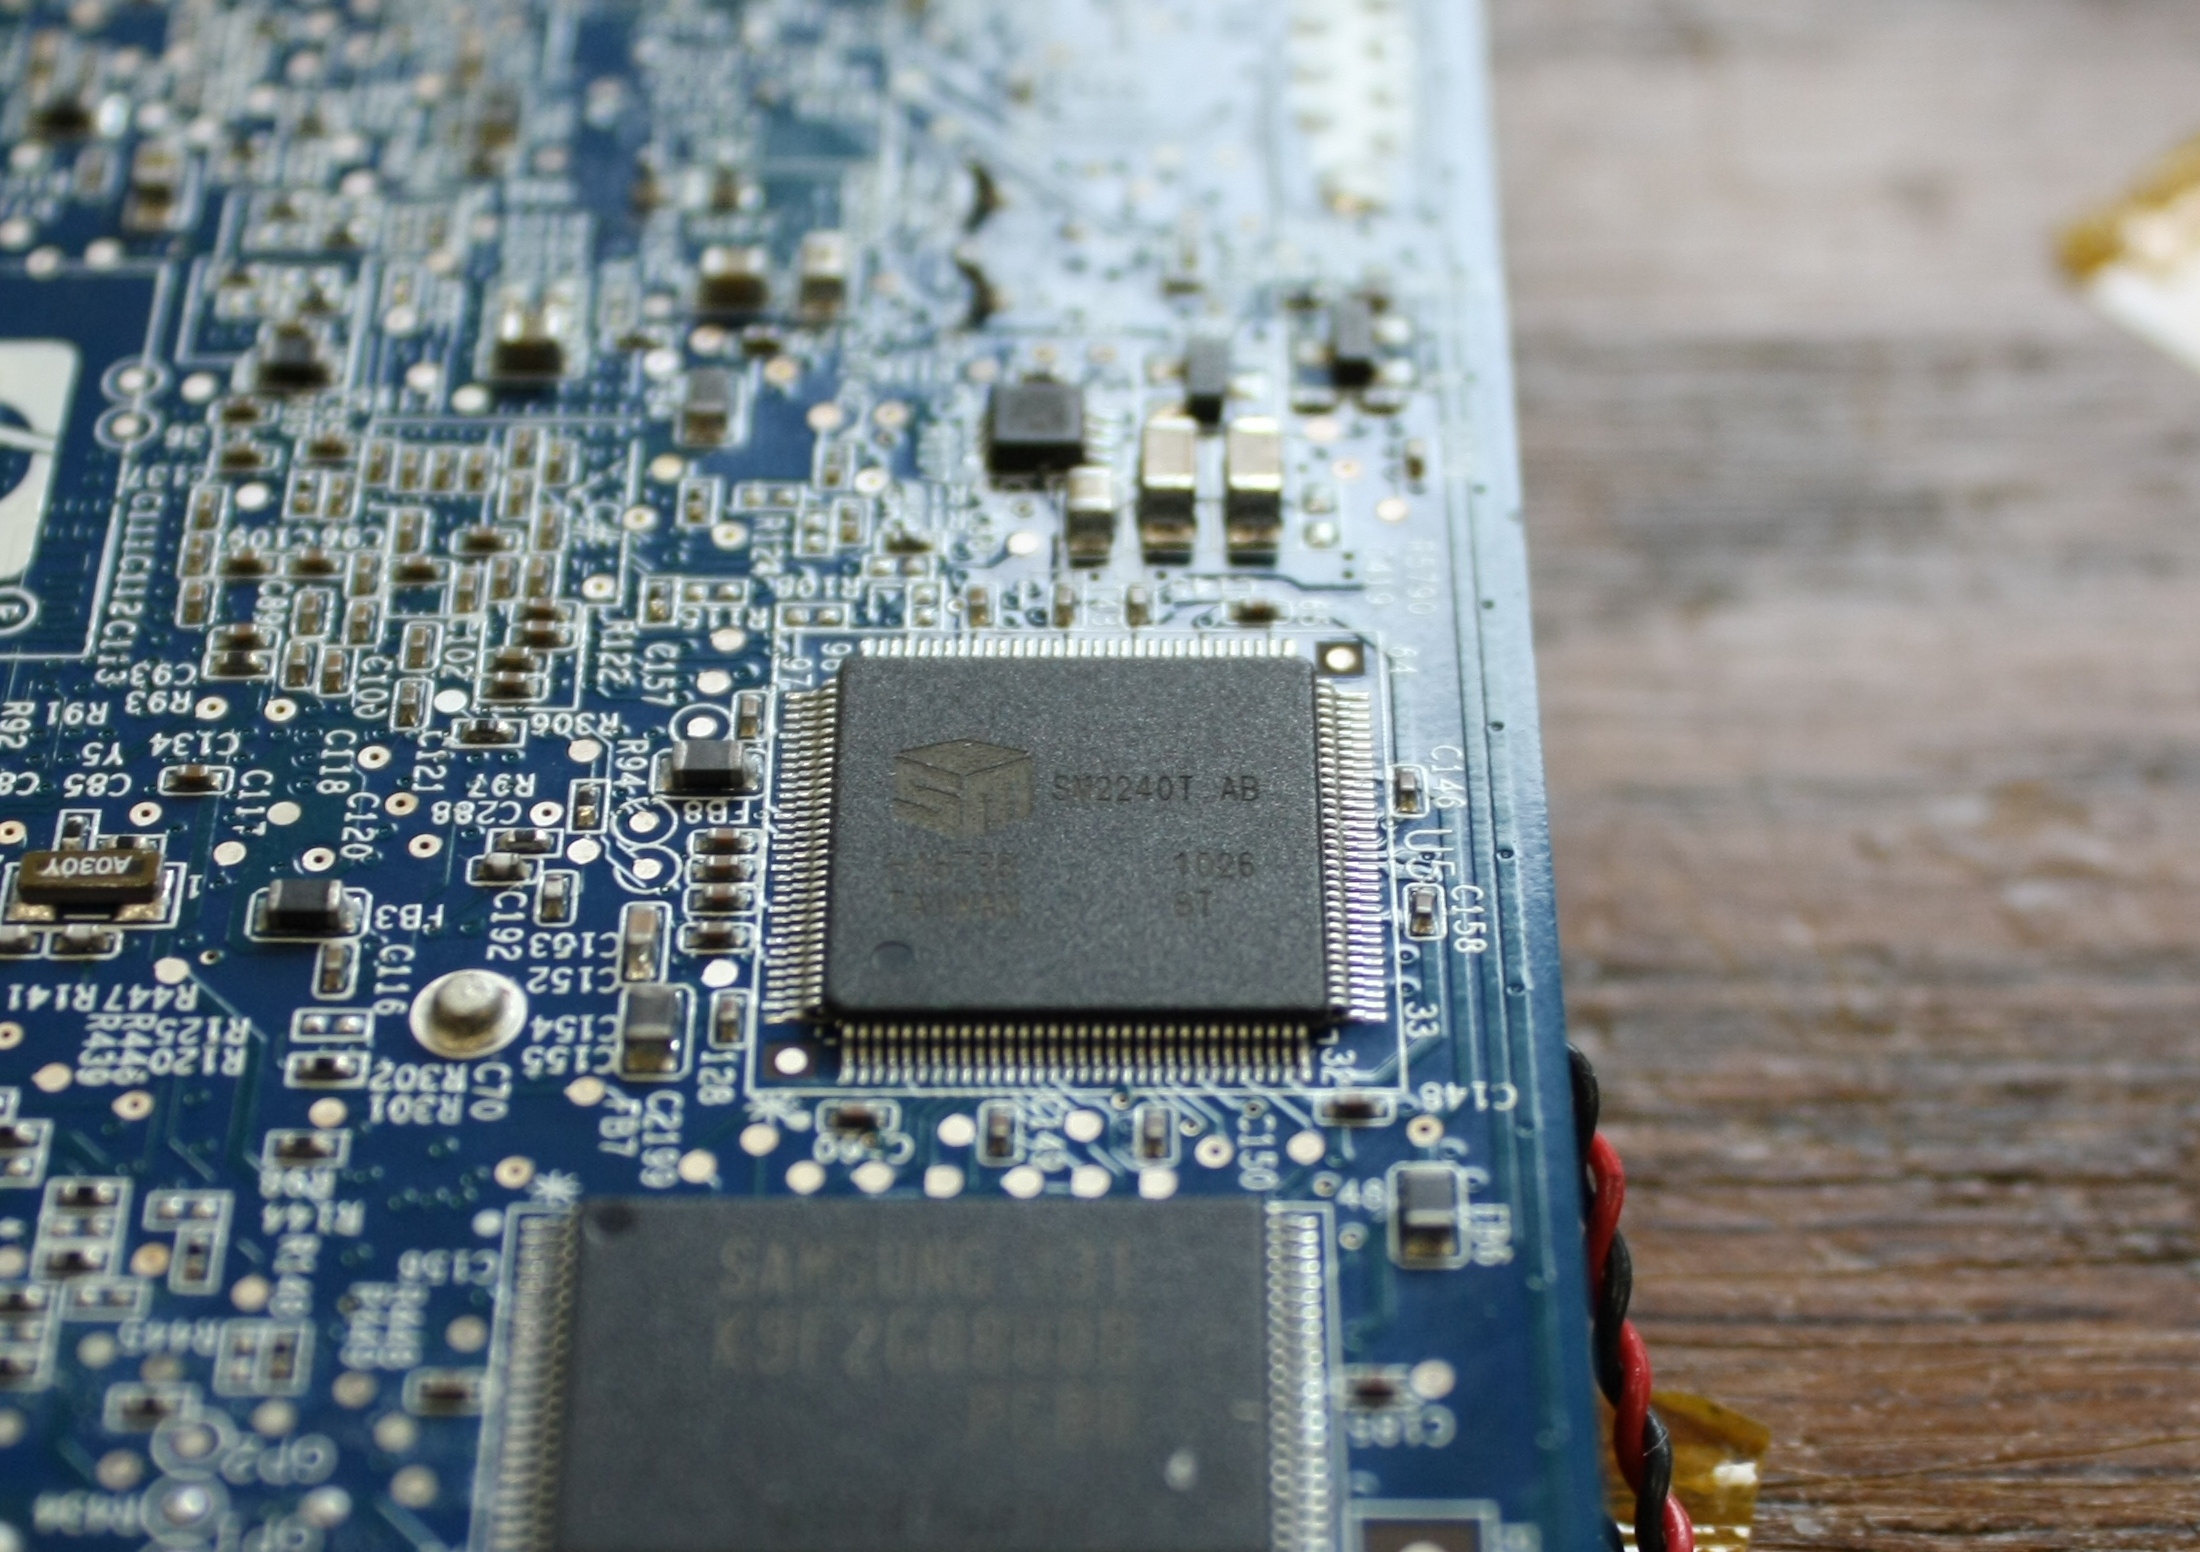
the NAND-flash of the device directly to the Kirkwood processor. Instead, they
used a Silicon Motion SM2240T chip to turn both flash-chips into a SATA SDD, and
then hook that up to a second SATA-port of the chipset. That meant I could get a
second SATA-port for free if I could just get at the SATA-lines running to the SSD.

But first I had to hook up the existing SATA-port. The job I did isn't too
pretty, but it works just fine.

After that, on to the second sata-port! First of all, I'd have to make sure the
original SSD-controller wouldn't interfere with my SATA-lines. I decided on a
quite drastic method, which would however aid me in finding the right signal lines:
I took a paint stripper and desoldered the entire chip.

Then I needed to find where the SATA-lines went. I couldn't really find the pinout
of the SSD-controller, so I had to look for it. That didn't prove too be too hard: according
to the specs, SATA datalines should have a series capacitor somewhere. That meant I
could go look for two pairs of capacitors that weren't connected to ground (because
capacitors that do have a ground connection usually probably decoupling capacitors.)
If they also did have a connection to the SSD-controller on one side, I could be pretty
sure I hit a SATA-dataline. With that info in mind, I found them fairly quickly.
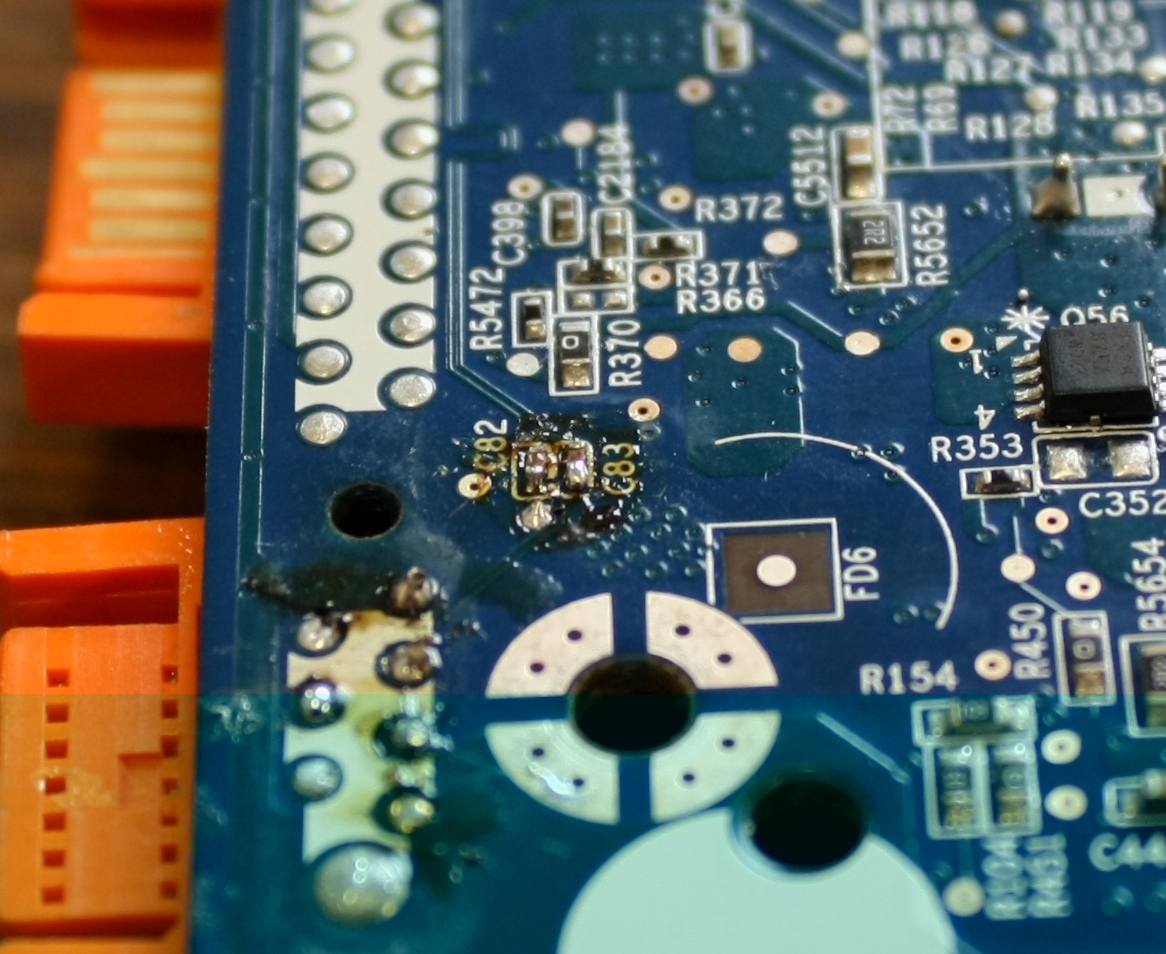
Thinking about these capacitors reminded me to check for them on the other sata-port too; it makes sense for HP to leave them out if they're not going to solder the sata-ports in either. That was a good idea: on both sides of the PCB a pair of capacitors was missing. I quickly got some off an old, broken SATA2USB-converter and soldered them in.
After that, it was time to test things out. I connected both my server HDs to the SATA-connectors, connected an USB-to-serial-converter to the serial connection of the board and booted it up. Luckily, the U-boot in the T5325 is quite versatile and it managed to detect both HDs.
USB 0: host mode
PEX 0: PCI Express Root Complex Interface
PEX interface detected Link X1
Net:   egiga0 [PRIME], egiga1
Hit any key to stop autoboot:  0

Reset IDE:
Marvell Serial ATA Adapter
Integrated Sata device found
[0 0 0]: Enable DMA mode (6)
  Device 0 @ 0 0:
Model: SAMSUNG HD753LJ                          Firm: 1AA01110 Ser#: S13UJ1CQ304192
            Type: Hard Disk
            Supports 48-bit addressing
            Capacity: 715404.8 MB = 698.6 GB (1465149168 x 512)
[0 1 0]: Enable DMA mode (6)
  Device 1 @ 0 1:
            Model: ST31500541AS                             Firm: CC34     Ser#:             5XW0JW9T
            Type: Hard Disk
            Supports 48-bit addressing
            Capacity: 1430799.3 MB = 1397.2 GB (-1364690128 x 512)
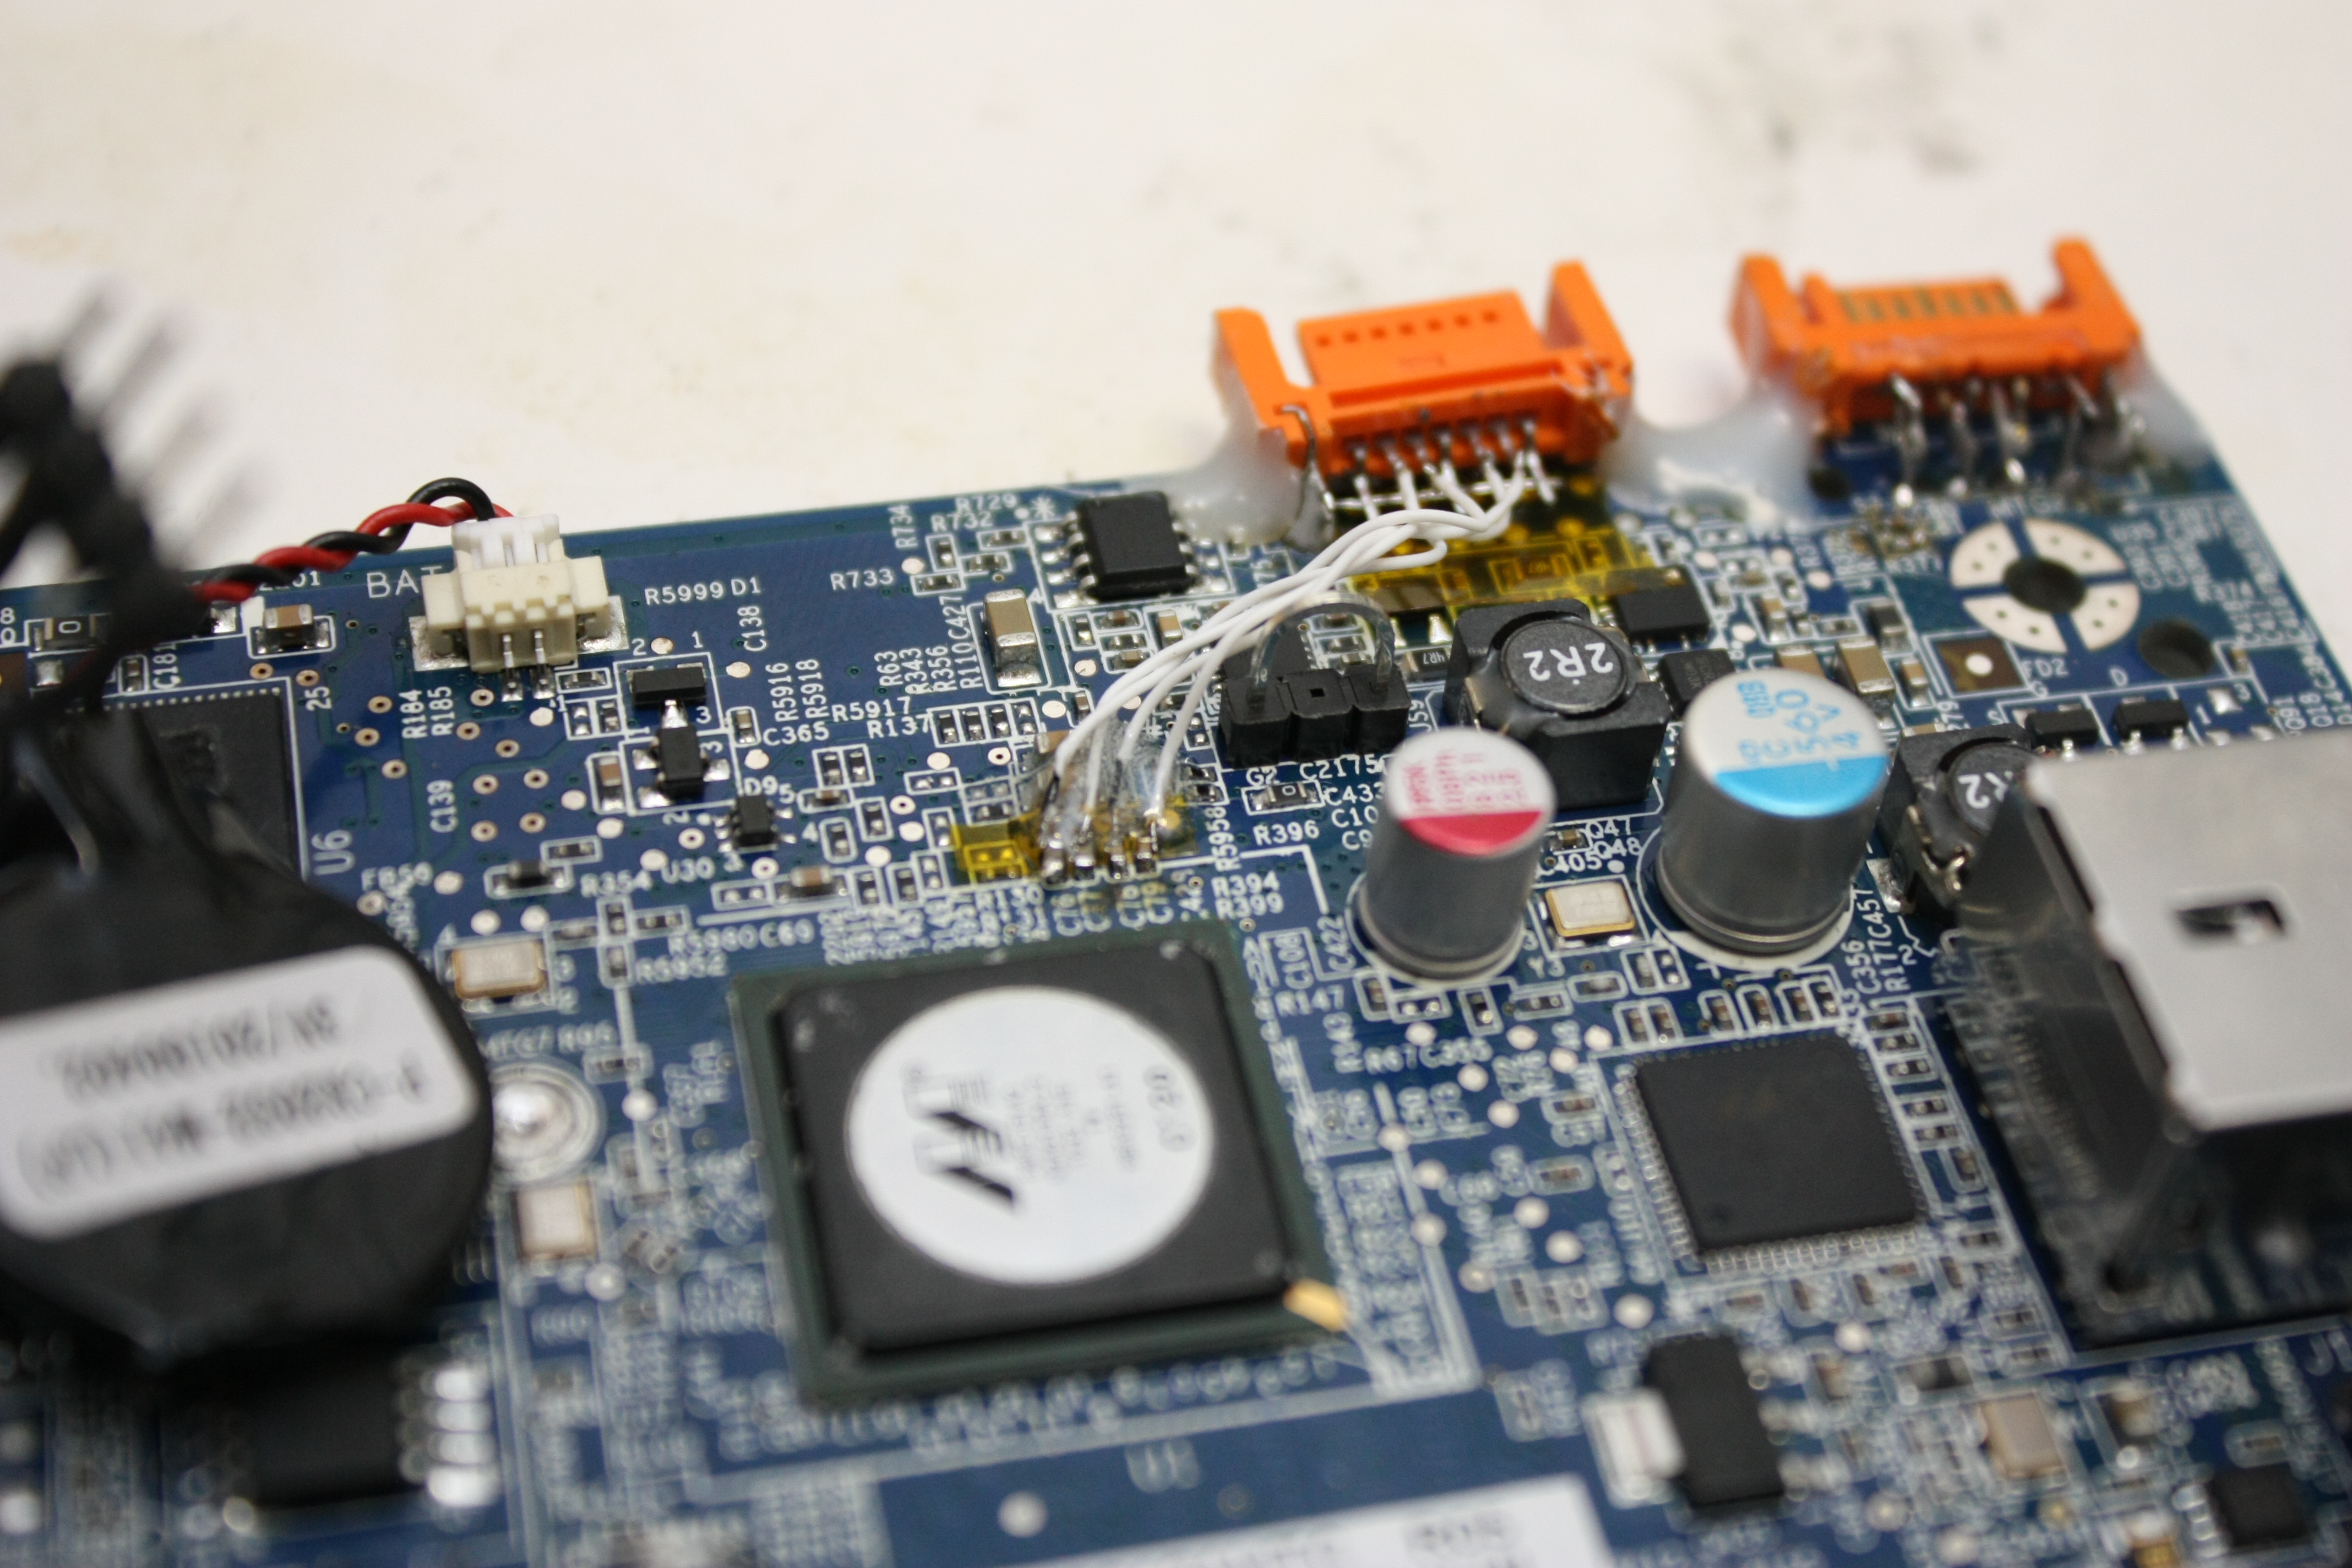
Great, it works! To make sure the small and fragile wires don't move anymore, I put a drop of two-component glue over them to fix them in place. On to the next challenge!