Design
Now, how to create a new flash cart? In theory, I could start from my original flash-with-dipswitch setup and replace the dipswitch with e.g. a CPLD. That way, the Vectrex would initially run a game selection menu, which would then instruct the CPLD to switch to another game ROM. This actually has been done before but I didn't like it: I'd still need a flash programmer and the amount of chips on the PCB would be pretty large for the functionality I wanted.
An alternative would be to use SRAM for storing the cartridge, and using a microcontroller to take the data from an external source - a bit of SPI flash or maybe an SD-card - and use the microcontroller to quickly fill the SRAM as soon as the user wants to load a game. That is how the VecMulti flash cart seems to do it. It still uses too many parts and sending data back to the microcontroller to indicate e.g. what data you want can be hard; maybe there's a third way?
Well, the Vectrex is 33 years old at the time of this article, and needless to say the state of electronics has improved quite a lot by now. In 1982, the price for the 8-bit 1.5MHz MC6809 that powers the Vectrex wa around $30. Nowadays, you can get 32-bit beasts running on multiples of that speed for peanuts. Wouldn't it be possible to emulate a ROM-chip in software? I decided to give it a shot and browsed some websites to find an ARM microcontroller that's still solderable, has a nice roomy RAM and flash memory and enough MHzs to run circles around the Vectrex, and most of all, that's cheap.
I found a promising candidate in the ST STM32F411. This chip is a 32-bit 100MHz Arm Cortex-M4
microcontroller. It has 128K of internal RAM and 256K of flash, lots of GPIO and even USB to
interface to a PC. With a bit of luck, all I needed to do was connect it to the cartridge port,
maybe whack some extra flash at it where it can store the games and be done with it. In the end,
I decided to build it like this:
I was about to send a PCB to China for manufacturing anyway, so I quickly designed a board that should
roughly do what I wanted:

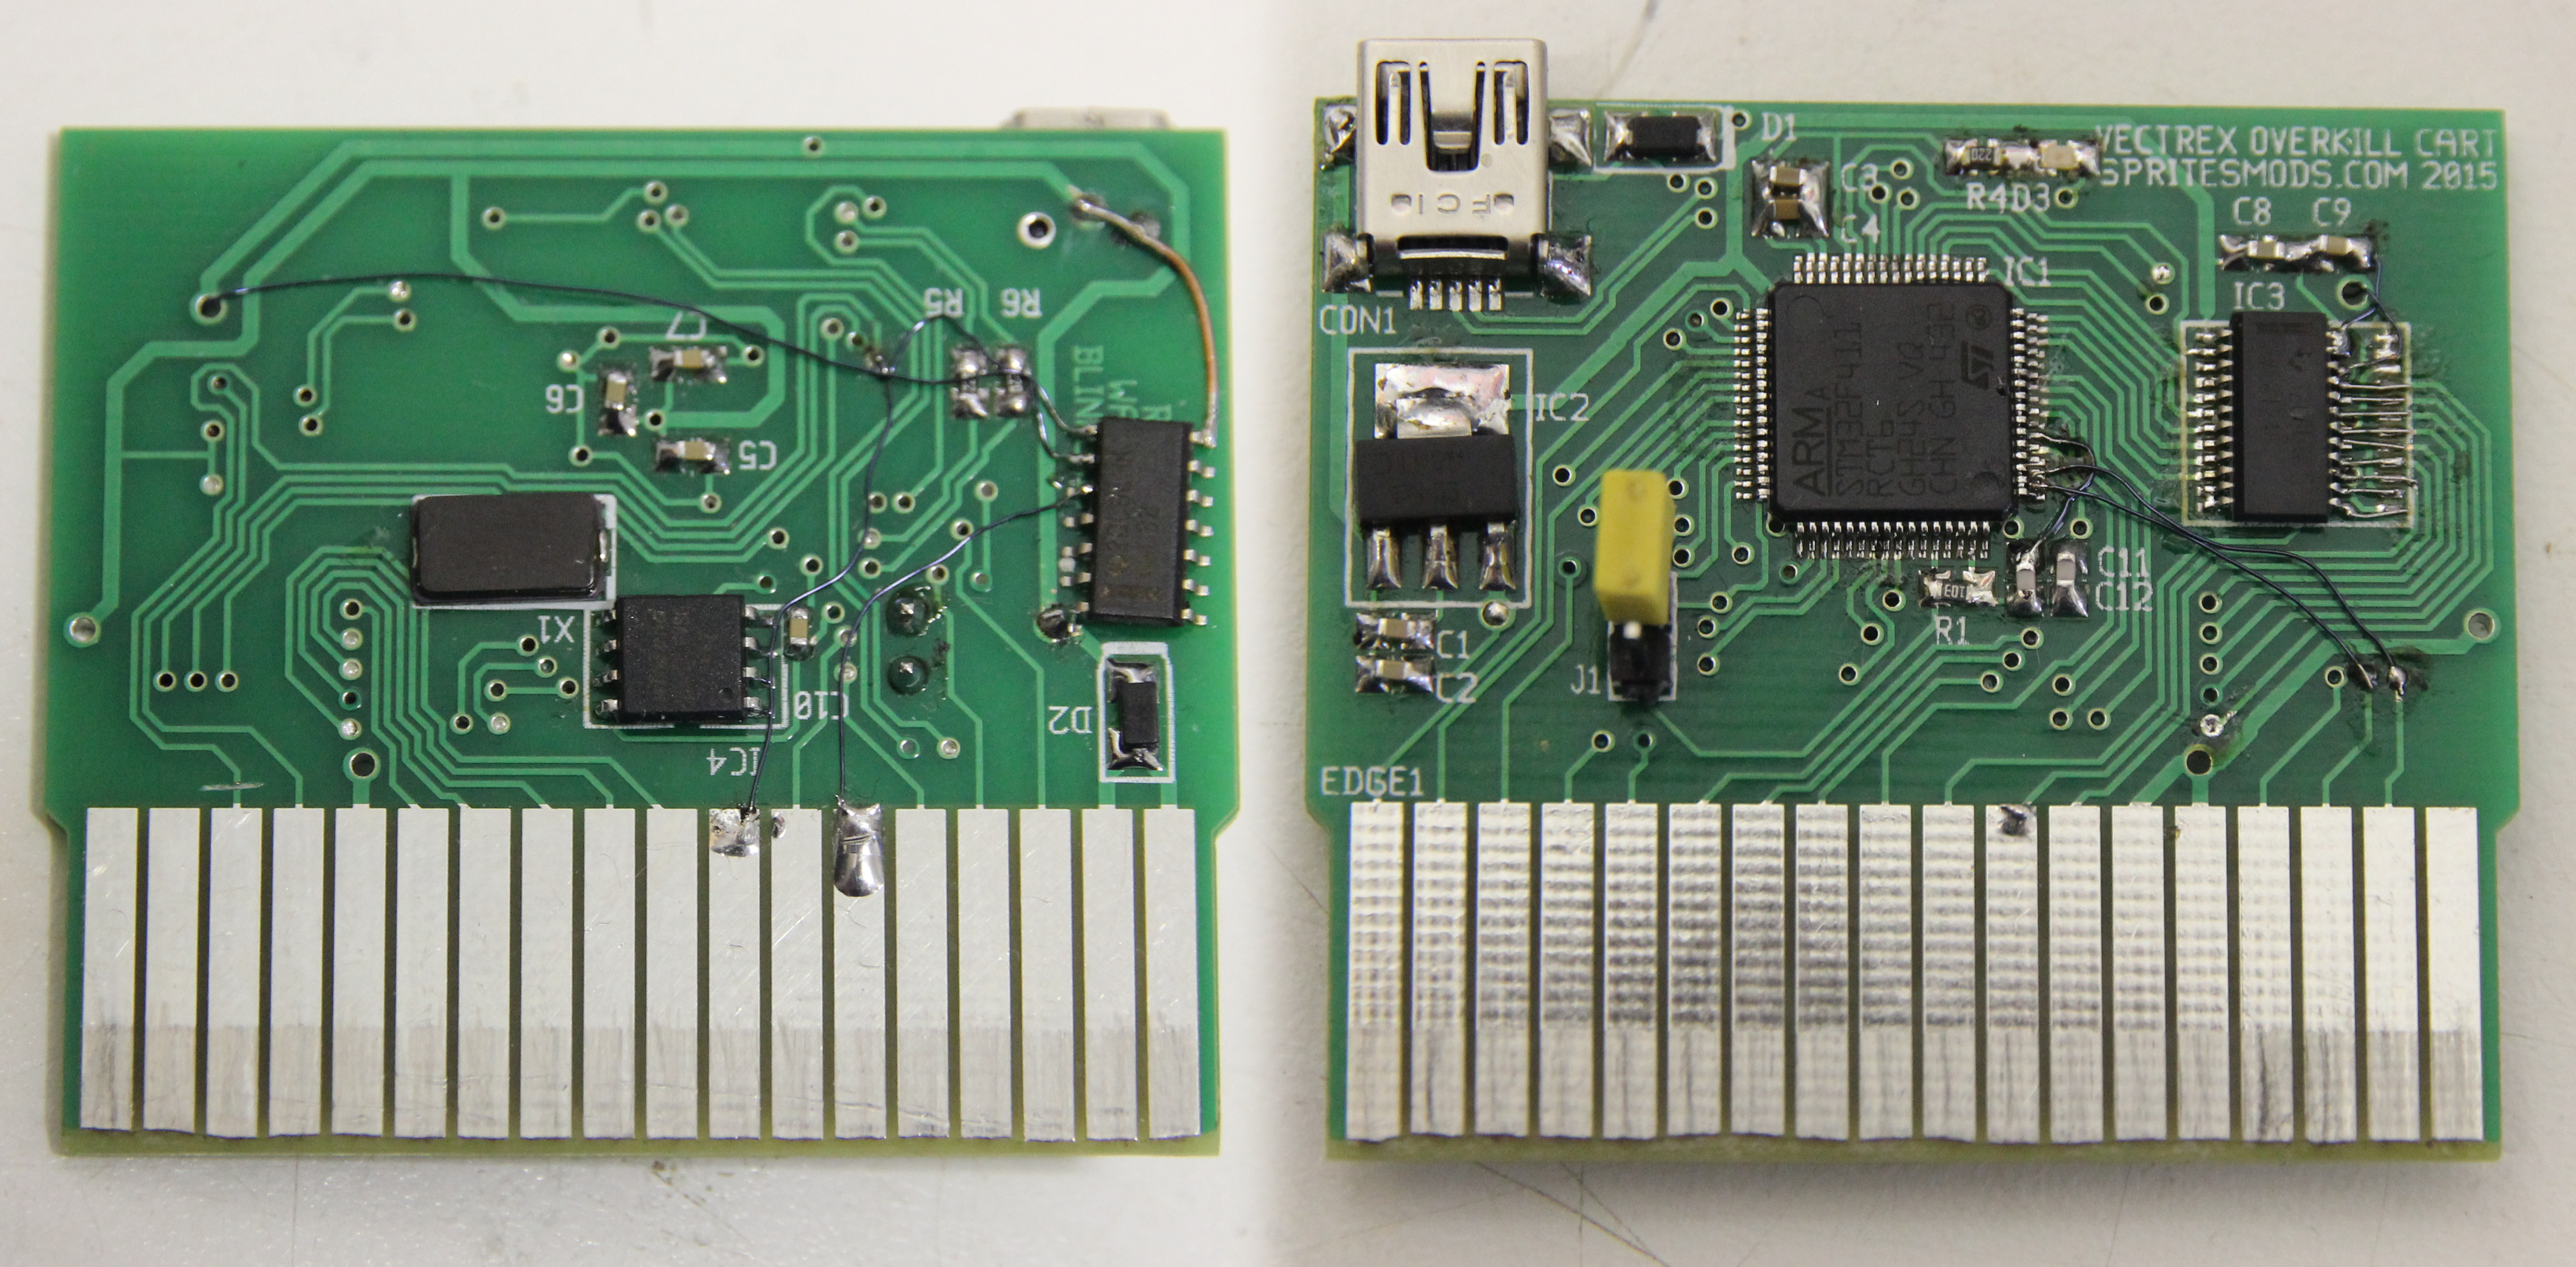
After a few weeks, the boards came in and I could get to soldering. At that time, I found out I'd probably been better off not hurrying the design of the PCB: the amount of bodge wires I had to put in was a bit too high for my taste. Not all bodges were due to design errors, by the way: the extra gate is due to a little-known design change in how the Vectrex is made. All the pinouts you can find on the web describe a signal known as NCART, which goes negative when the Vectrex tries to actively read data from the cartridge. No cart that was produced during the lifetime of the Vectrex actually used it, and it seems they left out the logic to generate the signal in the later versions. Luckily, the NCART signal is easily re-created by NORring two other signals on the cartridge port.
So all in all, with the extra chip and bodge wires, this is what the cart looks like:
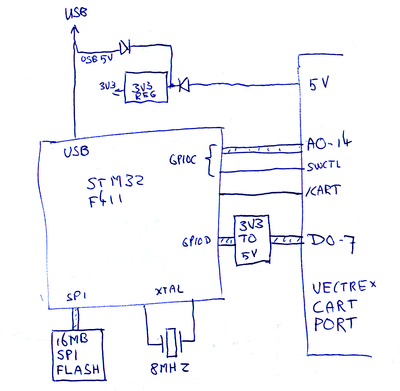
The full schematic I settled on is this:

As you can see, the STM32F411 does most of the work. It's connected to an 16MByte SPI flash chip. The entire set of games and demo's for the Vectrex only is 4MB or so, so I could've slapped in a smaller chip, but the 16MB only costs 50 cent or so extra, so why not use that one? It may come in useful later. I did know the STM32F411 has 5V compatible inputs, so I wired the address lines from the Vectrex straight to it. I wasn't sure if the 3.3V the STM outputs would be enough for the 6809 to understand, so I wired in a 3.3V to 5V level converter. (Afterwards, I took a better look at the specsheet of the 6809: seems it would have worked just fine without the level converter too.) For power, there's a LM1117-3.3 fed by either the USB or the cartridge port; the two diodes are there to prevent backfeeding if the two happen to be both plugged in. When the cartridge is written to, PB0 drives a LED that indicates the cart can't be safely unplugged yet. Finally, J1 can be used to put the STM32F411 in bootloader mode, which you can use to update its internal flash.
So, with the hardware settled, all I needed was some firmware to make it all work.